(Topic ID: 267345)

Bringing back to life an Eight Ball Deluxe

By matiou

3 years ago


Topic Heartbeat

Topic Stats

  • 187 posts
  • 31 Pinsiders participating
  • Latest reply 3 years ago by Lovef2k
  • Topic is favorited by 49 Pinsiders

You

Linked Games

Topic Gallery

View topic image gallery

Pic147 (resized).jpg
Pic140 (resized).jpg
Pic146 (resized).jpg
Pic145 (resized).jpg
Pic144 (resized).jpg
Pic143 (resized).jpg
Pic142 (resized).jpg
Pic139 (resized).jpg
Pic141 (resized).jpg
Pic138 (resized).jpg
ebdgif.gif
Pic137 (resized).jpg
Pic135 (resized).jpg
Pic134 (resized).jpg
Pic133 (resized).jpg
Pic132 (resized).jpg

You're currently viewing posts by Pinsider Lovef2k.
Click here to go back to viewing the entire thread.

#3 3 years ago

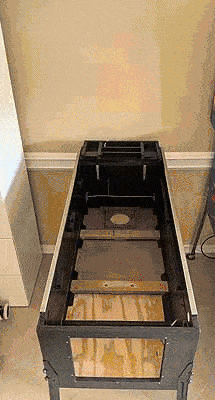
Holy cow! Does the lock down mechanism actually move? I can probably donate a used Lamp panel board for your back box if you pay shipping.

I bought a Bally Star Trek for parts a while ago. It was sitting under an open car port in Pennsylvania for a long time. Granted it wasn't as bad as this but all of the back glass art just fell odd in chunks into the cabinet. I cleaned up some connectors and it was playing in no time. So you never know!

#9 3 years ago
Quoted from matiou:

Yes it does! Once I drilled the door's lock I managed to pull the lever and release the lockbar, of course it needed a bit of force. I was positively surprised to see that the inside was not "that" bad. The manual was even there, in a relatively good shape! Sadly, there was only one quarter in the coin box [quoted image][quoted image]

I'm concerned about all of those inline fuse connectors, looks like tied into the GI's?

#24 3 years ago
Quoted from matiou:

I also cut a rectangle of plywood for the front panel...
[quoted image]
Now I need to make all this tight and solid. It's going to be a mix of miter joints, pocket holes, strong wood glue and some reinforcement brackets... to be continued....

Do you have access to a table saw? You will need to cut miters for the corners. The right corner can be a standard 45 degree on each board since you are making new. But the left is going to be tricky because that one is a locking miter joint. You can still make it fit but you will have to make a notch on the new board to allow it to mate with the original side and then miter the new piece but only miter half way through. I attach a pic to help explain it better. Basically it's a standard 45 degree miter with a notch cut out of it.

It will be easier to cut the opening for the coin door and shooter rod before installing the front board. I would wait until it's assembled before drilling the coin door trim holes. You probably should mount the door trim on the pack and use the trim as templates for the new holes. With a table saw you can cut 2 x 2 poplar stock to made the corner braces(cleats) for the front corners and leg brackets. Use old pieces as templates. A biscuit joiner and wood glue would be ideal to mate the new right side to the original. Blend together with Bondo. As you probably noticed there weren't many nails holding the front of the cab together. Most of the cab strength comes from gluing the corner cleats at the corners. When I redo/restore a cab I reinforce the corners with thin stainless steel decking screws. 2 at the lower corners that will be hidden the legs and one near the top under the side rail.

The wood in the pics is a piece I had made at a local wood shop for a EBD rear panel. This is what needs to be done because of the way the Bally cabinet was made.

P5030096 (resized).JPGP5030096 (resized).JPGP5030098 (resized).JPGP5030098 (resized).JPGP5030099 (resized).JPGP5030099 (resized).JPG
#25 3 years ago

I wanted to add, if you don't have another Bally cabinet around, you can use the rear panel to get the best measurement for the front width since the original was so rotted.

#28 3 years ago
Quoted from matiou:

And... I'm working on the coin door integration![quoted image]

Nice work! I see you have been planning ahead. I never thought of a router bit but looks more like the factory cut.

Don't forget the top groove for the glass channel and the hole for the carriage bolt.

#30 3 years ago
Quoted from matiou:

I forgot about this one! I guess I need to buy another router bit... a slot cutter. Or do you know any other clean way to drill such a slot ?

Slot cutter bit. 3/32 I believe. ½ inch or more deep.
Or take the cheap way out by cutting the bottom of the glass channel flush. The side rail and glass should hold all in place since it's only 6 or 8 inches long?

2 weeks later
#47 3 years ago

The lamp panel is due in tomorrow. I guess you you started the game to know that the S&T isn't working or is just assumed not working?

#52 3 years ago
Quoted from matiou:

Look what I got in the mail today! Thank you SO much lovef2k !
[quoted image]
A bit of sanding and a light coat of white paint will make it like new!

Good ol' UPS comes thru again! I would get new trace wire for the lamps and use the old board as a guide to install.

Also check pinwiki for the s&t issues. They may have a trouble shooting guide for that board and what the boot flashes represent.

3 weeks later
#61 3 years ago

Jeff from Pinball Pimp will most likely make a partial stencil set just for the front.

Painting the cab can be a pain. I have had mixed results with different paints going on plywood. In the future I'm going to try using a primer sealer before paint.

I still don't see a hole for the shooter

1 month later
#73 3 years ago
Quoted from matiou:

That's where I am now:
[quoted image]
Lovef2k will ask why the heck I have not drilled the hole for the shooter yet

Yup!

#75 3 years ago
Quoted from matiou:

Not sure why I postponed so far... I guess I'm so proud of my pure and even black paint on the front of the cabinet that I'm afraid to drill a hole in it
But I will soon as the game won't be fun if I cannot launch a ball into the playfield!

b\\

Haha yes. Not to break b*lls, but it would have been much easier to do before the assembly and paint. But you are doing great work and you had one heck of a challenge when you started, I think most would have sourced another cab and transferred the parts over.

1 week later
#96 3 years ago
Quoted from matiou:

"Backbox light" week-end job...
I know these sockets don't get much love... but once cleaned I got 90% of the ones from the backbox working pretty well.
[quoted image]
[quoted image]
Stapling session...
[quoted image]
I'm going full warm white LEDs for the backbox (I'll do LED for the inserts as well, and I think I'll keep the incandescents for the playfield GI)
[quoted image]
And then wiring and soldering... well as much as I could
[quoted image]

Now you can see how bad the original panel was sheesh!

2 weeks later
#106 3 years ago

Did you reflow the header pins? Might help.

1 month later
#113 3 years ago

That's not wear by the pistols, that's straight up damage. Sucks when people do that. I had a Seawitch once that had similar damage.
The correct screw for the flipper mounts is a #8 X 1/2 hex head screw. The same as the drop target banks, slings etc.

FYI, some things under the pf have a smaller screw such as the saucer eject and some switch mounting brackets. That should be a #6 x 7/16 hex head.

If you need screws lmk.

And yes, September was a blur for me as well.

1 week later
#132 3 years ago
Quoted from matiou:

I don't have a tumbler But the rust on these was quite easy to remove...
Before:
[quoted image]
After a bit of steel whool scrubbin' and some dish soap:
[quoted image]
Quite happy with the result.

You must have some killer dish soap!

I like Evaporust.

#135 3 years ago
Quoted from matiou:

The steel wool gets easily rid of this type of light surface rust... then cleaning up with dish soap or mean green removes dirt and rust residue...

Ahh I missed the steel wool you posted.

#140 3 years ago

It's fairly common to see stripped screws or holes on the sling shot main body for the coil stops. I'm pretty sure Marco has replacement mounts for these.

2 weeks later
#164 3 years ago

Please explain the coil noise...humming, buzzing, chatteringm machine gunning??

2 weeks later
#176 3 years ago
Quoted from matiou:

what about a gif
[quoted image]

Pretty cool. Can you give me some deets on this Lisy board please? I see you have the optional sound card. So does the speaker wire go directly to it? Their website and ordering process was confusing for me. I didn't see any pricing. I did see one version has IC's labeled displays, solenoid/lamps and switches. Why, is this board running everything or just as the MPU? I'm also curious about the sound and speech reproduction, does it sound original? Does it have separate volume for speech and sound as original S&T? How long did it take to receive? Sorry for all the questions, just trying to see if it's worth it.

#187 3 years ago
Quoted from matiou:

Thanks all!
That was a fun project... and quite satisfying to go from old piece of rusty junk to great used-but-shiny game
It was nice to share it here and get some feedback...
Thanks to all of you commenting and "upvoting" and special thanks to those who actually contributed by selling me parts at a good price (bbriese, schmitty, yfz450, bontango, damonator, diver12) or even giving away a backbox door (lovef2k). Pinside is great!
Next steps:
- hardtop
- cabinet stencil
- new plastics, drop targets...
But not now! I will enjoy the machine as is it... and maybe in few months!
[quoted image]

Promoted items from Pinside Marketplace and Pinside Shops!
11,500 (OBO)
Machine - For Sale
Homer Glen, IL
From: $ 170.00
$ 859.00
Flipper Parts
Mircoplayfields
 
Wanted
Machine - Wanted
Forest City, PA
From: £ 22.00
Electronics
Retro Electro Designs
 
$ 179.00
$ 15.00
Hardware
Volcano Pinball
 
$ 199.95
$ 29.99
Cabinet - Shooter Rods
Pinball Shark
 
4,500
Machine - For Sale
Mesa, AZ
$ 25.00
Electronics
Yorktown Arcade Supply
 
$ 9.00
Cabinet Parts
Third Coast Pinball
 
$ 69.00
Gameroom - Decorations
Pinball Pimp
 
$ 69.00
Gameroom - Decorations
Pinball Pimp
 
$ 30.00
Lighting - Led
Pinballrom
 
Hey modders!
Your shop name here

You're currently viewing posts by Pinsider Lovef2k.
Click here to go back to viewing the entire thread.

Reply

Wanna join the discussion? Please sign in to reply to this topic.

Hey there! Welcome to Pinside!

Donate to Pinside

Great to see you're enjoying Pinside! Did you know Pinside is able to run without any 3rd-party banners or ads, thanks to the support from our visitors? Please consider a donation to Pinside and get anext to your username to show for it! Or better yet, subscribe to Pinside+!


This page was printed from https://pinside.com/pinball/forum/topic/bringing-back-to-life-an-eight-ball-deluxe?tu=Lovef2k and we tried optimising it for printing. Some page elements may have been deliberately hidden.

Scan the QR code on the left to jump to the URL this document was printed from.