
So.... I bought this Eight Ball Deluxe pinball few months ago... Or at least what was left of it! The price was low. Very low. Some could find it was not low enough when looking at the machine... But come on, it's an EBD! and I always wanted an EBD...
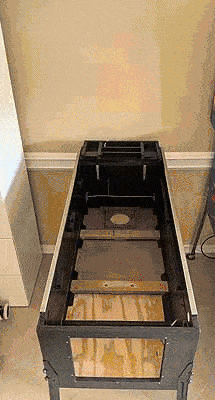
I took care of 3 or 4 project machines in the past, but I never started with a machine in such a bad shape. It spent the last 15 years in a warehouse where water was dripping on its glass, slowly rolling into the lock bar, and getting out through one the front corners, along one of the legs. It obviously caused some pretty bad damage to the cabinet. The MPU is corroded like crazy, there is no backglass and the lamp board got deformed by humidity. The playfield is heavily used, but not water damaged.
I decided to take the challenge to bring this machine back to life. My approach won't be to "restore" it, but only to get it to a "playable" state (at least for now)... To qualify for this, the cabinet needs to be solid and clean, the machine needs to work and to look and smell good enough to be moved from the garage to the house ![]() This is likely going to take me months... The hard part will be to do all this without spending money like crazy, I would like to *try* not to spend $3,000 to end up with a $1,200 pin!
This is likely going to take me months... The hard part will be to do all this without spending money like crazy, I would like to *try* not to spend $3,000 to end up with a $1,200 pin!
Even before starting working on it, I already bought some things (who never did that?). I found from a fellow pinsider an used backglass... Not in perfect shape, but will be OK for this machine.
If everything goes well, one day I may install a hardtop and stencil the cabinet. But this may be months from now (years?). As I said, my first focus will be to just... make it play!
Things purchased so far:
- Birch plywood 2ft x 4ft 3/4
- Plywood 2ft x 2ft 1/4
- 2x2 pine wood for corners
- Used backglass (Pinside)
- New black legs (Pinball Life)
- Leg bolts
- Leg levelers
- Metal bracket (Home Depot)
- Wide leg brackets (Pinball Life)
- Bally sticket for coin door (Pbresource)
- Misc metal screws (Home Depot)
 Broomfield, CO

