 Cheektavegas, NY
Quoted from DavidWhittle81:Plantary Pinball makes the full ramp decal kit and is currently in stock.
Didn’t know that! Nice price to!
 Bram Stoker's Dracula
Williams, 1993
Bram Stoker's Dracula
Williams, 1993Quoted from DavidWhittle81:Plantary Pinball makes the full ramp decal kit and is currently in stock.
Didn’t know that! Nice price to!
Not sure it will work, but one of the tricks I read about was to cut a small ring and put it on one of the bottom rails up high near the VUK to slow the ball down. You may need to shave it a bit to keep it from trapping the ball.
Quoted from Cheeks:My auto-plunger does not get the ball all the way to the drop target. It gets close, but dies out in the lanes up top. Any thoughts on how to increase the strength since this era didn't have coil strength settings?
I had a similar problem a while back. The following URL may prove helpful to you.
https://pinside.com/pinball/forum/topic/bram-stokers-dracula-clubmembers-only/page/187#post-7078427
Gord
Quoted from s000m:Cats out of the bag now I suppose
Hopefully Starship Fantasy makes the replacement ramps soon. For now I'll work on some temporary measure to make the skillshot 100%.
It's been about 10 months in the making.
I'll upload a video soon.
[quoted image]
[quoted image]
[quoted image]
[quoted image]
[quoted image]
[quoted image]
[quoted image]
[quoted image]
That's an amazing BG!! Who did those?
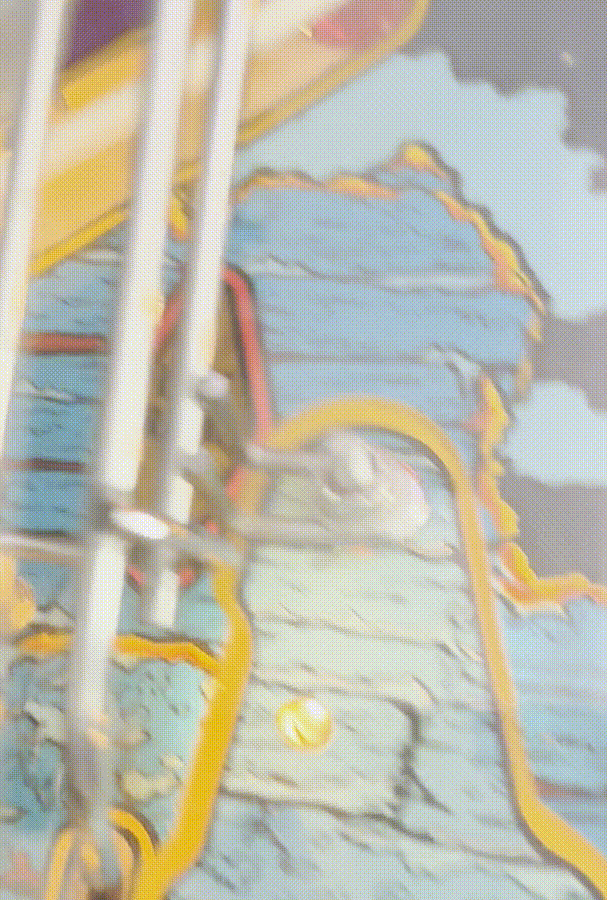
Quoted from data_eastside:On my Drac recently the VUK that delivers the ball to the left inlane has been kicking it out with too much force and causing drains. Anybody seen that ? Any tips on how to remedy? It's very annoying. Here's a clip of it:[quoted image]
Double check the vuk coil resistance to see if it has dropped some. It should be an AE-23-800 coil with around a 4.2ohm resistance reading. If its getting closer to zero it will need to be replaced. It's possible the windings are beginning to short together. That will cause the vuk to fire with more strength. You can also go into the test menu and fire the coil a bunch of times to see if it begins to get pretty hot to the touch. Alittle warm is normal. The coil getting hotter than normal would be another sign it's pulling more current than it should be from the decreased resistance.
One other thing to check is make sure the return spring for the vuk isn't broken. It does put a slight resistance to the vuk when firing that will slow the speed down slightly. You could also put a slightly heavier spring in as well if everything checks out.
Quoted from GRB1959:I had a similar problem a while back. The following URL may prove helpful to you.
https://pinside.com/pinball/forum/topic/bram-stokers-dracula-clubmembers-only/page/187#post-7078427
Gord
Thanks for the link. It looks like mine already extends past the ball guide, but I'll see if I can track down where it's losing momentum.
If there are any other thoughts or common solutions, I'm all ears in the meantime.
Quoted from Cheeks:Thanks for the link. It looks like mine already extends past the ball guide, but I'll see if I can track down where it's losing momentum.
If there are any other thoughts or common solutions, I'm all ears in the meantime.
Did it use to reach the drop target? If not, check to see if it's the correct coil and if it is check the kicker bracket components for wear or binding.
Quoted from Cheeks:Thanks for the link. It looks like mine already extends past the ball guide, but I'll see if I can track down where it's losing momentum.
If there are any other thoughts or common solutions, I'm all ears in the meantime.
Is your shooter lane clear plastic backwards? It should be pointing toward the plunger.
Quoted from Bohm:Did it use to reach the drop target? If not, check to see if it's the correct coil and if it is check the kicker bracket components for wear or binding.
…if it used to reach the drop target a bad solder joint could be another possible cause.
Quoted from data_eastside:On my Drac recently the VUK that delivers the ball to the left inlane has been kicking it out with too much force and causing drains. Anybody seen that ? Any tips on how to remedy? It's very annoying. Here's a clip of it:[quoted image]
The ball popper/vuk is striking the ball off center putting a back spin on the ball. Because this is a recent/new problem I would lift the play field and see if you have some screws loose or missing on the mech
Quoted from Bohm:Anyone have a lead on a set of wire form ramps?
Google search hasn’t lead to anything
Quoted from Bohm:Anyone have a lead on a set of wire form ramps?
Google search hasn’t lead to anything
I have this one. Let me know if you’re interested. It’s NOS
3A42A836-8F36-47AC-8125-6169FDFB3FDF (resized).jpegDB66BA0C-9AFC-41D4-9D0A-52EC6F82433B (resized).jpegQuoted from Pbgixxer:I have this one. Let me know if you’re interested. It’s NOS [quoted image][quoted image]
Pm sent
thought I'd try the vinyl wrap exercise to gauge if I want to eventually powder coat rails, lock bar and coin door etc
quite a simple process and only a couple of dodgy mistakes that aren't too noticeable !
not sure how it will hold up or if I want to lose the chrome for ever....but for $25 it was worth a go
wrap-black1 (resized).jpgwrap-black2 (resized).jpgWow! .. I'm planning that same experiment before I go for powder coating. I just bought gloss black vinyl wrap off of Amazon for $18.
I hope mine comes out even close to yours. Your wrap job looks great! .. Any tips or recommendations?
Quoted from allsportdvd:My tip - go the black powdercoat!
[quoted image][quoted image]
I second this. There are plenty of photos here to decide whether you like the look or not. Just go for the powder if you like it. I went with a black that has subtle purple and blue flakes. Looks black until the light hits it just right.
20211215_181907 (resized).jpg20220118_195511 (resized).jpgQuoted from paulie484:Stunning peoples !! ...some very sexy looking black powder coating there !!
Quick question, removing the door inner workings/harness etc, simple enough task ?
Yes, it looks tough, but it's not really bad. Just take lots of pictures.
Quoted from crazypinballguy:Wow! .. I'm planning that same experiment before I go for powder coating. I just bought gloss black vinyl wrap off of Amazon for $18.
I hope mine comes out even close to yours. Your wrap job looks great! .. Any tips or recommendations?
I followed some tips in this link;
https://pinside.com/pinball/forum/topic/vinyl-wrap-lockdown-bar-rails-etc
Definitely use a heat gun and don't be afraid to give it some heat...the first corner I was hesitant and it didn't stretch so got a few creases, the second one was a lot better once I worked out it's limits and was easy to stretch. I have a spare piece that I kept as a back up
Like to share some photos and a video if I can of my game. Took a while to get to this point, but I’m glad it’s done.
5C83A003-459B-4AEB-B9F1-9F676C813449 (resized).jpeg19BA8DE8-8E00-4A99-80E5-2ED7126B1BB2 (resized).jpeg92A06EF6-5518-4C2A-9E80-4ACEA9B913C8 (resized).jpeg80BBAD28-5BD0-4C1A-920B-F84FE74BAE1B (resized).jpeg73B70299-613A-4D13-B767-937DDFF3DFF4 (resized).jpegFB155FCF-3D5C-4A39-B03C-87213A382C9E (resized).jpegQuoted from paulie484:Quick question, removing the door inner workings/harness etc, simple enough task ?
Very simple, I think it 4 nuts to remove and a couple of connectors.
Quoted from Don44:Very simple, I think it 4 nuts to remove and a couple of connectors.
And probably one hex screw attaching the ground wire to the ground braid.
I finally picked up one of these after looking forever! It's an awesome game, and mine is working almost 100%, but I'm having an issue with the left mist gate. The spring that the game came with (which I think was a standard flipper return spring) didn't have the proper tension and kept the gate stuck open, even when the coil wasn't firing. I checked the manual and it lists part number 10-120 (see first pic) as the proper spring. I ordered a bunch of them from Marco, but using one as is results in the same problem, but only worse. After checking some pictures on IPDB (see second pic), it looks like a much longer spring is installed on the game.
Does the manual simply have an error? Or does the spring have to be stretched to a certain length? After stretching and otherwise fiddling a friend and I were able to briefly get it working for a day, but the spring deformed and now the gate is stuck open. I tried searching this thread and the one post I could find indicates it is a 10-120. Feeling a bit befuddled here.
10-120 (resized).pngbsd_spring (resized).pngQuoted from Rolpa:I finally picked up one of these after looking forever! It's an awesome game, and mine is working almost 100%, but I'm having an issue with the left mist gate. The spring that the game came with (which I think was a standard flipper return spring) didn't have the proper tension and kept the gate stuck open, even when the coil wasn't firing. I checked the manual and it lists part number 10-120 (see first pic) as the proper spring. I ordered a bunch of them from Marco, but using one as is results in the same problem, but only worse. After checking some pictures on IPDB (see second pic), it looks like a much longer spring is installed on the game.
Does the manual simply have an error? Or does the spring have to be stretched to a certain length? After stretching and otherwise fiddling a friend and I were able to briefly get it working for a day, but the spring deformed and now the gate is stuck open. I tried searching this thread and the one post I could find indicates it is a 10-120. Feeling a bit befuddled here.
[quoted image][quoted image]
Link?
I'm assuming you mean to the post(s) saying it's a 10-120?
https://pinside.com/pinball/forum/topic/bram-stokers-dracula-clubmembers-only/page/116#post-4624994
https://pinside.com/pinball/forum/topic/bram-stokers-dracula-clubmembers-only/page/63#post-2832356
I think gun-metal gray with some peppering of black throughout it would blend nicely with the cabinet decals .. or just a gloss black for more contrast.
Quoted from WeirPinball:What color powder should I go with to complement these decals. Think I can get away with red, but wanted to hear other ideas...[quoted image]
Red? Dear god no! It’s best with black ![]()
Quoted from WeirPinball:What color powder should I go with to complement these decals. Think I can get away with red, but wanted to hear other ideas...[quoted image]
Dark metallic blood red.
Quoted from mollyspub:Red? Dear god no! It’s best with black
Hey!!!
lol
Pinside_gameroom_10705_3019166 (resized).jpegQuoted from WeirPinball:What color powder should I go with to complement these decals. Think I can get away with red, but wanted to hear other ideas...[quoted image]
I just bought these alternate decals too. I’m going with dark blood red powder, with dark pooling effect. Like this pic…
0E728B04-2E7F-4DD1-8848-F2983C005431 (resized).jpegQuoted from aobrien5:I've got the dreaded mist ball problem.
Looks like no light from the long opto. Time to start disassembly.
Before you tear everything to hell and back, remove your 24" opto control board from underneath the playfield and inspect it closely. It's easy to remove, and known to cause issues if it's original. Mine went bad a couple weeks ago. It had a burnt resistor on the board. Replaced the resistor and it fried again. Then I noticed a swollen (from heat) chip on the board. I figured that was the culprit. Bought a brand new board for $80 and it fixed all my issues. Never had to take apart anything above the playfield. Definitely worth a close look.
It's definitely the longer spring shown in the photo above for the left mist gate.
The 10-120 spring goes on the back of the coil. The one to the gate is (according to the parts list on ipdb.org):
https://www.marcospecialties.com/pinball-parts/10-194
You may have to adjust the throw of the plate on the relay to get the gate lifting right:
From the parts list, see part 1038:
1038 ..3 10-194 spring-extension 1
Quoted from CoolCatPinball:Before you tear everything to hell and back, remove your 24" opto control board from underneath the playfield and inspect it closely. It's easy to remove, and known to cause issues if it's original. Mine went bad a couple weeks ago. It had a burnt resistor on the board. Replaced the resistor and it fried again. Then I noticed a swollen (from heat) chip on the board. I figured that was the culprit. Bought a brand new board for $80 and it fixed all my issues. Never had to take apart anything above the playfield. Definitely worth a close look.
Me too, even though I ordered the optos also, just in case.
Quoted from CoolCatPinball:Before you tear everything to hell and back, remove your 24" opto control board from underneath the playfield and inspect it closely. It's easy to remove, and known to cause issues if it's original. Mine went bad a couple weeks ago. It had a burnt resistor on the board. Replaced the resistor and it fried again. Then I noticed a swollen (from heat) chip on the board. I figured that was the culprit. Bought a brand new board for $80 and it fixed all my issues. Never had to take apart anything above the playfield. Definitely worth a close look.
Thanks. It's definitely original. A once over of the board didn't show anything but I'll pull it and take a closer look, thanks. Going to avoid a new board.
Is the LED1 light on the original board supposed to indicate power to the opto transmitter?
Some have asked how I did the window light mod in post #10233 so I figured I should post a quick "how to" in case it help others.
*I'm not a professional modder, I just took what I had available.*
The hardest part is to cut the window, I just used a dremmel with a round tip. Since I did'nt want to see through the interior, I used a sheet of frosted vinyl folded over itself, so there is no adhesive side visible, and tape it to the backside.
P1070278 (resized).JPG
For the lighting, I used some matrix socket. The idea was to create a "Torch" effect.
P1070279 (resized).JPG
Saddly, once installed, the light coming from the purple plastic underneath is killing the orange light too much. I'll try with flex twins pointed at the window to see if it fixed the issue.
If I had to redo it, I would use a matrix 20smd lightstrip instead of sockets.
As for wiring, just use comet's matrix and connect it to one of the GI socket.
Just installed my powder coated set from Pinball Refinery. Went with the dark red sparkle over black, but had him dilute the sparkle. Owned this game for 20 years and thought it was about time for an upgrade. Now, trying to decide whether to add the Laseriffic topper.
IMG_2890 (resized).jpgIMG_2892 (resized).jpgIMG_2893 (resized).jpgQuoted from Gorgar666:It’s my Birthday!!
[quoted image]
I love this item. Don’t love the price though and it was my birthday yesterday. I’m not lucky enough to get that kind of present lol
Wanna join the discussion? Please sign in to reply to this topic.

Great to see you're enjoying Pinside! Did you know Pinside is able to run without any 3rd-party banners or ads, thanks to the support from our visitors? Please consider a donation to Pinside and get anext to your username to show for it! Or better yet, subscribe to Pinside+!

This page was printed from https://pinside.com/pinball/forum/topic/bram-stokers-dracula-clubmembers-only/page/205?hl=data_eastside and we tried optimising it for printing. Some page elements may have been deliberately hidden.
Scan the QR code on the left to jump to the URL this document was printed from.
 Siegen
 Perth
Perth
 Montréal, QC