(Topic ID: 163782)

BoP: Father and Son's First Restoration [COMPLETE]

By jsa

7 years ago


Topic Heartbeat

Topic Stats

  • 450 posts
  • 52 Pinsiders participating
  • Latest reply 7 years ago by MajorHavoc
  • Topic is favorited by 76 Pinsiders

You

Linked Games

Topic Gallery

View topic image gallery

IMG_5782 (resized).JPG
IMG_5776 (resized).JPG
VH1A4993 (resized).jpg
VH1A5002 (resized).jpg
VH1A5004 (resized).jpg
VH1A4987 (resized).jpg
VH1A4986 (resized).jpg
VH1A4985 (resized).jpg
VH1A4983 (resized).jpg
VH1A4979 (resized).jpg
VH1A4976 (resized).jpg
VH1A4975 (resized).jpg
VH1A4970 (resized).jpg
bop_gif.gif
010517203830 (resized).jpg
IMG_5535 (resized).JPG
There are 450 posts in this topic. You are on page 9 of 9.
#401 7 years ago
Quoted from jsa:

Ok, the game has been pretty solidly working. Almost ready to declare victory. When you folk adjust leaf switches, such as stand up targets or slingshot switches, do you remove them from the playfield first or adjust with them in place? Right now, this appears to be our biggest challenge in ironing out the little bugs. That, and identifying what is supposed to be "normal behavior" and making necessary changes to accomplish that. It's remarkable to me how much variation the ramps have from the original ramps (thickness), which definitely creates its own set of challenges. I've also installed Cliffy protectors. Clearly, these are 100% required, as the ramp entrances are completely destroyed on our original set.
We installed plastic protectors as well. The challenge here is that now that everything is installed, we can see how certain gates, the spinner, and other hardware can get caught on the protectors. I have no problem adjusting them... Would you folks think there would be any problem shaving them down "in place" with a dremel? Removing plastics that are under ramps can be... frustrating.
Some additional thoughts about the reassembly process:
-Photo context is everything. I've found a good technique is to place the end of a post or screwed in object next to the hole it belongs in during teardown for the photo...making sure to have a wide enough angle that you can see the context of the location.
-Existing restoration photos reveal there is some artistic license involved in this process. What one restorer choses to do in a location is different than another. Furthermore, the restorers before you may actually have a better solution than the original game had, so take that into account as well.
-Tumbling screws can remove their magnetic plating. If I could do one thing differently, I would have audited each screw type during teardown and bought 100 of each type. Finding screws in a tumbling batch royally sucks, and losing magnetic capability will make you want to poke your eyeballs out with a fork.
-Repro playfield screw holes are just markers. They aren't big enough to be pilot holes for a #6 screw. Best investment I made was a hand crank drill for this purpose. It keeps you from over-shooting and is great for protecting your playfield.
-Repro playfield screw holes are about 99% accurate. Pretty close to 100%. I had to move a couple but they were marginal and clearly visible from the playfield art (hole not quite inside a circle, etc).
-I ended up with parts, mostly screws, that have no place to be installed. How is that possible? The answer is that when you don't find a screw you need, you don't have time to go through every screw in the batch, so you grab a new one.
-Doing this project with my son was the most rewarding thing we've ever done together. Playing this game with him was just plain amazing. The challenges with this have to do with what is largely one person jobs (screwing in a screw), so it was easier to involve him in the cabinet work than the playfield work. That being said, even having him around during the playfield work was a complete joy.
I will post some photos soon.

Totally stoked for you guys!

I adjust leaf switches in the game with a leaf adjusting tool, or long thin flat head driver

Dremel stuff in the game!?! Lay covers on everything, even have a vacuum going to suck up the slag/dust while you are dremeling... if you must do it in the game, I hate the thought of you having to do that with everything all together finally....

Once I pulled the castle out of my medieval madness, which requires removing rails and ramps, I had everything together when I was finished, then only to realize I forgot something that was under the castle... I had to remove it all over again, sometimes it just happens, and you have to pull stuff off a few times

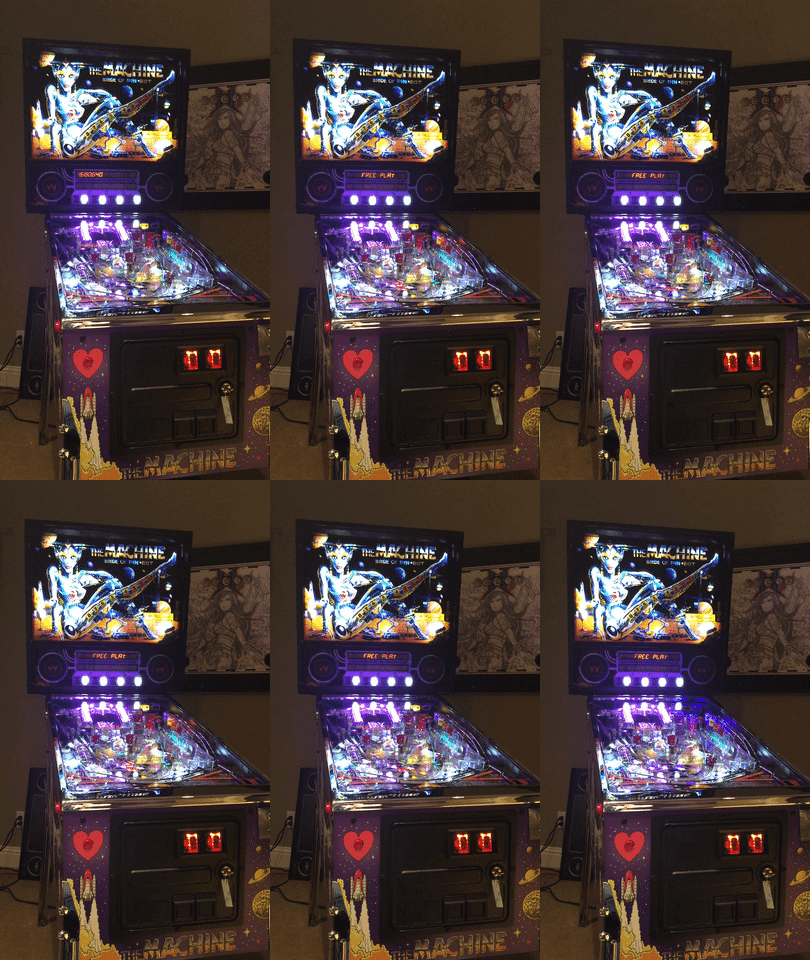
#402 7 years ago

She's alive!

010517203830 (resized).jpg010517203830 (resized).jpg

I'll get some in daylight tomorrow.

#403 7 years ago
Quoted from jsa:

She's alive!

I'll get some in daylight tomorrow.

Looks totally amazing! Oh that chrome, wowza!!!

#404 7 years ago

I installed the wrong LEDs. Ordered regular supers and got premiums accidentally, and they aren't compatible with the LED/GI OCD boards I was planning on installing, so oops. I'll have to swap out all those bulbs. ARGH!

#405 7 years ago

This is such a great thread on so many levels.

#406 7 years ago

bop_gif.gifbop_gif.gif

10
#407 7 years ago

VH1A4970 (resized).jpgVH1A4970 (resized).jpg
VH1A4975 (resized).jpgVH1A4975 (resized).jpg
VH1A4976 (resized).jpgVH1A4976 (resized).jpg
VH1A4979 (resized).jpgVH1A4979 (resized).jpg
VH1A4983 (resized).jpgVH1A4983 (resized).jpg
VH1A4985 (resized).jpgVH1A4985 (resized).jpg
VH1A4986 (resized).jpgVH1A4986 (resized).jpg
VH1A4987 (resized).jpgVH1A4987 (resized).jpg
VH1A5002 (resized).jpgVH1A5002 (resized).jpg
VH1A4993 (resized).jpgVH1A4993 (resized).jpg
VH1A5004 (resized).jpgVH1A5004 (resized).jpg

#408 7 years ago

Wow!

#409 7 years ago

^^^^^^^^What he said!^^^^^^^^^^^^^

#410 7 years ago

Other than installing Pinduino, getting the helmet running on incandescents, and finally 2.0, I think we can call this one done. I've got a timelapse video of the entire teardown and reassembly which I'll post, but I'm lacking the drive space to compile it all at the moment. I will see if I can find an external to get me through it.

#411 7 years ago

I'm going to miss the updates, kudos to you guys, you'll love the pinduino, it really does add a lot to the game... of course 2.0 does too, but there's something really special to add lighting in that give the visuals more depth

#412 7 years ago

Fantastic job you two. Now go play it.

#413 7 years ago

Excellent job!

#414 7 years ago
Quoted from jsa:

Other than installing Pinduino, getting the helmet running on incandescents, and finally 2.0, I think we can call this one done. I've got a timelapse video of the entire teardown and reassembly which I'll post, but I'm lacking the drive space to compile it all at the moment. I will see if I can find an external to get me through it.

Came out real sweet but more importantly...working side by side with your son = priceless.

Now you need to find another candidate for restoration before your son leaves you for an ipad

#415 7 years ago
Quoted from jsa:

Other than installing Pinduino, getting the helmet running on incandescents, and finally 2.0, I think we can call this one done. I've got a timelapse video of the entire teardown and reassembly which I'll post, but I'm lacking the drive space to compile it all at the moment. I will see if I can find an external to get me through it.

Also before you can say stick a fork in it... you may want to tweak the left flipper as it seems a tad higher than the right. Yes this is of the utmost importance! lol

#416 7 years ago
Quoted from Manic:

Also before you can say stick a fork in it... you may want to tweak the left flipper as it seems a tad higher than the right. Yes this is of the utmost importance! lol

Already on it. It seems that when I tighten the flipper, it's perfect, then it drifts up...So something about the way that flipper defaults when loosened is goofing me up.

#417 7 years ago

Looks great! Awesome to do this with your son. I hope he learned the skills to do this on a new machine.

#418 7 years ago

Here's a video with the GI & LED OCD boards installed. Note that we installed red and purple incandescents into the helmet as the controller board interferes with the GI OCD's ability to dim/anti-ghost those lamps. To do this required replacing the F3 fuse on the GI OCD with a 4A slow blow. We like how this is all looking now.

#419 7 years ago

Last but not least, here is a time-lapse video of the complete teardown and reassembly:

Let me know what you think.

#420 7 years ago
Quoted from jsa:

Last but not least, here is a time-lapse video of the complete teardown and reassembly:
» YouTube video
Let me know what you think.

Looks like about 80% Father, 20% Son on this one.

The result is amazing, but get that BoP 2.0 in there! Stock, the Billion shot breaks the game scoring.

#421 7 years ago

What's with the ghost rag on the siderail? Spooky

#422 7 years ago

Very cool time-lapse video, nice work with the restore.

#423 7 years ago
Quoted from PinMonk:

Looks like about 80% Father, 20% Son on this one.

We learned quickly that the playfield work was easier with one person, since it involves flipping it over frequently and another person working on another part gets interrupted. Instead, he focused on parts, tumbling, getting assemblies organized, etc. We're a great team!

That was one lesson I took away from this, that the cabinet work (however menial) is easier to do with two people than the rest of the experience.

#424 7 years ago
Quoted from DocRotCod:

What's with the ghost rag on the siderail? Spooky

You mean at 4:58? Yeah, it's amazing how when something moves slowly enough, you can't see it or notice it with the naked eye, but in a time-lapse, it jumps out at you. That is a very clean rail, and a microfiber towel that was just heavy enough to slowly get pulled down the rail!

#425 7 years ago

Super Cool!

One more thing to add! Rock Custom under cab interactive LED Strips, $100 well spent. I do wander if it works with the Bop2.0 though??

#426 7 years ago
Quoted from Chosen_S:

Super Cool!
One more thing to add! Rock Custom under cab interactive LED Strips, $100 well spent. I do wander if it works with the Bop2.0 though??

Interesting. What triggers them? If it's run of an existing light, it should work fine.

#427 7 years ago
Quoted from jsa:

Interesting. What triggers them? If it's run of an existing light, it should work fine.

Yes they do, I have them on three of my machines, and I plan to put them on the rest of them because the interactive lights makes the game that much better

#428 7 years ago

Two pinball champions just came over my house and both scored over 1 billion on our BoP. I'm now confident the machine works properly! Just need to adjust the sensitivity of the slings. Well, that and I need to work on my game.

Any tips from you folks on adjusting the sling leaf switches?

#429 7 years ago

I think Marco or pinlife has the leaf adjustment tool, I use it almost exclusively since someone told me about it

#430 7 years ago
Quoted from Chosen_S:

I think Marco or pinlife has the leaf adjustment tool, I use it almost exclusively since someone told me about it

I've got the tool, and mostly know how to use it. The challenge is figuring out how to adjust it while installed, so I can test different gaps. If I pull it out, adjust it, and re-install it, it's this awkward process that takes forever.

#431 7 years ago
Quoted from jsa:

Two pinball champions just came over my house and both scored over 1 billion on our BoP. I'm now confident the machine works properly! Just need to adjust the sensitivity of the slings. Well, that and I need to work on my game.
Any tips from you folks on adjusting the sling leaf switches?

That's the problem with that game in its stock condition. You can score a billion with ONE not-that-hard-to-get-to shot. Scoring is way unbalanced as a result.

Time to bring on the BoP 2.0 and make this whole restoration worthwhile!

#432 7 years ago
Quoted from jsa:

I've got the tool, and mostly know how to use it. The challenge is figuring out how to adjust it while installed, so I can test different gaps. If I pull it out, adjust it, and re-install it, it's this awkward process that takes forever.

I pull off the sling plastic depending on the game and adjust it from the top, bending the leafs just a little at a time until I get the sweet spot, sometimes I have to adjust from underneath with the switch still installed... yes its a pain. I have the gap distance burned into my brain as to the way I like them so as Im putting the game back together I adjust them before the sling plastics and anything else gets attached

2 weeks later
#433 7 years ago

Added an apron magnet. Oh, and this BoP 2.0 thing. Thanks to NinJaBooT for a great product:

IMG_5776 (resized).JPGIMG_5776 (resized).JPG
IMG_5782 (resized).JPGIMG_5782 (resized).JPG

Also, for future restorers, if you bother to soup up the sound with a larger throw hole and 8" bass speaker in the cabinet, you'll need anti-rattle tape. I have new side rail channel plastic and the bass was so strong (particularly with 2.0), I first tried felt (too thick), then electrical tape (too much grip), and finally bought the bullet and went for Pinball Pro's anti-rattle tape. Problem solved.

#434 7 years ago
Quoted from jsa:

Added an apron magnet. Oh, and this BoP 2.0 thing. Thanks to ninjaboot for a great product:

Also, for future restorers, if you bother to soup up the sound with a larger throw hole and 8" bass speaker in the cabinet, you'll need anti-rattle tape. I have new side rail channel plastic and the bass was so strong (particularly with 2.0), I first tried felt (too thick), then electrical tape (too much grip), and finally bought the bullet and went for Pinball Pro's anti-rattle tape. Problem solved.

Super jelly. BoP 2.0 is on my want list, and your machine is so choice!

#435 7 years ago

Better than new. Well done. You guys must be proud.

#436 7 years ago
Quoted from PinSinner:

Better than new. Well done. You guys must be proud.

The best part is listening to my son talk to his friends about it. It's really amazing to hear his pride.

#437 7 years ago
Quoted from jsa:

The best part is listening to my son talk to his friends about it. It's really amazing to hear his pride.

Think he could do one by himself?

#438 7 years ago
Quoted from MustangPaul:

Think he could do one by himself?

I think he could, but I think he wouldn't. My son tends to get distracted pretty easily, so having me as structure to bring him back into the project every few days (which he didn't mind) was part of why it worked so well. For that reason, I think we should work together on another project. He wants to restore our Theatre of Magic but it's in such great shape I really don't want to mess with it. Instead, I think we'll find something a bit older. Maybe a Future Spa?! LOL.

#439 7 years ago
Quoted from jsa:

I think he could, but I think he wouldn't. My son tends to get distracted pretty easily, so having me as structure to bring him back into the project every few days (which he didn't mind) was part of why it worked so well. For that reason, I think we should work together on another project. He wants to restore our Theatre of Magic but it's in such great shape I really don't want to mess with it. Instead, I think we'll find something a bit older. Maybe a Future Spa?! LOL.

Yeah when your young you get distracted easily.....especially when you discover girls.

#440 7 years ago
Quoted from jsa:

I think he could, but I think he wouldn't. My son tends to get distracted pretty easily, so having me as structure to bring him back into the project every few days (which he didn't mind) was part of why it worked so well. For that reason, I think we should work together on another project. He wants to restore our Theatre of Magic but it's in such great shape I really don't want to mess with it. Instead, I think we'll find something a bit older. Maybe a Future Spa?! LOL.

man a classic bally will be a breeze compared to bop, I recommend a paragon to future spa if your going for widebody, parts are a plenty, the stencils for the paint are by pinball pimp and are supposedly really great. and I think its just more fun and for me has more staying power, just imo. Honestly, I just want to see you document another project, I think the wife and cat should be more involved though, well, at least the cat if the wife doesn't want to get her hands dirty

#441 7 years ago
Quoted from jsa:

I think he could, but I think he wouldn't. My son tends to get distracted pretty easily, so having me as structure to bring him back into the project every few days (which he didn't mind) was part of why it worked so well. For that reason, I think we should work together on another project. He wants to restore our Theatre of Magic but it's in such great shape I really don't want to mess with it. Instead, I think we'll find something a bit older. Maybe a Future Spa?! LOL.

Bally Playboy?

#442 7 years ago

Stumbled upon this thread today, I am in wow of your patience, hard work, learning on the fly, teamwork, etc, etc, etc.

I have 3 pins, done my own mediocre "shopping" of all three and still learning what some parts even are as I go. I would like to think I could try this, but like I said your first virtue of patience isn't built in me and I might pull the pin early in the process. Congratulations on the hard work and dedication.

#443 7 years ago
Quoted from northerndude:

Stumbled upon this thread today, I am in wow of your patience, hard work, learning on the fly, teamwork, etc, etc, etc.
I have 3 pins, done my own mediocre "shopping" of all three and still learning what some parts even are as I go. I would like to think I could try this, but like I said your first virtue of patience isn't built in me and I might pull the pin early in the process. Congratulations on the hard work and dedication.

Stuff like this is just done one step at a time, not fully focusing on the final goal, but rather in the small victories. And like my dad always told me, "you eat an elephant one bite at a time"

#444 7 years ago
Quoted from Chosen_S:

Stuff like this is just done one step at a time, not fully focusing on the final goal, but rather in the small victories. And like my dad always told me, "you eat an elephant one bite at a time"

Part of this process, at least for me, was this exercise of deep diving into a new skill about once a week. For example, I went through this whole process around HVLP spraying. First, learning how it worked. Then, what types of paint and at what thickness would work. Then weeks of experimenting. I learned my compressor was too weak, so I rented a more powerful one, etc. I learned how to clean the parts. Finally, once all was done, I realized that it just wasn't producing the results I wanted with the black, so I switched to rattle cans.

Some of these kinds of experiments could have been avoided, I'm sure, but the act of going through it was in many ways part of the satisfaction. I know more now about HVLP sprayers than I would have ever known! One thing is clear: Latex isn't ideal for an HVLP gun, and while you can make it work, if you want automotive like results, you need great equipment. Bryan_Kelly talks about using rattle cans after years of work, and honestly, you should take advice like that very seriously.

Another part for me is this community. It's not just about the machine, my son and I, though that's huge. I get a major kick out of engaging with a positive, uplifting group of people as I do it. I've managed communities online in the past, and let me tell you...it's refreshing to work with folks like all of you.

#445 7 years ago

Such an awesome read - so cool to see a father/son work together! You've inspired me to try to tackle something like this when he's a little older! Thanks for sharing!

#446 7 years ago
Quoted from jsa:

I get a major kick out of engaging with a positive, uplifting group of people as I do it. I've managed communities online in the past, and let me tell you...it's refreshing to work with folks like all of you.

I feel the same way. if it weren't for Pinside I know I wouldn't be as deep into the hobby as I am. I enjoyed your resto VERY much. If you do another game I'll follow that one too.

#447 7 years ago

Amazing...and you've made me want the OCD again. I better get on that!

#448 7 years ago
Quoted from Morydees:

Amazing...and you've made me want the OCD again. I better get on that!

If you're sticking with BoP 1.0, get the OCD cards, it's amazing. If, on the other hand, you're going BoP 2.0, I would hold off, at least for now. herg is trying his absolute best to support the P-ROC but we don't know if it's going to get there, stay tuned. Instead, buy two sets of OCD cards for your other machines.

#449 7 years ago
Quoted from jsa:

If you're sticking with BoP 1.0, get the OCD cards, it's amazing. If, on the other hand, you're going BoP 2.0, I would hold off, at least for now. herg is trying his absolute best to support the P-ROC but we don't know if it's going to get there, stay tuned. Instead, buy two sets of OCD cards for your other machines.

I've been hounding him recently to adapt his OCD so it works on XMEN LE and AC/DC, both of which are Stern's initial foray into LED light boards with a direct driver, and both of which have a TERRIBLE implementation of LED lighting as a result, which lights that have no transition period when coming on or off. I told him I'd get him a loaner pin so he could test on-site, but he said he's too busy and not motivated to do those (hopefully just yet).

#450 7 years ago

Wow! Bravo jsa ! Amazing project, well done.
I just told my son that he and I will be working on our ToM when he comes home for his next college break! lol

Promoted items from Pinside Marketplace and Pinside Shops!
$ 200.00
Lighting - Interactive
Professor Pinball
 
£ 69.00
Playfield - Other
PinballToys
 
$ 1.00
Lighting - Led
Mitchell Lighting
 
From: $ 30.00
Cabinet - Toppers
+CY Universal
 
$ 109.95
Electronics
PinSound
 
$ 27.95
$ 250.00
Lighting - Interactive
Professor Pinball
 
$ 1.00
Lighting - Led
Mitchell Lighting
 
£ 58.00
Lighting - Led
PinballToys
 
Wanted
Machine - Wanted
Albany, NY
$ 9.95
$ 170.00
Displays
Digipinball Shop
 
3,700 (OBO)
Machine - For Sale
Memphis, TN
$ 9.99
$ 69.00
Gameroom - Decorations
Pinball Pimp
 
$ 9.95
$ 20.00
Playfield - Decals
DevilsMuse Arcade
 
Wanted
Machine - Wanted
Westminster, MA
From: $ 35.00
Cabinet - Other
Rocket City Pinball
 
$ 1.25
Lighting - Led
Mitchell Lighting
 
$ 399.00
Cabinet - Decals
Mircoplayfields
 
Hey modders!
Your shop name here
There are 450 posts in this topic. You are on page 9 of 9.

Reply

Wanna join the discussion? Please sign in to reply to this topic.

Hey there! Welcome to Pinside!

Donate to Pinside

Great to see you're enjoying Pinside! Did you know Pinside is able to run without any 3rd-party banners or ads, thanks to the support from our visitors? Please consider a donation to Pinside and get anext to your username to show for it! Or better yet, subscribe to Pinside+!


This page was printed from https://pinside.com/pinball/forum/topic/bop-father-and-sons-first-restoration/page/9 and we tried optimising it for printing. Some page elements may have been deliberately hidden.

Scan the QR code on the left to jump to the URL this document was printed from.