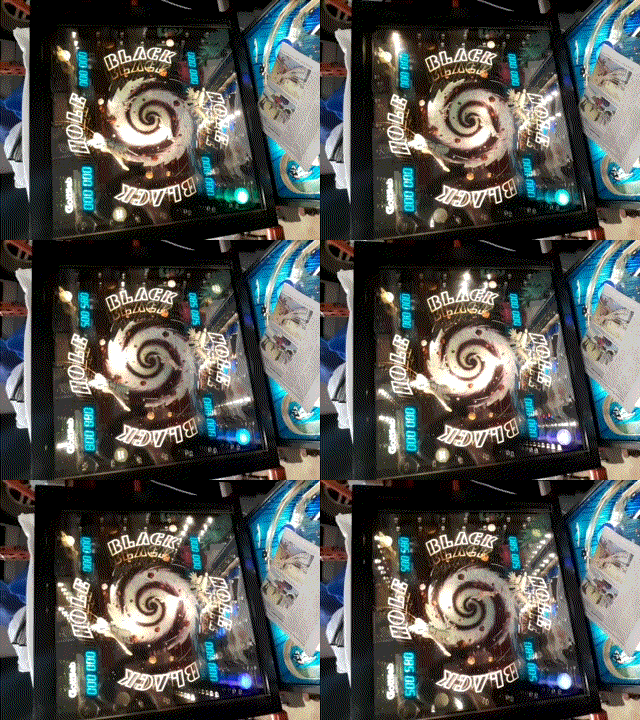
(Topic ID: 255339)

Black Hole repair log

By gdonovan

4 years ago


Topic Heartbeat

Topic Stats

You

Linked Games

Topic Gallery

View topic image gallery

20210217_213509 (resized).jpg
20191212_184701_resized (resized).jpg
20191130_180925_resized (resized).jpg
20191130_152728_resized (resized).jpg
20191127_201614_resized (resized).jpg
20191127_201604_resized (resized).jpg
20191123_172944_resized (resized).jpg
20191123_150505_resized.jpg
20191123_144747_resized.jpg
20191123_173126_resized.jpg
20191123_134811_resized.jpg
20191123_172956_resized.jpg
20191123_163357 (2).gif
20191121_185126_resized (resized).jpg
20191120_192546_resized (resized).jpg
20191120_193112_resized (resized).jpg

You're currently viewing posts by Pinsider gdonovan.
Click here to go back to viewing the entire thread.

#1 4 years ago

Repair log for recently obtained Black Hole.

Because who would not want two of the most iconic solid state Gottlieb sitting side by side? Haunted House is going to have a roomate.

Work list as of 11/10/19

Flipper power relay repaired (contacts all mangled)
A2 power board replaced (brought main displays back online)
Cleaned all board contacts.
Transistors on chaser board replaced (lights out)
1 major, 1 minor transistors replaced on driver board (malfunctions)
Ball release for shooter lane repaired (frozen)
LPF ball kicker coil replaced (still non-functional, working on circuit)
Reflowed pop bumper boards, need to update one
Replaced EOS switch inner right flipper
Rebuilt inner left flipper
Cleaned and reinstalled plastics (going to replace)
All Comet LED, some lamp sockets repaired.

To do list:

Clean upper right rollover switch (erratic)
Replaced elastics, plastics and lane guides
Replace disc motor
Replace window gaskets and finish polishing.
Replace under playfield remote transistor for upkicker and add pull up resistors.
Ground mods, slam switch mod and remove battery off MPU
Finish buffing out playfield and minor touchup
New coil for upper captive hole (weak, wrong part number)
Update last popper board.
New power supply caps.

Impression: Well I have not been able to play in the lower playfield yet but my impression is better than what I have gathered in the past playing this title at shows. Its fast-fast-fast which is what I like in a game. The few examples I have played before seemed slow and ponderous. Glad I had not written this one off as one I was keeping an eye out for.. but it was close.

Led usage:

Backglass now has Comet retro in warm white, the playfield inserts are retro natural white except for the green and blue inserts which have green or blue LED. The main playfield GI has clear dome retro warm white bulbs while the lower playfield has 5 LED white towers for GI illumination. Poppers all have 2SMD LED natural white.

My aim is to always look somewhat stock with just the slightest pop.

20191108_195319_resized (resized).jpg20191108_195319_resized (resized).jpg20191108_212059_resized (resized).jpg20191108_212059_resized (resized).jpg20191109_083402_resized (resized).jpg20191109_083402_resized (resized).jpg20191109_114433_resized (resized).jpg20191109_114433_resized (resized).jpg20191109_122928_resized (resized).jpg20191109_122928_resized (resized).jpg20191029_140414_resized (resized).jpg20191029_140414_resized (resized).jpg
#2 4 years ago

LEDs for the chaser circuit, plastics set, elastics, lane guides, coils, transistors, resistors, caps for lower power supply and pop bumper boards, window gaskets and new upper power supply are all on order.

Happy Veterans Day to all service personal on Pinside! My son took the oath last week.

#4 4 years ago

Adventures in the last 24 hours..

1) Touched up the re-entry point. Started by putting down a "base color" and then filling in the detail. I'm a bit of a perfectionist and the inability to get the color match just where I wanted it drives me crazy. I console myself that 99% of the public will never realize the spot was touched up in the first place. After I'm doing doing clean up and other touch ups I'll seal the spot with mylar.

2) We have full operation! WOOT!

A box from Mouser arrived and I installed the MJ2955 transistor in its under playfield location for the upkicker coil and installed a 4.7K Ohm resistor on all the under playfield transistors per Gottlieb. This is an earlier Black Hole that does not have the resistor bank later production units did.

Only thing of note is I might replace the upkicker coil as the one that was with the machine is a little too powerful and the ball will fly right over the gate time to time.

Game is a mean bitch, it clearly earns its reputation as a game that makes you a better player.

Tonight after dinner I'm going to start swapping caps in the popper boards.

20191112_173318_resized (resized).jpg20191112_173318_resized (resized).jpg20191112_175115_resized (resized).jpg20191112_175115_resized (resized).jpg20191113_151731_resized (resized).jpg20191113_151731_resized (resized).jpg
#5 4 years ago

1) Pop bumper boards done! They have the extra cap mod to make sure they don't double fire due to noise.

2) I was cleaning up the shop tonight and had a sneaky feeling about the MPU battery. Rather than put it off another day I pulled the board and then the battery. Talk about nick of time! I'll have this cleaned up tomorrow and resealed and it will be right as rain.

3) Orange cap replaced with new 12,000 uf unit.

20191113_173306_resized (resized).jpg20191113_173306_resized (resized).jpg20191113_181357_resized (resized).jpg20191113_181357_resized (resized).jpg

#6 4 years ago

Corrosion removed, traces re-tinned, sealed with clear, remote battery pack installed, main MPU board cap replaced.

Also repaired bad solder joint on lamp.

Short night tonight, going to catch a show with the Mrs, packages here tomorrow though!

20191114_182652_resized (resized).jpg20191114_182652_resized (resized).jpg
#8 4 years ago
Quoted from Antero21:

Very cool! I rebuilt mine about a year ago and it’s still playing very good! Out of all my machines, my kids live this one the best. Now if I could just get my hands on a HH.

Frankly, didn't think I'd have a HH or BH and now I have both! Just dumb luck.

Not sure which one I like better yet, BH is clearly the more challenging of the two though. New elastics will make it even more zippy.

20191102_201039_resized (resized).jpg20191102_201039_resized (resized).jpg
#9 4 years ago

Toying with the idea of modifying the chaser lamp board so the backglass lights are variable speed.

Maybe a slow speed for regular play and faster rate for multiball.

#10 4 years ago

Light night once more; USPS seems to have misplaced packages from PBR... again.

Package from Comet came in though! Replaced the chaser lamps with clear done retro bullet LED in warm white, cleaned the backglasses and reinstalled, touched up some spots on the head and removed a broken post from the playfield.

#11 4 years ago

Only day off so light as there was stuff to do around the house.

Replaced the upkicker coil, replaced the left upper ball release coil and tuned the mech, fooled about with the pop bumper boards some more, polished the "launch tube" and removed the broken metal post from the playfield. Clean contacts on displays and reinstalled. Cleaned and adjusted right top green insert rollover switch.

Packages came in but power board missing, arg. More delays.

#12 4 years ago

Ok some progress again!

Package from PBR came in and I installed a Stern/DE post with T-nut in place of the snapped of Gottlieb one. Even installed a nice stainless washer under it to spread out the load a little bit more.

Installed new power board and did the ground mods tying the MPU, driver, chaser and power supply board. From there it connected to the backbox ground eyelet at the latch mechanism which runs down to the ground buss bar. Might run a ground to the sound board too but have to look up where is appropriate on this model sound board.

Picked up a used BH soundboard off Ebay, one reason was to have a spare as it is the same as Haunted House but I spied it had a SC-01 chip on board. I plugged it in and the board just makes a rude noise but swapping the SC-01 to the good board.. and the chip is ok! Worth the purchase right there.

In the future I'm going to diag the board and see if I can get it working again. Already have a manual with tips, it literately is a small MPU board with a 6502 CPU and you start diagnostics the same way you would an MPU pretty much. At least I have 2 other pins with the same board I can compare for troubleshooting. Getting excited, only real hardware left to repair is the backbox motor and I have to dive into playfield touchup.
20191120_182114_resized (resized).jpg20191120_182114_resized (resized).jpg20191120_192546_resized (resized).jpg20191120_192546_resized (resized).jpg20191120_193112_resized (resized).jpg20191120_193112_resized (resized).jpg

#13 4 years ago

Backbox motor... is on order from ServoCity.com

By the time it arrives, the touchups, deep cleaning, window gaskets and elastics should be done and it will be the final item to address.

#14 4 years ago

I don't like it, not a lick. The lower popper is ok, the upper one was just a fight from the git-go. I'll strip off the blue/grey paint and try again. Think I'll mask off so I get nice clean lines, free hand just isn't working for me.

Tracking states disc motor will be here Saturday, which is a surprise. Nice if it is, but I think I'll still be working on the playfield this weekend.

20191121_185126_resized (resized).jpg20191121_185126_resized (resized).jpg

#15 4 years ago

We have motor action!

20191123_163357 (2).gif20191123_163357 (2).gif
#16 4 years ago

Busy day today! The Mrs. was at work so I headed out first thing pedal to the metal.

Finished touchups which came out satisfactory, sealed all touched up areas with mylar, replaced lane guides with new ones, installed new plastics, installed new elastics, tweaked a bunch of switches after of course, installed an extra socket for GI lamp on the top right of the playfield, adjusted the capture ball location on the upper left, cleaned coin lens & installed bulbs, fixed coin mechs, removed window, polished it and bonus display, installed with new gaskets and leveled, installed the new servo motor for the backglass animation.

Whew.

Game plays fasssssssssssssssssst!

Only operation issue is one of the poppers is sticky, might be a magnetized plunger. Changing the popper board and plunger stop made no difference. Sometimes it is fine, other times it will hang up for a moment or two before releasing. If you push on the ring it will freely retract, no power on it clearly.

20191123_150505_resized.jpg20191123_150505_resized.jpg20191123_144747_resized.jpg20191123_144747_resized.jpg20191123_134811_resized.jpg20191123_134811_resized.jpg20191123_172956_resized.jpg20191123_172956_resized.jpg20191123_173126_resized.jpg20191123_173126_resized.jpg
#17 4 years ago

Today was a good day to tidy up some loose ends while the Mrs. was at work this afternoon.

1) Pulled the disc motor back out and shimmed it back another 1/8" It was not hitting the glass but decided why take chances.

2) Fixed the "sticking popper" by changing out the plunger.

3) Fixed the left side outhole, though not as positive as I'd like. I'm thinking the factory coil is on the weak side, and might step up the coil strength. Changed out the colored outhole LED from orange to blue while I was at it.

4) New lock for coin door, missing.

5) Yes I have the plastic for the lower right, was fussing around with the gate which is why it is off when I took the picture.

20191123_172944_resized (resized).jpg20191123_172944_resized (resized).jpg

#19 4 years ago
Quoted from Matesamo:

That is one seriously nice looking Black Hole! Side-by-side with a Haunted House no less, great pair of machines.

Thank you! I'm already planning how I can park them next too each other. Going to take some planning moving a bunch of pins about.

Enjoy the video, I actually made it to multiball twice though I crashed and burned on the second round.

#21 4 years ago
Quoted from PghPinballRescue:

I'm sure I overlooked it, bit can you tell me the parts number you ordered for the spinning disc motor and mounting plate? I see you ordered from Servo City.

https://www.servocity.com/3-rpm-gear-motor

I pulled the old motor off the flat bracket, slipped a 1/8" washer between the bracket and new motor snout. Used new screws with washers and spacers to grip the sides of the bracket and then one hole lines up with original bracket. It gets the third screw with a small nut or washer as a spacer between the motor and bracket so its level.

Drill out the original hub adapter with a 1/4" drill bit. Attach to shaft with set screw with end of motor shaft flush with adapter. Reinstall.

The wiring is straightforward.

#22 4 years ago
Quoted from gdonovan:

Picked up a used BH soundboard off Ebay, one reason was to have a spare as it is the same as Haunted House but I spied it had a SC-01 chip on board. I plugged it in and the board just makes a rude noise but swapping the SC-01 to the good board.. and the chip is ok! Worth the purchase right there.
In the future I'm going to diag the board and see if I can get it working again. Already have a manual with tips, it literately is a small MPU board with a 6502 CPU and you start diagnostics the same way you would an MPU pretty much.

Pulled the 2716 Eproms from the Ebay sound board and dropped the contents, exactly the same files as found on some mame site on the web so I think I can rule out the Eproms being corrupted.

Need to start making a list for Mouser again, going to replace all the caps next.

#23 4 years ago

Interesting problem I have been chasing and finally a resolution. Perhaps this will help another Gottlieb owner in the future.

One of the pop bumpers looked.. slower than the others is the only way I think I could describe it. Almost like it was hanging up when the coil was released. I had the assembly apart a few times and installed new parts but nothing seemed to really totally fix the issue. Tonight I took it apart one more time and noticed when I reassembled that the plunger was not totally making contact with the stop. The hat or link under the fiber was making contact with the plunger bracket.

It would make sense it is binding up as when the plunger is all the way down it is being forced to one side when it came in contact with the bracket. When the coil released, it was bound up against the side of the sleeve and takes a split second to release.

Grinding off the point of the piece gave me about 1/8" of clearance and it no longer binds up, a noticeable improvement when playing.

Played several games tonight, only other issue was one of the U45 drivers failed on the driver board during testing, took a hot 10 minutes to repair.

20191127_201604_resized (resized).jpg20191127_201604_resized (resized).jpg20191127_201614_resized (resized).jpg20191127_201614_resized (resized).jpg
#24 4 years ago

One last thing... I must sound like Colombo..

The mounting plates for the legs were in terrible condition... So I chopped some 1 1/2" flat stock into 5" sections, drew out a pattern and got busy with the drill press and welder. Rip these threads out!

20191130_152728_resized (resized).jpg20191130_152728_resized (resized).jpg
#25 4 years ago

In the lineup with friends.

20191130_180925_resized (resized).jpg20191130_180925_resized (resized).jpg
#27 4 years ago
Quoted from PghPinballRescue:

"more pinball....shoot again!"

One of my favorite games, I only play it once a week because I don't wish to master it overly and get bored with it.

#29 4 years ago
Quoted from PghPinballRescue:

The spiral ramp is unobtainium.
Also, I recommend putting LEDs in the row of flashers under that ramp.

Mines all LED except for a few flashers.

#30 4 years ago

Raised the back an additional 3/4", gone from being mildly difficult to "REDRUM REDRUM"

Love it.

#32 4 years ago
Quoted from wm6929:

Totally digging the repair log.
I am working through problems on my Black Hole, though I kinda cheated and started with a all in one board.
Super Jealous of your machine.

A year ago I was terrified at the thought of doing board work, now I'm doing battery leakage repair, diagnostics and IC replacement..

(Please Lord, don't wack me in the kneecaps on the next one, lol.)

Just getting my feet wet though; still working on gathering tools and documentation. Its a good learning experience and I'm more comfortable now owning solid state pins.

Black Hole wasn't bad after what I learned on my Haunted House. The MPU was pretty much dead and I had to replace many components in the area around the battery and reset circuit, board ram and a related IC and a display IC for good measure.

https://pinside.com/pinball/forum/topic/dead-system-80-diagnostics-a-haunting-we-will-go

Good Luck on your project! Feel free to ask questions, more than happy to help.

Gary

#34 4 years ago
Quoted from gdonovan:

In the future I'm going to diag the board and see if I can get it working again. Already have a manual with tips, it literately is a small MPU board with a 6502 CPU and you start diagnostics the same way you would an MPU pretty much. At least I have 2 other pins with the same board I can compare for troubleshooting.

Board is repaired and tested! Darn funny playing Haunted House with Black Hole sound roms! After I was sure nothing bad would happen, I swapped in the HH roms from the HH board in the machine and played for an hour. No problems at all, worked perfect.

It was tested in HH as I can't get the BH backglass door open without moving the pin and I wasn't feeling that ambitious tonight.

20191212_184701_resized (resized).jpg20191212_184701_resized (resized).jpg
#36 4 years ago
Quoted from PghPinballRescue:

Don't forget to recap that board while you have it out.

Already done! Parts from of Great Plains Electronics, Ed (@g-p-e) is a great guy to do business with.

1 week later
#38 4 years ago
Quoted from wm6929:

what was the problem with the sound board?

Recapped the board, cleaned all the socketed chip legs and reflowed a few suspicious joints and its working like a champ.

1 year later
#44 3 years ago
Quoted from Shenanigander:

Yes I read that. As mentioned in my post pinwiki suggests an A-20095 so I was wondering which of the options the OP went with or a different option all together. I don't think he mentioned the actual coil part number. I don't think I will be making an EOS bracket. There are about 20 recommended mods/upgrades for Black Hole so I am going to choose my battles

To be honest, I dont recall what coil I ordered but remember ordering a new one. I'll try and pull up invoices.

#45 3 years ago
Quoted from Shenanigander:

Yes I read that. As mentioned in my post pinwiki suggests an A-20095 so I was wondering which of the options the OP went with or a different option all together. I don't think he mentioned the actual coil part number. I don't think I will be making an EOS bracket. There are about 20 recommended mods/upgrades for Black Hole so I am going to choose my battles

I ordered three coils for BH

GTB-A4893 Coil $10
GTB-A1496 Coil $10
GTB-A16570 Coil $10

I think the 1496 is what I used but unsure at this time.

Promoted items from Pinside Marketplace and Pinside Shops!
$ 1,159.00
Flipper Parts
Mircoplayfields
 
From: $ 3.00
Cabinet - Other
Space Coast Pinball
 
Hey modders!
Your shop name here

You're currently viewing posts by Pinsider gdonovan.
Click here to go back to viewing the entire thread.

Reply

Wanna join the discussion? Please sign in to reply to this topic.

Hey there! Welcome to Pinside!

Donate to Pinside

Great to see you're enjoying Pinside! Did you know Pinside is able to run without any 3rd-party banners or ads, thanks to the support from our visitors? Please consider a donation to Pinside and get anext to your username to show for it! Or better yet, subscribe to Pinside+!


This page was printed from https://pinside.com/pinball/forum/topic/black-hole-repair-log?tu=gdonovan and we tried optimising it for printing. Some page elements may have been deliberately hidden.

Scan the QR code on the left to jump to the URL this document was printed from.