(Topic ID: 159118)

Batman 66 Retheme Project - From Diner to Caped Crusader

By docquest

7 years ago


Topic Heartbeat

Topic Stats

  • 218 posts
  • 64 Pinsiders participating
  • Latest reply 7 years ago by docquest
  • Topic is favorited by 115 Pinsiders

You

Linked Games

Topic Gallery

View topic image gallery

MI0000137914 (resized).jpg
514lHyn6PAL._SS500 (resized).jpg
ashcs (resized).jpg
batman_on_ice (resized).png
Bat-Cave (resized).jpg
bman_playfield_(resized).jpg
582163_502028193145631_261438381_n_(resized).jpg
20160806_080953_(resized).jpg
20160805_180336_(resized).jpg
20160805_180242_(resized).jpg
20160728_212253_(resized).jpg
20160728_212241_(resized).jpg
IMG_0192_(resized).JPG
IMG_0179_(1)_(resized).JPG
IMG_0186_(resized).JPG
insert_off_(resized).jpg
There are 218 posts in this topic. You are on page 1 of 5.
19
#1 7 years ago

Since the rumors of the Stern making a vault edition of Classic Batman and another pinsider (Drano) starting his homebrew Batman thread I decided I should finally start my thread as well. This isn’t a jump on the bandwagon moment. I’ve been think about doing a re-theme for several years and decided on my Batman theme about 1 ½ years ago. I didn’t start the actual build until this winter. This thread will try and document what I’m done already and what I’m planning to do. I should have started it earlier but I was worried about totally screwing it up and having it come out half-assed so I was procrastinating sharing anything until it looks like it might actually come together. I should have started a build thread earlier because I probably would have gotten a lot of advice from fellow pinsiders on better ways to do thing or point out pitfalls before I fell into them. I’m hoping by documenting the process of the re-theme it will help others in the future when they decide to do a similar project of their own.

Why Batman?
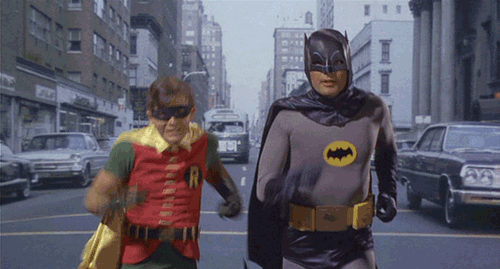
So of out of all the themes that you could make into a pinball machine, which one been the most the most neglected over the years? Batman of course (insert sarcastic emoticon here). Ok so with all this Batman pinball history already why make another one? In addition to liking the dark, gritty, serious Batman also love the classic 66 TV show. Adam West as My first exposure to the world of Batman and comics in general. I fondly remember running home from the school bus hoping to get my little 2'nd grader butt in front of the TV before the opening credits started. I loved it as a kid for the pure action of it and still appreciate it just as much as an adult for all for all the cleverness of it. I think it’s a fantastic blend of action, writing, humor, art design, costumes, props, and overall entertainment. It’s just a fun show to watch. I think it was one of those lightning in a bottle moments that was a product of the time it was made and could never be duplicated. I always wondered if this theme was ever considered for pinball game during the 60’s and early 70’s. When the show premiered in 1966 it was an instant hit. In that era three B’s dominated pop culture: Bond, Beatles and Batman. With all of its crazy villains, cool music, campy humor, a Batman ’66 re-theme offers a ton of pinball possibilities.

What Style of Game: EM, Early Solid State, Alpha-Numeric, DMD, Full Custom?
When I first started think about doing a re-theme project Batman was always the title I had in mind but I wasn’t sure what style of machine I wanted to use. So the next step was to decide what kind of game do I want to build with this theme? Do I do a total scratch build game or just new art on an existing game? If I use and existing game do I want to use an EM, early solid state, or fully modern DMD?

Once I knew my theme I began auditioning possible candidates. Whenever I went to a pinball show or played a location machine I would ask myself if its layout lent itself to a Batman re-theme. I originally started looking at EM’s as possible donor machines. It though this would keep things simpler and easier. I would just need to redo the art and keep the original game rules and chime/bell sounds. I was thinking about re-theming it as if it was actually designed from a mechanical and artistic viewpoint in that 66-73 time period. For example, make the art look like Christian Marche might have actually drawn it. I even bought an old fixer upper EM that has a layout that would work well with a Batman theme. However as I thought about it more I decided I wouldn’t be able to draw new art that looked enough like real “pointy people” art. I also decided that this theme needed more complexity than what an EM design could offer. I wanted multiple music tracks and sound effects from the show, I wanted mult-ball and ramps, and I wanted to add cool “gadgets” integrated with the game play.

I thought about going with a P-Roc or Fast board set approach but I decided I didn’t want to go that complex. I wanted to find a game with a rule set and layout that I could use as is. I also didn’t want to have to make DMD animations so I focused on early solid state and alpha-numeric games. If I go totally nuts with ideas that require a new rule set or more complex toys I might migrate to a new board set in the future.

A recent mod I picked up was a Pinsound board that I put into a DE Star Trek. This board allowed me to totally re-do the sound package on the game with relative ease (once I made it past the learning curve).The Pinsound board is extremely flexible and lets you replace all the existing sounds, music, call outs, etc. with whatever replacement wav file you want. It also allows you to offer multiple sounds for a single event. For example if a drop target in the existing game always makes the same sound when hit, you can replace it to randomly play 1 of 100’s of sounds when hit. Other re-themes have used external sound boards (like wav trigger or mp3 trigger or Arduino based coupled with additional switches added to existing switches. While this approach can work fine I decided I‘d rather not deal with adding so many new switches and wires. Pinsound talks directly with the main MPU board so no additional switches needed to be added. Another feature of the Pinsound is that it will be able to (FW for this is still pending) trigger external devices. So if you want a shaker, extra flashers, smoke machine, etc. they could be triggered to turn on by Pinsound board whenever the pinball CPU actives a particular sound. So based on the ease of installation and flexibility of sound use I decided I needed a donor machine that was compatible with Pinsound. This narrowed the list down to DataEast R3 games, System 11C games, and WPC/WPC-95/WPC-DCS games. Since I didn’t want the complexity of a DMD I decided to focus on the system 11C games.

Why Diner?
I didn’t have a lot of experience with Diner previously but as I researched it more and played a few I realized it was almost a perfect match for a Batman theme. The main appeal was that it’s just a fun great game. The rule set is not super deep but still very challenging with lots of different objectives to accomplish. Being a sys11C, Diner is also pinsound compatible so all the audio will be easily modified. The picture below shows the re-theme plan. The little art clips are some of the art I’ve already stated pulling together.

batman_shots.jpgbatman_shots.jpg

#2 7 years ago

After acquiring the game I had my first big moment of truth. Do I have the kahunas to take a perfectly fine working Diner machine and take a belt sander to the playfield? Well to be honest the playfield had issues. It had the typical highly raised inserts in the center of the playfield and the Mylar in many areas was separating and in some cases lifting artwork with it. When the ball rolled those areas of the playfield the separated Mylar made that crinkling noise that sounds like a toddler walking around in their pampers. I decided it was a good Diner player’s machine that would soon become a great Batman homebrew machine. So I played one last game, then grabbed the tools and started stripping everything off the playfield. I took a ton of pics to make sure I could put it all back together again.

Even though I was going to sand the whole playfield I wanted to see how much of the Mylar I could remove without destroying art underneath. A little experiment for future reference. I used the freeze spray method using a 2 pack of compressed air I bought at Wally world. The general idea is to hold the can upside down and the liquid inside the can comes out and is very cold. The cold liquid freezes the glue attached to the Mylar and the Mylar then just peels off. So you are removing the mostly Mylar only, the majority of the glue is still stuck on the playfield.

walmart_air_(resized).jpgwalmart_air_(resized).jpg

#3 7 years ago

This method worked great for me at removing the Mylar. Except for the paint that was already lifted, I didn’t remove any additional paint when lifting the Mylar. The harder part of the job was removing the residual glue. I used an old credit card as a scraper and some 91% Isopropyl alcohol and a chemical called goof off. It was a slow and tedious process but it all came off eventually. Again I could have just sanded all of this off right away. My intent for this experiment was to see to just see how well I could do this if I was just restoring a playfield not re-theming it. Based on this test. I would feel comfortable trying to remove Mylar in a future game using the freeze spray method. You can see in the pic below the used Mylar and gunk that came off in the process.

20160209_202624_(resized).jpg20160209_202624_(resized).jpg

#4 7 years ago

Now that’s all done I can put on my dust mask and whip out the power sander with the 50 grit sandpaper and go to town. I’m definitely past the point of no return now. Next update will show how I prepared the playfield once it was fully sanded.

20160207_173744_(resized).jpg20160207_173744_(resized).jpg

#5 7 years ago

Ok I'm intrigued by this one, sorry to lose a Diner, but this could be cool.

#6 7 years ago

Excellent, like it a lot, will follow......

#7 7 years ago

Very cool! Excited to see your progress.

#8 7 years ago

Seems well thought out

Just keep focused and move forward

I had a few re themed ideas and never got past the drawings

Please post progress

Sounds Bad Ass

don't forget the MOST important thing

The Batusi !!!

#9 7 years ago
Quoted from TheCnyPinGuy:

don't forget the MOST important thing
The Batusi !!!

You mean this?

#10 7 years ago

Ok...this is sounding very cool. :>

#11 7 years ago
Quoted from Tsskinne:

...sorry to lose a Diner...

I was expecting a little bit of that type of reaction from some.

batman-slap-desicrate.jpgbatman-slap-desicrate.jpg

#12 7 years ago
Quoted from docquest:

You mean this?
» YouTube video

OMG.... and I used to get pissed with my friends who said batman was gay!

#13 7 years ago

Are you basing this on Batman 66 or the TV series?

#14 7 years ago
Quoted from o-din:

Are you basing this on Batman 66 or the TV series?

It's kinda both since batman 66 comic series is based off of the tv series. I like most of the art from the Batman 66 series (each issue had a different artist) and will be using mostly that for the playfield. Most of the covers and one of the issues itself were done by Mike Allred. I like his stuff the most. I think the game will look better with comic art vs actual photos from the show. For the translite I was thinking of using a more photo realistic look or actual photos. I'm probably breaking some kind of art design rule by making the playfield a different style than backbox. Like I said, I'm not an artist so I'm just picking stuff that looks good to me. Here's a Chris Franchi poster I have hanging up in my gameroom that I really like that could be the basis of a nice translite.

dc-comics-batman-d0b0d0b4d0b0d0bc-d0b2d0b5d181d182-710488.pngdc-comics-batman-d0b0d0b4d0b0d0bc-d0b2d0b5d181d182-710488.png

#15 7 years ago

I use Goo Gone rather than Goof Off when removing residual mylar adhesive. Let it soak for a bit and it comes right up. Goof Off can remove paint Goo Gone never will (not that it mattered in your case, though).

Also, did your dust off have bitterant added? That's the worst thing ever! One can I got from Office Depot had SO much I was tasting the nasty residue for days from just casual contact in the area I was applying the freeze spray. From now on, I seek out bitterant free dusters, only.

#16 7 years ago

Galloping Ghosts Batman! Why are Robin's shorts so short?

#17 7 years ago

Another great thread to follow! I have the same Franchi poster hanging in my game room and always get compliments on it. Look forward to seeing the finished pin!

#18 7 years ago

Wow great idea!

#19 7 years ago
Quoted from Friengineer:

Galloping Ghosts Batman! Why are Robin's shorts so short?

Good question. I assume Batman made the costume for Robin. Makes you wonder.

batman_robin_leather_thong.jpgbatman_robin_leather_thong.jpg

#20 7 years ago

How are you going to do the artwork and plastics? I see so many rethemes, but noone ever seems to go into detail on that parr

#21 7 years ago
Quoted from travisbmartin:

How are you going to do the artwork and plastics? I see so many rethemes, but noone ever seems to go into detail on that parr

I'm near the end of the playfield art process now and will detail my approach to that next. I'll be tackling the plastics after that. I'm still not sure what method I'll be using for the plastics art yet and will probably experiment with a few techniques. I'll try to provide lots of details as I go through it.

#22 7 years ago

Thanks, Doc. I've got a blown out Scorpion and Jungle Lord in the basement as retheme candidates. Any information would be excellent

#23 7 years ago

Wow; you're onto something great here! I can't wait to see the results!

#24 7 years ago

Playfield Scanning
A step I forgot to mention prior to sanding was the playfield scanning. I wanted a scan of the stripped playfield with all of the original artwork on it before I sanded it off. My copier at work has the ability to scan an 11x17 sized original so I scanned in sections of the playfield at 300 dpi one chunk at a time. I then used the “Photomerge” feature in Photoshop to automatically stitch the separate scans into one continuous image. It took a few attempts to get it right. I found out that if the individual scans are skewed too much then Photoshop has a tougher job aligning them back together accurately. So I ended up re-scanning it a second and tried to more carefully about not skewing the playfield as I scanned each section. You can see an example of a Photomerge error if you look at the text over the spinner insert in the original scan below. So watch out that if you use the Photomerge tool. An alternative to scanning the actual playfield would be to get a large sheet or paper and lay it on the empty playfield with a strong light under it. Then carefully trace the outline of each insert onto the paper. You could then take the paper with your tracing on it to a staples and they could scan it for you and give you a digital image to start working with.

Creating The Insert/Holes Mask
The insert mask is just a print of each of the inserts and holes on the playfield. The idea is to have a white canvas with just the insert outline on them and then you fill in all the artwork around the inserts later. You don't want to put all the artwork on all nice and pretty like and then find out one of your inserts was off by 1.5mm and have to shift everything around again. So you want to get all your insert locations nailed done before the artwork goes in.

Using the full color playfield scan I then used Photoshop (could use any other image editing software you are comfortable with) to make outline of each of the playfield inserts and everything else is white. When I’m ready to test my insert placement I print out the image at my local Staples (cost about $3 to print an approx 21x48 black and white image). I could then lay the print on the playfield and shine a light from below to check the alignment of the inserts on the print to the real playfield. I found it hard to be precise using this method So I decided to actually cut out the inserts from the printed map using a sharp Xacto knife. I then overlay the printed map onto the playfield and see if my insert cutouts match where the insert actually is. A lot of the inserts had to adjusted a small amount to be in the right location. Ultimately I ended up doing this 3 or 4 times before all the inserts were precisely located. Once you are at that point you have a working canvas to start laying out your artwork in Photoshop

The pics below show the full color scan after photomerging, the full color scan with all the inserts marked with a black mask, and the final insert map that you can print out and check for proper registration with the real playfield. The last image is the printed out insert mask to test my alignment. You can see where I started cutting out some of the inserts to see how well it would line up.

insert_test.jpginsert_test.jpg

insert_map.jpginsert_map.jpg

original_art_with_inserts.jpgoriginal_art_with_inserts.jpg

original_art.jpgoriginal_art.jpg

#25 7 years ago

My first thought was to run for my pitchfork and light a torch to defend one of my favorite games, but your explanation and vision seem spot on.

I will be watching this one with interest.

Good luck!

#26 7 years ago

Insert Replacement
I should also mention that I replaced the center inserts. The game as I received it had raised inserts in the center of the playfield. This appears to be a very common problem in a lot of Diner machines. I think the large size of the insert coupled with hot incandescent lamps causes the insert to get hot and move around a little over the years. Once the insert gets raised the ball starts to chip away at the art on the raised edge. Over time they get a bit chewed up. This game had that issue. Some try to fix the missing art around the insert by applying a new decal over the whole center area. This will work as long as reset to be flush with the playfield.

Initially I tried to save the existing inserts. I used a heat gun to heat the insert from underneath and then gently pry out the insert. While doing this I found that there is a fine line between not enough heat to budge it or too much heat which can cause the insert to deform with the slightest amount of pressure. As I pushed the inserts from below to free them, some of the inserts deformed slightly because they were too hot. You couldn’t really see it until you put the insert on a flat surface. I also noticed that the inserts we very yellowed from years of light exposure. Lucky for me you can buy this 2 ¼” x 1 1/8” insert at pinball life for the low low price of $0.50. The have totally clear ones, and red or clear ones with a starburst pattern in it.

http://www.pinballlife.com/index.php?p=catalog&parent=459&pg=1

See if you can tell which insert is the new vs old in the pic below. Prior to putting the new inserts in I did my best to remove all of the old glue from lip inside the insert hole. The old glue was very “gummy” so it would come off mostly in chunks but it was still a very tedious process to clean out all 10 insert holes. However if I wanted the new insert to stay put I’d need to try and get all that old glue out and rough up the wood a little out so the new glue would have a good solid surface to bite into.

I used the recommendations by Vid1900 in his ultimate playfield repair and restoration thread:

https://pinside.com/pinball/forum/topic/vids-guide-to-ultimate-playfield-restoration

In my opinion that thread is the single best thread in all of pinside history due to the shear amount of good information in it. Big shout out to Vid1900 for making that thread (and all the other similar threads he has created). As he states, most new inserts need to be sanded to get them to fit well and be flush with the playfield surface. The new inserts required some sanding on all four sides to get it to fit well within the existing hole for a snug fit. Without the sanding it would require some vigorous hits to get it in the hole (phrasing?). Once in the hole the new inserts still sat a little proud of the playfield surface and required additional sanding to get it to be totally flush. I used some basic 2 part epoxy from harbor freight to glue them in.

http://www.harborfreight.com/super-strong-quick-drying-epoxy-92665.html

Before gluing the insert Vid recommends putting an adhesion promoter on the plastic edges. I found this product at home depot:

http://www.homedepot.com/p/Rust-Oleum-Automotive-11-oz-Adhesion-Promoter-Spray-Case-of-6/204707453

I'm not sure if its the most effective material or not to use on plastic insert or not but I gave it try. I decided to test it out using my old used inserts. I put a blob of the epoxy on the edge of an insert and on another insert I put the adhesion promoter on first then after it dried put on the same epoxy. After letting it sit overnight I compared the two. The epoxy on the insert with no adhesion promoter could be peeled off with some effort. The epoxy on the insert with the adhesion promoter was much harder to remove. So I guess it works as intended. This stuff can in a spray can so to use it I just sprayed it into a paper cup until I had a small puddle of it and then used a small brush to apply it to the insert. I painted the sides of each insert with the adhesion promoter and let them dry before gluing them in. On one of the inserts I got a little of the adhesion promoter on the surface and it clouded it up. This didn’t matter to me because these insert were going to be painted white later. However if I wanted the insert to stay crystal clear this might have been an issue. It’s possible that if I clear coated it the cloudiness would go away. Once all the inserts were in place I let the epoxy sit overnight and then re-sanded the playfield again to get the inserts totally flush and smooth. Once done it was now smoother than a baby’s butt with nice non yellowed inserts.

old_vs_new_insert_(resized).jpgold_vs_new_insert_(resized).jpg

adhesion_promoter_(resized).jpgadhesion_promoter_(resized).jpg

#27 7 years ago

What Technique to Use to Get New Artwork On the Playfield?
For the new art they are several approaches I’ve seen used on playfields. You can hand paint the art on. This is the method used on “The Cave” re-theme:

https://pinside.com/pinball/forum/topic/the-cave-pinball-retheme

and “Silver Bullet” re-theme:

https://pinside.com/pinball/forum/topic/silver-bullet-new-custom-conversion-game

If you look at those threads you can see that if you are a real artist you can get fantastic results. Since I have no artistic ability I’m SOL do it this way.

Another technique is direct ink printing. John Greatwich has done this for some repro playfields and I think he can do custom one-offs. This approach can give great results to but it can be fairly expensive when compared to a just printing an overlay. A few other projects I seen on pinside used this technique with great success like the DE Batman restore and Zitts Mirror universe pin.

https://pinside.com/pinball/forum/topic/restorations-with-direct-ink-uv
https://pinside.com/pinball/forum/topic/de-batman-direct-ink-restore
https://pinside.com/pinball/forum/topic/star-trek-mirror-universe-pinball

The vinyl overlay method seems to be the most common way to re-theme a game. Probably because it can be made at most all print shops and compared to the other methods is fairly inexpensive and doesn’t as much skill.

#28 7 years ago

The Vinyl Overlay Method
The most popular method seems to be using a custom overlay, i.e. a big sticker. With the overlay you can print in two styles. You can print the overlay on clear vinyl or you can print it on white vinyl. Let’s look at the difference between the two.

Print on White Vinyl Approach:
The advantage of printing on white vinyl is that you don’t need to paint white you playfield. The disadvantage is that you need to cut out the areas that go over an insert if you want the insert to be visible. On some inserts (like the center inserts in diner) there is full artwork over the insert so those types of inserts could be covered with white printed vinyl and look correct. However, most inserts were not meant to have full artwork on them, just a small amount of text. You could try and cut the vinyl by hand after it has been printed but would be difficult to get precise clean edged cuts and there are usually quite a few inserts on a typical playfield. It would be preferable to have the printer also cut the vinyl automatically using a cut file that you would provide, typically in Adobe illustrator vector format. The cut file would be a map that shows the cutter exactly where to cut. The cut file should be easy to generate from the full art file because all of the inserts to be cut should have no art in them. The printer will likely charge you extra to do the cutting operation. I’ve never had something printed and cut before so I’m not sure if it’s a big deal to get perfect registration between the art and the cut file. If the registration was off, even just by a small amount, it would likely be noticeable. Another disadvantage is that you now have overlay with a lot of holes in it for the inserts. Those holes need to be filled with something or you will have discontinuities in the surface as the ball rolls over them. So you would either need to use a large piece of Mylar or one of those makrolon protectors on top of the overlay like these:

http://www.pinballnews.com/learn/playfieldprotector/index.html
https://pinside.com/pinball/forum/topic/review-atlantis-makrolon-playfield-protector

I guess you could clear coat it as well. I had playfield touched up and cleared by HSA pinball and asked him about clearing overlays and he said he doesn’t do that. I’m assuming they don’t hold up as well? Maybe someone who has cleared an overly before can chime in with their experience.

Pinsider, gameroompinball, has done some great re-themes that I’ve had a chance to see up close.

https://pinside.com/pinball/forum/topic/re-theme-boston-bruins-bally-power-play

He prints on white material with insert cutouts for his custom projects. His print shop prints and cuts small pieces of clear material perfectly sized to fill in those holes. Intuitively you would think they would be a noticeable seam between the edges of the overlay with the insert hole and the new insert “plug” piece. On the contrary, I’ve seen his playfields up close and they look like a perfectly flat continuous glossy surface, just beautiful.

If you go the pinballbuilders.com website the Journey re-theme blog entries show the overlay being made with white vinyl and cutouts were made for the inserts in the vinyl.

http://pinballbuilders.com/?p=671

Printing on Clear Vinyl Approach:
The other approach is to print on clear vinyl. The advantage of this is that there are no holes in your overlay. It will be one continuous piece of material that gets overlaid onto the playfield. Wherever you have an insert there will be a clear area of the overlay. The disadvantage of this approach is that you need to make all the portions of your playfield that will have artwork over them white. The colors on the printed overlay will not look correct unless there is a white backing behind them. So you need to prepare you playfield by masking off all of the areas that you either want to retain a wood finish (like the shooter lane or under the apron) and all of the inserts that you want to be visible.
The goonies pinball re-theme used this approach. I got a chane to mee the creator Mike at a show and check out his machine. It looks even better in person than in the pics in his very well document thread.

https://pinside.com/pinball/forum/topic/the-goonies-pinball-project-hollywood-heat-re-theme

Using clear overlay is the approach I’m going to use. I thought it would easier to align the clear overlay with the playfield inserts if the overlay was one continuous piece. With all the inserts cutout on the overlay, I was worried that the vinyl would stretch and distort as I was putting it down, like a big piece of Swiss cheese. I also wanted to have a single continuous surface for the ball to roll on. My printer can also put a laminate covering on the overlay which should make it more durable. By not doing the cutting operation I’ll should save a little bit on the printing cost as well. I will still need to cut out the outer boundary of the overlay after it’s printed. I can do that by hand or make a cut file for the printer to use. In the end going with white or clear vinyl is more of a personal preference. I think you can get excellent results either way. Proof of that is in the link I posted above.

#29 7 years ago

Preparing Playfield for Clear Vinyl Overlay.
Since I’m using the clear overlay method I need to paint most of the playfield white. Once the playfield was sanded totally smooth and all inserts were flush I put a few layers of Varathane clear coat down. It dries fairly quickly, is inexpensive, and will seal the wood so the paint will go on easier and be more consistent. I did 3 or 4 coats with day in-between coats. A week or so after the final coat I lightly sanded with 400 grit sandpaper to smooth out imperfections and give a little rougher surface for the paint to adhere to.

Before painting the white I masked off the shooter lane section of the playfield and all of the inserts. To mask off the inserts I used the paper insert cutouts I had left over from when I made my original insert map to test the alignment (see pics of insert test print a few posts up). I ran insert shaped cutouts through my Xyron sticker maker machine. I’ve had this little device for a while. It comes in handy whenever you need to make a small decal or sticker of something. It cost me about $25 after coupon at Michaels craft store. You can buy different types of adhesive cartridges for it. For this situation, I used the re-positionable adhesive which is designed to stick on stuff but still be easily removable. The adhesive is slightly stickier than a post-it note. They also have a permanent adhesive cartridge which is much stickier.

I stuck my home made insert stickers over each insert that I didn’t want painted white and was ready to paint. For the center inserts that represent the villains and the 6 henchman I wanted those to be painted white. If you look at the original diner playfield these inserts have full art of them so the insert itself is hidden behind the art. I did a little test where I spray painted a clear overhear transparency with the same white paint I was using on the playfield. Once dry I placed it over a center insert to make sure it still had some translucency so an LED behind the insert would still be able to light it sufficiently which I did. see pic below for the paint I used on the varathane coated playfield.

One coat seemed like enough. I then peeled off my masked areas about 5 minutes after spraying so the so it would peel cleanly without pulling up dried paint. There were a few inserts where the mask wasn't perfectly on the edge that I later touched up. To touch it up I took a paper cup and spayed the paint into it into it until I had a little puddle of paint and then used a fine brush to clean up where I needed to. There were also a few spots where the paint got a little under the edge of the sticker mask. For those areas I put some paint thinner on a q-tip and cleaned up the edges of those inserts. After about 3 days of drying I then put another 2 coats of varathane over everything to seal it all up. I’m now ready for insert decals and then the overlay itself.

This is basically where I am today with the project so the updates will be a little slower now. My playfield art is about 90% done and I hope to have it printed in the next week or two. I just got some laser waterslide decal paper and will be playing with that next week. I'll try to update the thread when I have new stuff to show. Hopefully all this info will be useful to other homebrew makers or re-themers. Now its time to get ready for the trip to Allentown tomorrow.

So tune in next time same Bat-Time same Bat-Channel.

varathane_(resized).jpgvarathane_(resized).jpg

playfield_after_varathane_(resized).jpgplayfield_after_varathane_(resized).jpg

xyron_sticker_machine_(resized).jpgxyron_sticker_machine_(resized).jpg

white_paint_(resized).jpgwhite_paint_(resized).jpg

playfiled_after_white_paint_(resized).jpgplayfiled_after_white_paint_(resized).jpg

tune_in_tomorrow_(resized).jpgtune_in_tomorrow_(resized).jpg

#30 7 years ago
Quoted from PinMonk:

I use Goo Gone rather than Goof Off when removing residual mylar adhesive. Let it soak for a bit and it comes right up. Goof Off can remove paint Goo Gone never will (not that it mattered in your case, though).
Also, did your dust off have bitterant added? That's the worst thing ever! One can I got from Office Depot had SO much I was tasting the nasty residue for days from just casual contact in the area I was applying the freeze spray. From now on, I seek out bitterant free dusters, only.

You are right that was a typo on my part. I used goo gone shown below for my glue removal. Sorry about that.

goo_gone_(resized).jpggoo_gone_(resized).jpg

#31 7 years ago
Quoted from docquest:

I then used the “Photomerge” feature in Photoshop to automatically stitch the separate scans into one continuous image. It took a few attempts to get it right. I found out that if the individual scans are skewed too much then Photoshop has a tougher job aligning them back together accurately

I've found photoshop (at least CS2) does a pretty terrible job at photomerging. If you process it through microsoft's ICE (free) it does a much better job of aligning them.

#32 7 years ago

looking awesome, thanks for the details. Staying tuned...

#33 7 years ago

Wow I thought I was going to see a really cool Batman retheme in progress which would be cool by itself, but on top of that I am getting a great education about retheming in general including links to a bunch of stuff I hadn't seen before. This is very helpful for me, thank you for doing this.

+++++

#34 7 years ago

So much good stuff in these posts that I no longer need to research if I ever really get the ball rolling on a re-theme. Thanks!

You mentioned using a pinsound board and keeping the original rules and scoring. Do you have any plans or a method to change the Diner themed words on the alpha-numeric display? (I'm not aware of an easy way to do it and I'm selfishly curious)

#35 7 years ago

following!

#36 7 years ago

Nice start! Can't wait to see how this turns out!

Sorry we missed you in Allentown

#37 7 years ago
Quoted from Lame33:

Do you have any plans or a method to change the Diner themed words on the alpha-numeric display? (I'm not aware of an easy way to do it and I'm selfishly curious)

I want to but haven't figured out how to do it yet. In many ROM's you can open them in a HEX editor and see the text in there like "PLAYER", Bonus", TILT", etc. But in Diner there is no text visible. Williams must have used an alternative non-ASCII encoding method for that game. I know on Got Sys80 ROM's you can view and edit text in HEX editor then burn a new ROM chip.

Some posted a thread asking for help on this and no one could provide an answer"
https://pinside.com/pinball/forum/topic/how-do-i-change-the-text-on-a-system-11-display-for-a-retheme

In the link I posted there is another link to a sys 11 hacking manual. It describes a way to use pinmame to open ROM's and emulate the machine on your computer. Using piname in a debug mode I might be able to find where in the ROM the text is being encoded and then change it. I haven't tried this yet but it sound like it might work. The other issue if the checksum could change and the game may or may not have a problem with that and need another hack to disable checksum verification if its being used.

#38 7 years ago

following...

Can't wait to see how this turns out.

1 week later
#39 7 years ago

The Allentown show and another trip to NYC afterwards ate up some time the last few weeks but I was able to do some tests on my insert text. I’m printing the playfield art on a clear vinyl overlay so all of the areas that I want the insert color to show through will be clear. I could have my insert text printed on the clear overlay as well but I wasn’t sure how translucent the text on the printed overlay would be. I wanted the insert text to be as opaque as possible so it can be easily read when the insert is off or on. I thought if I applied my insert text to the playfield first (under the overlay) I would have more options as to what technique I used, such as; waterslide decals, sticker letters, rub-on dry transfer letters, painted text via stencils, etc. My first choice was to use waterslide decals as I think that’s the easiest and most direct approach. Then if I wasn’t happy with the opacity of the text, I could try one of the other techniques.
I ordered clear waterslide decal paper for laser printers from decalpaper.com. A pack of 25 sheets was $23 plus shipping.

http://www.decalpaper.com/product-p/l825c.htm

I also got some “micro-set” decal setting solution. I’m not sure what it is chemically but it’s supposed to soften the decal so it follows the shape of your substrate better and forms a better overall bond when dry. You use a small brush to apply it on the surface the decal will be going on and then apply some more on top of the decal as it’s applied. I’m not sure how essential this stuff is but since it was only $6 a bottle via amazon I figured it was worth the money.

http://www.amazon.com/Microscale-Industries-Micro-Setting-Solution/dp/B0006O9K4W/ref=sr_1_1

This was my first attempt at using waterslide decals so I wasn’t sure how well they would turn out. I have a bag of loose random colored inserts so I could try the decals out on those before putting them on my own playfield. I used the recommendations in Vids guide on how to apply/set the decals.

https://pinside.com/pinball/forum/topic/vids-guide-to-ultimate-playfield-restoration/page/6#post-888283

They were much more fragile and thin than I thought they would be. It was very easy for them to bunch up and fold onto themselves. When you apply them use a small brush dipped in the micro set (or just water if you don’t have micro set) and carefully smooth out the decal to remove any air bubbles, wrinkles, or folds while it’s still very wet.

Right off the bat (pun intneded) I could that these were not very opaque when back lit. When they are not back lit they look fine but shining a light behind them really shows any non-uniformity in the toner coverage. When I printed them on the laser printer I boosted the print density as high as possible to try and increase the opacity. In addition I tried printing multiple times on the same decal. I was able to run the same piece of decal paper through the printer 3 times before it started having trouble getting through with jamming. The pic below shows the difference. The text on the right was printed once and the text on the left was printed 3 times. You can see that its thicker on the left, it even has a little raised edge due to more toner being laid on it. you can also see the danger of multiple print passes as the registration from pass to pass is not perfect so text gets a little more “bloated”, which in most cases would be a good thing with this application.

triple_print_(resized).jpgtriple_print_(resized).jpg

#40 7 years ago

This pic shows a single print pass decal vs a triple pass one after it has been applied to a white insert and back lit. The pic after that shows that even a triple printed decal still has a lot of translucency.

triple_print_comapre_(resized).jpgtriple_print_comapre_(resized).jpg

back_lit_signal_(resized).jpgback_lit_signal_(resized).jpg

#41 7 years ago

The prior image is probably the worse cast scenario for opaqueness since the symbol here is much larger than typical insert text. When I looked at just text printed on an insert, the non-uniformities were not as obvious since the solid areas of text are much smaller compared to the bat signal image.

skill_shot_insert_(resized).jpgskill_shot_insert_(resized).jpg

#42 7 years ago

I also played around with text style. While the tilted text looks cooler I’m not sure it will be as easily legible as just a simple straight line of text. Still not sure which type I’ll go with. Opinions?

text_style_compare_(resized).jpgtext_style_compare_(resized).jpg

#43 7 years ago

So I’m not happy with the current opaqueness of the waterslide decals. I don’t thinks it’s due to the decal brand itself. I thinks it’s due to the opacity of the toner in the laser printer I’m using. Perhaps a different laser printer might work better? Before I give up on using the waterslide approach I want to try some white backed (as opposed to clear) waterslide decal paper. I know the white backed will still be translucent but the white backing with the toner on top might be enough to give me the opacity I’m looking for. Also I think the black text with a white outline makes it more readable. This is the style Stern is using on the new Ghostbusters pin for their insert text, I think it looks nice. I just ordered some white backed decal paper and I'll give it a try in a few days and post some pics if it looks better or not.

gb_inserts_(resized).jpggb_inserts_(resized).jpg

#44 7 years ago

Another part of the game I was thinking about was the skill shot. On Diner there is a molded jukebox piece in the upper right corner at the end of the shooter lane. It alternates flashing a light between 25K, 50k, 75K, 100K, and 150K points. When you launch the ball with the right amount of force to the saucer in the upper left corner (too much plunge force and it bounces out, too little and it doesn’t reach the saucer) you are awarded whatever points were lit when it lands in the saucer.

skill_shot_(resized).jpgskill_shot_(resized).jpg

#45 7 years ago

One thought was to just replace the plastic in the jukebox with a plastic that has pictures of the various bat-vehicles; bat-copter, bat-mobile, bat-cycle, or bat-boat. Unfortunately there are only 4 bat vehicles I remember from the show/movie that batman and robin used. The fifth choice could just be a pic of them running. That would be the lowest point option.

bman_run.gifbman_run.gif

#46 7 years ago

Instead of just a plastic with artwork on it I was thinking about using the match box versions of the classic vehicles. In place of the jukebox I could build a little “vehicle alcove”. There would be a shelf for each vehicle and a back lit sign with its point value next to it. Not sure If I have enough room back there or not for that approach.

Another alternative would be to make a long plastic that lays above the shooter lane and each of the vehicles is mounted to that plastic one after another in a single line.
Whether I went with the “vehicle alcove” in place of the jukebox or a row of vehicles above the shooter lane area, each vehicle would be spot lit one at a time just like in the jukebox. If the ball is plunged into the saucer at launch then the pinsound board would play the appropriate sound clip according to which vehicle was lit.

I just found these at my local Walmart. I'm surprised they all of them there.

vehicles_(resized).jpgvehicles_(resized).jpg

#47 7 years ago

Batgirl cycle?

#48 7 years ago

You could also do the bat cycle and side car separately, as I seem to remember at least one episode where batman shot out the side car with robin and robin "drove" it at least a small distance.

#49 7 years ago
Quoted from Insane:

You could also do the bat cycle and side car separately, as I seem to remember at least one episode where batman shot out the side car with robin and robin "drove" it at least a small distance.

I think they did that in the 1966 movie, It splits up as they approach the bat-copter.

I think in the commentary track on the film Burt Ward complains about how it was hard to control and he had a few spills on it.

#50 7 years ago

I didn't think of that. I'll have to see if hot wheels made that one as well.

Promoted items from Pinside Marketplace and Pinside Shops!
$ 29.99
Eproms
Matt's Basement Arcade
 
$ 5.00
Playfield - Protection
UpKick Pinball
 
$ 54.99
Cabinet - Shooter Rods
Lighted Pinball Mods
 
$ 22.50
$ 12.50
Lighting - Led
RoyGBev Pinball
 
$ 11.95
Playfield - Toys/Add-ons
ULEKstore
 
$ 27.95
Eproms
Pinballrom
 
$ 10.00
Playfield - Toys/Add-ons
UpKick Pinball
 
$ 1.00
Pinball Machine
Pinball Alley
 
From: $ 17.99
$ 95.00
Cabinet - Sound/Speakers
Pinball Mod Co.
 
$ 19.99
Eproms
Matt's Basement Arcade
 
Wanted
Machine - Wanted
Fort Lauderdale, FL
$ 79.99
Cabinet - Armor And Blades
PinGraffix Pinside Shop
 
$ 18.95
Eproms
Pinballrom
 
$ 44.99
Cabinet - Shooter Rods
Pinball Shark
 
$ 29.99
Playfield - Toys/Add-ons
Daddio's 3D Printed Mods
 
$ 15.00
Playfield - Decals
Metal-Mods
 
There are 218 posts in this topic. You are on page 1 of 5.

Reply

Wanna join the discussion? Please sign in to reply to this topic.

Hey there! Welcome to Pinside!

Donate to Pinside

Great to see you're enjoying Pinside! Did you know Pinside is able to run without any 3rd-party banners or ads, thanks to the support from our visitors? Please consider a donation to Pinside and get anext to your username to show for it! Or better yet, subscribe to Pinside+!


This page was printed from https://pinside.com/pinball/forum/topic/batman-66-retheme-project-from-diner-to-caped-crusader and we tried optimising it for printing. Some page elements may have been deliberately hidden.

Scan the QR code on the left to jump to the URL this document was printed from.