(Topic ID: 192072)

Attack From Mars Remake (AFMr) Owners Club

By Pin_Guy

6 years ago


Topic Heartbeat

Topic Stats

  • 10,558 posts
  • 720 Pinsiders participating
  • Latest reply 8 days ago by Lethal_Inc
  • Topic is favorited by 334 Pinsiders

You

Linked Games

Topic Gallery

View topic image gallery

624D70E8-C6B0-4450-8701-B57F9551F120 (resized).jpeg
IMG_0612 (resized).JPG
IMG_0590 (resized).JPG
IMG_0589 (resized).JPG
82811421-ED1C-4870-B24A-B741D5DE9D2A (resized).jpeg
IMG_0547 (resized).JPG
Screenshot_20240318_092901_Gallery (resized).jpg
Screenshot_20240318_092838_Gallery (resized).jpg
pasted_image (resized).png
IMG_0458 (resized).JPG
IMG_0459 (resized).JPG
pasted_image (resized).png
IMG_0457 (resized).JPG
IMG_0456 (resized).JPG
IMG_3716 (resized).jpeg

Topic index (key posts)

26 key posts have been marked in this topic, showing the first 10 items.

Display key post list sorted by: Post date | Keypost summary | User name

Post #1 PinGuy's links to unboxing and SOL potential issue. Posted by Pin_Guy (6 years ago)

Post #5 SOL protector issue Posted by Pin_Guy (6 years ago)

Post #73 LED info Posted by stpcore (6 years ago)

Post #145 Cliffy install info Posted by evh347 (6 years ago)

Post #149 Firmware 1.0.0 Posted by Pin_Guy (6 years ago)

Post #189 info on using AFM cliffys Posted by GorillaBiscuits (6 years ago)

Post #357 Topper connector issue Posted by LTG (6 years ago)

Post #366 Image of Cliffy addition to scoop. Posted by sparechange1974 (6 years ago)

Post #368 Cliffy install info Posted by sparechange1974 (6 years ago)


Topic indices are generated from key posts and maintained by Pinside Editors. For more information, or to become an editor yourself read this post!

You're currently viewing posts by Pinsider Mr_Tantrum.
Click here to go back to viewing the entire thread.

567 posts in this topic match your search for posts by Mr_Tantrum. You are on page 1 of 3.
#5429 5 years ago

First of all, I love this game and probably my favorite to play. Well outside of my price range, but Cidercade in Dallas (near me) has an AFM LE that is a blast to play. Literally, my only complaint about the pin (foregoing the bad flipper alignment they have setup on theirs) is the M-A-R-T-I-A-N insert lighting. I have a really hard time telling what is lit verses what needs to be lit during game play. I haven't taken the time to read through this thread, but was wondering if that was a common issue with others and/or is there a way to adjust the blinking rate or even turn off the target lights that aren't hit yet?

I've played the original AFM a few times, but can't seem to remember if it had the same type of operation or not.

#5431 5 years ago
Quoted from pinballinreno:

The flippers if slightly drooped are at the correct factory setting.
The lighting is probably set to slow emulation and should be set to medium.
So yes the lighting is fully adjustable, and the flippers are probably correct.

Cool, thanks for the feedback.

1 year later
#7372 4 years ago

How would one be acquired if you are not the original owner? Still contact a local distributor?

#7374 4 years ago
Quoted from PinMonk:

Usually CGC wants you to go through the original distributor, but since Game Room Guys were dicks about supporting a machine they sold - not wanting to handle the CRITICAL PIC upgrade for a second owner, despite the fact that leaving it as-is COULD PERMANENTLY DAMAGE THE MACHINE, opening a ticket with CGC allowed us to get the chip upgrade directly from CGC.
Support ticket system is here:
https://chicagogamingcompany.freshdesk.com/support/login

Awesome, thank you. I'm in the process of acquiring a LE, and just trying to be prepared for things I might need to address.

#7380 4 years ago

Not going to count my chickens before they hatch, but I have a verbal agreement on an AFMr LE (green) that I'm picking up Saturday. Super excited, and I've already ordered the green Pinbits plastic protectors (which I think look great) and all Titan glow in the dark rings (I've seen/played a AFM in person with this setup, and it looked fabulous).

I've also ordered a couple of Comet Matrix lighting strips - ice blue for scoop and UV for center drain. On traditional pins, I just alligator clip or solder into the GI circuit (typically just on the leads of a light socket). Given the electronics of this pin, how would I go about easily tying a light strip into the GI?

#7382 4 years ago
Quoted from Da-Shaker:

I'd love to see some pictures of that when your all done...

Most definitely. You'll be asking for my Pinside account to be suspended by the time I'm done posting! Can't come close to express how excited I am to obtain my dream pin.

#7388 4 years ago

Has anyone been able to acquire or know of a source for the AFMr GI LED bulbs (interested in cool white)? I've communicated with Comet, and they do not have them nor are they going to. Apparently NiftyLED did not transfer any of their inventory, rather, they just referred all LED customers to Comet. NiftyLED is not communicating with any end-users from my understanding.

#7391 4 years ago
Quoted from atrainn:

Well I finally beat my fiancee's 6.75 billion high score tonight. Just by a hair....[quoted image]

If you really wanted to show your love, you should have entered her initials

#7395 4 years ago

Silly question from an owner in waiting . . . how many balls does this game take (I seem to not be able to find the answer)?

#7396 4 years ago

Can anyone tell me what the Molex/plastic connector type/model is that is used for the GI bulbs? I'd like to buy a few to tap into the cables for adding on some accessory GI lighting.

Capture.PNGCapture.PNG
#7400 4 years ago
Quoted from Gogdog:

Yep...I went through the same thing when I wanted to do my own trough light kit. (I wanted to learn how to soder/do own mods and save money by DIY vs buying a kit).
I added a trough light to a IMDN, DI, and AFMr….and each one required different ways to do it.
For attack from mars...its .100 IDC connectors.
I mean, you could just buy the IDC assembly from mezelmods ->
https://mezelmods.com/collections/diy/products/4-pin-100-idc-assembly
But for DIY...here was my setup ->
[quoted image]
and most of the parts ->
[quoted image]
So the order is ->
1. 7 SMD led strip from comet
2. Comet matrix brightness adjuster
3. JST 2.0 connectors from aliexpress (something like this https://www.aliexpress.com/item/32848166904.html?spm=a2g0s.9042311.0.0.2e874c4dLct124)
4. 22 gauge wire
5. .100 IDC connectors from digikey. (https://www.digikey.com/product-detail/en/3-640620-4/A31090-ND/698308?utm_medium=email&utm_source=oce&utm_campaign=2452_OCE18RT&utm_content=productdetail_US&utm_cid=707689&so=57863092&mkt_tok=eyJpIjoiWmpBMll6TXdOekkxTTJVeiIsInQiOiI0RHUzUnB3Vm52V290dzZxR1JjNFJDNjBkclowRHRYTW5SSkxRT29oVkorSTZsZkNKWk5KOE5UWjkzVng3MUFUT29odFQ3OWx6UUlzeUg4ZkUyTXRxT1Q4VFArUkttWU1vaTFzSTA0elM4V2ZsdEVpMTl5NW9LMnN5bDBGTnAxQiJ9)
6. .100 IDC z-connector. I bet this strip of z-connectors are at digikey somewhere...but I couldn't find them. I had to buy a strip of z-connectors from mezelmods for $4. They aren't listed on their shop...I think I had to contact them directly to ask to buy it. You don't HAVE to buy a z-connector...you could just splice all the wires together, but I wanted to keep it completely removable.

Exactly what I was looking for - thank you! I'm a Comet Matrix connoisseur when it comes to the older DMD games, but this will be my first new generation pin with all this high-fangled technology.

Crazy that you have to go to 4 different sources.

#7401 4 years ago
Quoted from atrainn:

4 balls. As for your bulb question, AFM just uses faceted bulbs, so these from comet should work, not sure if there was anything special about what Nifty made: https://www.cometpinball.com/products/faceted-non-ghosting

Actually, the NiftyLED bulbs were unique in that the housing used is proprietary. Comet does not and will not ever make these (I've had firsthand discussions with them). What I don't know since I don't possess the game yet, is if you can somehow Frankenstein a third party LED into the existing GI LED housings or if it is a closed unit.

#7405 4 years ago
Quoted from Gogdog:

Wait a minute. I haven't had to replace an actual bulb yet in afmr. Are you saying I can't use standard Wedge (555) bulbs that I can get from most anywhere?

Correct, you cannot use standard bulbs in the GI since it takes these things.

nifty.jpgnifty.jpg
#7408 4 years ago
Quoted from Gogdog:

Yep...I went through the same thing when I wanted to do my own trough light kit. (I wanted to learn how to soder/do own mods and save money by DIY vs buying a kit).
I added a trough light to a IMDN, DI, and AFMr….and each one required different ways to do it.
For attack from mars...its .100 IDC connectors.
I mean, you could just buy the IDC assembly from mezelmods ->
https://mezelmods.com/collections/diy/products/4-pin-100-idc-assembly
But for DIY...here was my setup ->
[quoted image]
and most of the parts ->
[quoted image]
So the order is ->
1. 7 SMD led strip from comet
2. Comet matrix brightness adjuster
3. JST 2.0 connectors from aliexpress (something like this https://www.aliexpress.com/item/32848166904.html?spm=a2g0s.9042311.0.0.2e874c4dLct124)
4. 22 gauge wire
5. .100 IDC connectors from digikey. (https://www.digikey.com/product-detail/en/3-640620-4/A31090-ND/698308?utm_medium=email&utm_source=oce&utm_campaign=2452_OCE18RT&utm_content=productdetail_US&utm_cid=707689&so=57863092&mkt_tok=eyJpIjoiWmpBMll6TXdOekkxTTJVeiIsInQiOiI0RHUzUnB3Vm52V290dzZxR1JjNFJDNjBkclowRHRYTW5SSkxRT29oVkorSTZsZkNKWk5KOE5UWjkzVng3MUFUT29odFQ3OWx6UUlzeUg4ZkUyTXRxT1Q4VFArUkttWU1vaTFzSTA0elM4V2ZsdEVpMTl5NW9LMnN5bDBGTnAxQiJ9)
6. .100 IDC z-connector. I bet this strip of z-connectors are at digikey somewhere...but I couldn't find them. I had to buy a strip of z-connectors from mezelmods for $4. They aren't listed on their shop...I think I had to contact them directly to ask to buy it. You don't HAVE to buy a z-connector...you could just splice all the wires together, but I wanted to keep it completely removable.

After researching, I can get the JST 2.0 connectors and the Feed Thru Wire Housing from Mouser (fairly local to me). I'm still trying to figure out that blasted 4 pin Z-connector (some look like they are homemade). I have a PM to somebody that sells mods with those included to see if they will share a part number & source with me.

I assume for your Z-connector you just broke off a 4 pin section as you needed it? Also, do you really need the brightness adjuster or is that just a nice to have in case you want to tweak?

#7409 4 years ago

In preparation for my soon to be AFMr, I've designed a keychain for the coin door key to match others I offer for a variety of pins. Keychains are square transparent acrylic with the photo size approximately 1.25" square. If anyone is interested in purchasing one please PM me. I sell them for $12 for the first keychain plus $5 each for the next 5 if ordering multiples. Pricing includes US shipping, and I'm happy to custom design for any pin.
KC_AFMr.jpgKC_AFMr.jpg

IMG_2801.JPGIMG_2801.JPG
#7412 4 years ago
Quoted from mbwalker:

Might be a good application for a 3D print, no?

Small piece, but maybe. I'm more concerned with how the pins and wiring are done. Might be easier to hack an existing socket.

#7414 4 years ago
Quoted from maffewl:

Also, if you are just needing to buy replacements, you can get them from PlanetaryPinball. Link below.
http://www.planetarypinball.com/mm5/merchant.mvc?Screen=PROD&Product_Code=PPS-LMP-GILEDWW

Wow, they are proud of those. I was hoping to possibly convert to cool white, but even if they had them it would be over $100.

#7420 4 years ago
Quoted from Gogdog:

Ooooh...yeah, if you can find out the actual source of those zconnectors, that would be awesome. I'm sure they are called something else in the electronics industry besides z-connectors.
And yeah, you just break off however much you need at a time...2,4,6 pin, etc.
And no, you don't need the brightness adjuster. I bought them because I didn't know exactly how much a 7 smd would throw, or maybe a 5 smd wasn't going to be enough...etc. Easier to adjust down from a 7. Which...I believe I did (the 7 was too bright full power). I would probably still recommend though if you have to buy a led strip from comet anyway.

I usually end up just cutting SMDs off the strip to change intensity - but that is a non-reversible action.

Also, Eric from Pinduino pointed me to these: https://www.greatplainselectronics.com/proddetail.asp?prod=MWWS100-2236

#7421 4 years ago
Quoted from Gogdog:

Yep...I went through the same thing when I wanted to do my own trough light kit. (I wanted to learn how to soder/do own mods and save money by DIY vs buying a kit).
I added a trough light to a IMDN, DI, and AFMr….and each one required different ways to do it.
For attack from mars...its .100 IDC connectors.
I mean, you could just buy the IDC assembly from mezelmods ->
https://mezelmods.com/collections/diy/products/4-pin-100-idc-assembly
But for DIY...here was my setup ->
[quoted image]
and most of the parts ->
[quoted image]
So the order is ->
1. 7 SMD led strip from comet
2. Comet matrix brightness adjuster
3. JST 2.0 connectors from aliexpress (something like this https://www.aliexpress.com/item/32848166904.html?spm=a2g0s.9042311.0.0.2e874c4dLct124)
4. 22 gauge wire
5. .100 IDC connectors from digikey. (https://www.digikey.com/product-detail/en/3-640620-4/A31090-ND/698308?utm_medium=email&utm_source=oce&utm_campaign=2452_OCE18RT&utm_content=productdetail_US&utm_cid=707689&so=57863092&mkt_tok=eyJpIjoiWmpBMll6TXdOekkxTTJVeiIsInQiOiI0RHUzUnB3Vm52V290dzZxR1JjNFJDNjBkclowRHRYTW5SSkxRT29oVkorSTZsZkNKWk5KOE5UWjkzVng3MUFUT29odFQ3OWx6UUlzeUg4ZkUyTXRxT1Q4VFArUkttWU1vaTFzSTA0elM4V2ZsdEVpMTl5NW9LMnN5bDBGTnAxQiJ9)
6. .100 IDC z-connector. I bet this strip of z-connectors are at digikey somewhere...but I couldn't find them. I had to buy a strip of z-connectors from mezelmods for $4. They aren't listed on their shop...I think I had to contact them directly to ask to buy it. You don't HAVE to buy a z-connector...you could just splice all the wires together, but I wanted to keep it completely removable.

Based upon your recommendations, I believe these components should do the trick (minus the Comet stuff):

- Feed Thru Wire Housing | https://www.mouser.com/ProductDetail/571-3-640620-4
- JST 2 Pin Power Connector | https://www.mouser.com/ProductDetail/713-321050009
- Feed Thru Z Connector (32 pin designed to be cut to size) | https://www.greatplainselectronics.com/proddetail.asp?prod=MWWS100-2236

Also, instead of buying wire, I'm just going to make my harnesses short (the length of the JST 2 cable) and then use the Comet Matrix extensions to route to where my add-on lighting mods will be.

Just got my parts ordered - now my disappointment of not being able to do add-on lighting has turned into me being really stoked!

#7427 4 years ago
Quoted from Gogdog:

Ok nice...glad you found a local place for your electronics....and what another place to buy the z-connectors! Good to see that its at least the same price as mezelmods price so mezelmods wasn't price gouging me.
And with the led strips, you can really just snip them to length? Do you have to do anything to the end of them once you cut them?
Good luck with your upgrade!

Cutting is simple on the Comet LED strips (done it dozes of times for all the mods I sell). You just have to maintain a resistor with each SMD (i.e. for every SMD you cut off, also cut off it's corresponding resistor). This image shows were all SMDs and resistors are in sequence. Sometimes in a strip the sequence will reverse (e.g. S|R|S|R|R|S|R|S) Same principle applies when cutting, you must leave each SMD's corresponding resistor intact for it to illuminate. Just work backwards from the opposite end of the wires in pairs, and you'll never mess up.

As far as doing anything to the end after you cut the strip - it always helps to lick it with your tongue to seal in the flavor.
stripcut_large.pngstripcut_large.png

#7428 4 years ago

Just got these in the mail. Oh man, I'm getting excited. Only 3 more days before I pickup my game.

FYI, I bought both the standard and the thin flipper bands to see which I like best on this game.
IMG_2802.JPGIMG_2802.JPG

#7430 4 years ago
Quoted from neverahighscore:

I had these installed on my game from day 1 and changed the flipper bats to enhance the color. Great color choice-you'll love the look! Don't forget your Eat At Eddy's!!![quoted image][quoted image][quoted image]

That is a beautiful game, and I also have the green plastic protectors on the way. I’ll have to think about the bats. A translucent green might look nice. As far as the E@E, I have my own ideas for that.

#7438 4 years ago

BTW, you know my comment was in jest, right? I typed it while smiling?

Seriously, however, if you’ve not figured out how to use the Pinside search features or how to view the image gallery in a topic, they are extremely useful features of this forum.

#7443 4 years ago

I had a few goodies arrive today. Now all I need is the actual machine to go with them - that's happening tomorrow.

IMG_2816.JPGIMG_2816.JPG
#7445 4 years ago

So, I'm not one to count my chicken's before they hatch, but I'm 99.9% certain that an AFMr LE (green) will be in my possession tomorrow. I found one in pristine condition within a day trip of where I live that is currently owned by a fellow Pinsider who really seems to love his pinball. He has a significant collection of all newer pins and typically LE models. He's got a couple of new ones coming in and needs to make room, so he decided to put his AFM on the market. Coincidentally (well, not really), it was exactly what I've been looking and saving for over the last year. Fortunately for me, I was the first to make a serious offer and we came to terms. I always dreamed one day that I would be able to join the exclusive AFM/AFMr owners club, and now it's just one day away.

Since the pin is in stock condition (beautiful and pristine at that), I do want to put my own flair on it - I just can't help myself. I've spent the last week reading every single post in this thread, and every other thread that references AFMr. Anyway, down the line I will most likely add some external lighting mods (definitely the interactive flipper buttons, and maybe the undercab lighting), but for now here are the things I have ordered. Let me know if I've overlooked anything obvious:

- Full set of AFMr Cliffy protectors
- Pinbits green plastic protectors (I have thin lock nuts coming - not sure what else I will need to make these work)
- Full set of Titan rings, posts, and flipper rubbers in glow-in-the-dark
- Parts to build my own lighting harnesses to tap into GI to for my planned lighting mods (trough light and scoop light using Comet Matrix LED strips)
- Nylon washers for the leg bolts (picked these up at Ace Hardware for $0.27 each)

- The other two things on my list that will come a little later are
1) Target decals - I'm going to design my own just for the red targets and the top of the 3 target gate. Not sure exactly what the design will be yet, but I don't care for the ones I've seen out there. Also, for some reason I really like the greens to be blank in this game (probably the semi-transparency).
2) Eat at Eddies - Well, my plan is to design my own version of this. I have something in my head, but not on digital paper yet. There are a few things I would prefer be different, and I want to put my own flare on the mod. More to come on that.

#7448 4 years ago
Quoted from maffewl:

See my post #7302 at the link below:
https://pinside.com/pinball/forum/topic/attack-from-mars-remake-afmr-owners-club/page/147#post-5145994
Thin nuts can work, but there will still be very little thread to "grab". There are plenty on here that have done it and do not seem to have issues. So, what I did was likely overboard, but it gives me peace of mind to know that the entire nut is on the threads. Just posting so that you are aware what will need to be changed if you want it similar.
Welcome to the club!

Thank you for the link. I'll see how things go for me, and turn to ordering new posts if I need to. These protectors are much thicker than I expected them to be.

#7449 4 years ago
Quoted from PinMonk:

Titans play dead IMO. I'd use the glow-in-the-dark for accents like posts if you want, but Marco white is the way to go for the rubber. Lots more ball action. Marco is the only white rubber worth using. Everything else I've used falls short, and some are AWFUL.
I'd also have a look at the animated EL art blades from pingraffix. Really cool finishing move to the inside of the cabinet.

Thanks for your perspective. I've played Titans on both of my other pins since I've owned them, and personally really like the look and the feel. Of course, I really don't have anything to compare to except the crappy deteriorated black rubber ones that came on Getaway (my JP was my neighbor's and he always had Titans on all of his pins too).

#7453 4 years ago

I initially had transparent with red posts on my getaway then switched to clear posts and red rings which looked much better. I have yellow on my DE Jurassic Park, I they look great.

Anyway, didn’t mean to turn this into a silicone vs. rubber conversation. Everyone go shoot down some Martian ships, and I guarantee you’ll feel good about whatever kind of rings you have installed.

#7464 4 years ago

Look what found its way to my house today. More pics to come when I get it unpacked and setup.

IMG_2824 (resized).JPGIMG_2824 (resized).JPG
#7471 4 years ago

It’s a beauty! LE #363 in perfect condition with 80 plays on it. Seller was an awesome guy, and he let me play the games I wanted in his collection, including the new Jurassic Park LE, Monster Bash Remake LE, and Black Knight LE - all 3 were awesome, as well as the rest of his collection.

I’m waiting for all my upgrades to arrive, so I can do everything at once. Even so, this pin is a stunning out of the box.

90C3E119-746F-445A-BF7A-CE417BB5C6F0.jpeg90C3E119-746F-445A-BF7A-CE417BB5C6F0.jpegAF68643E-7CA3-4BBD-9B09-4FDD78977C90.jpegAF68643E-7CA3-4BBD-9B09-4FDD78977C90.jpeg285A95F1-81A9-4029-82D6-41CC2A6D047F.jpeg285A95F1-81A9-4029-82D6-41CC2A6D047F.jpeg

#7480 4 years ago

So, I'm really on the fence about adding Pin Stadium lights, mainly due to the cost of the mod. For those of you who have them, I was wondering what your thoughts are once you've owned them for awhile and played several games. How might you persuade met to go for it, or do you regret your decision in any way? I've seen every post related to Pin Stadium in this thread, but they are somewhat limited and I know that photos probably don't do the lighting justice. Also, I'm sure everyone posted when they first installed the lights, and opinions may have changed as time passes.

My main desires are as follows:

- General better illumination of the middle of the playfield
- General better illumination of the back of the playfield
- Making the UV reactive inks on the playfield pop/glow (e.g. the green saucers, et. al.) - this would also be good for my Titan glow rings.

Also, have any of you purchased them at shows, and was there any kind of discount for doing so other than saving shipping? If I decide to buy them, I'm not sure I can wait until TPF 2020, but depends on if they offer a significant discount.

#7483 4 years ago
Quoted from Jimmyhonda:

You can adjust the GI brightness and color as well.[quoted image][quoted image]

So, they don't turn the game purple do they (I don't want to end up in the color puke thread)? Seriously, does the mix of UV and white eliminate the "purpleization" while also giving a nice glow to the UV elements?

#7486 4 years ago
Quoted from rrosenhouse:

The UV is tied to a flasher, so it is only on when that particular flasher is active. I have mine tied into the flasher in the big saucer. It is pretty intense.

Do you have a video you can share? If you don't want to post publically, I can PM and give you my email.

#7490 4 years ago
Quoted from rrosenhouse:

Destroying the saucer with my Pinstadium UV flashers connected to the mother saucer flasher. Not sure why things come across so red at the end of the video. Hope this gives you some idea of what to expect.

Okay, that's pretty awesome.

#7495 4 years ago

So, after playing several games of my new AFMr LE (which I love), I just happened to notice that I have a set of plastics with the crackling artwork. I submitted a ticket and received a prompt reply that cosmetic issues are only warrantied to the original owner within two weeks of purchase (which has obviously lapsed) and that I would need to buy a replacement set from Planetary Pinball. I found the set here: http://www.planetarypinball.com/mm5/merchant.mvc?Screen=PROD&Product_Code=PPS-31-2535-COMP for $139 plus shipping, but had some questions from those of you who had to do the same.

Are these plastics truly OEM or are they remakes? The tiny picture doesn't do the coloring justice and there is no other info on the site about them. I'm bummed a little at having to spend the money if I want perfect condition ones (the ball returns are really the only 2 that are bugging me), but I want to make sure that I'm getting OEM quality and coloring.

1.jpg1.jpg
#7498 4 years ago
Quoted from pinballinreno:

The new plastics are the exact OEM replacements.
PPS is the license holder of the game. All parts from Rick will be exact replacements.

Thank you for the info. I'm going to consider it but not pull the trigger yet. There are minor issues with some of the other plastics (I've not looked closely at everything), but the lane returns are most noticeable. Of course the close-up camera shot does exaggerate the issue some.

Quoted from maffewl:

If you end up purchasing, I'd buy the saucer plastics (left and right of the scoop) from you if you don't need them.

If/when I decide to replace them, you have first right of refusal on my saucer plastics.

#7503 4 years ago
Quoted from PinMonk:

Wow, that sucks. It's DEFINITELY their problem, and it's not a cosmetic issue that would have manifested within two weeks of manufacture. It's a factory defect of using the wrong ink on the PET-G plastic, causing a reaction where the ink appears to crackles OVER TIME as it pulls away from the plastic. This problem didn't begin to show itself for MONTHS (almost a year in our case), which is normal for this kind of defect. They were kind enough to replace the ones we had, even though this one was second-owner.
Sucks that they're blowing the issue off now and making you pay for their defect.

Okay, that is interesting. Why would they not offer consistent support in the same situation? Might it be because I'm beyond the initial 2 year warranty (even though that is not what was communicated to me?).

#7506 4 years ago

Well, I followed up with a reply equipped with the new info about what is occurring and how they have replaced for others. I'll see how they respond.

LTG, do you have any input on this or can you help me?

#7509 4 years ago
Quoted from LTG:

Sorry. I have no say in this.
LTG

Thanks for taking the time to respond.

#7511 4 years ago
Quoted from PinMonk:

You have to remember that our replacement was a year ago. Also, if you're outside the "normal" 2 year warranty, that's probably grounds for you spending $139 to replace it. The other owner should have had it taken care of within the 2 year period since it started showing up on machines after about 6-8 months.
When I initially replied, I didn't realize we were outside the 2 year warranty period (time flies!). I'm pretty sure that means you're on your own.

I definitely understand my situation, and I am being very respectful in my communications with CGC. I'm just not one to take the first "no" for the final answer in any circumstance. I know that the frontline support staff follow the processes and rules that have been established, but somewhere up the line is a decision maker that has the final say regarding if/how to support the customer. I realize they have no obligation to do so, but if they were to make a decision to support me then they would definitely earn my support and public praise. If not, then I have nothing negative to express about them, I have no hard feelings, and I move on with life.

Added over 5 years ago:

To my surprise, the CGC technician (Art) just called me regarding the two cases I have open (PIC 2.0 chip & Plastics), and even transferred me to the VP of Sales (Ryan) who is responsible for approving the parts warranty. I must say that even though they have no obligation at all to support me (both as second owner of a game and also the 24 month warranty on my pin has expired), they were both extremely helpful, friendly, and supportive.

While they are unfortunately unable to provide me a replacement plastic set, Ryan took the time and effort to explain to me why. It isn't just a matter of policy or strict adherence to the terms of the warranty. Rather, due to the age of the AFM title they just don't have any plastic sets left in inventory to distribute. Regarding the PIC 2.0 chip, Art directed me to engage the original distributor, and they are now sending me the updated chip.

I can honestly say that my experience with CGC customer support in the few days I've owned my AFMr LE has been very positive, respectful, and extremely responsive to my needs. After actually speaking with Ryan & Art, I feel even more positive about their company and the quality products they are bringing to the pinball community. Ryan was also nice enough to chat a little pinball with me (wasn't in a rush to move on and get me off the phone), and even extended the offer for me to call their support team any time I might experience an issue with my game in the future.

I'm a firm believer of letting others know when I have a positive customer experience, and CGC has treated me as well as I could expect given my particular situation.

#7512 4 years ago

So since I'm changing out all of my rings, I'll be left with a full set of OEM black rings with only 80 plays on them. I don't know if anyone wants them or not, but I'd be happy to send them to the first to claim them for $10 (includes US shipping). Otherwise, they are just going in the trash.

#7514 4 years ago
Quoted from Only_Pinball:

You should hang on to them just in case a rubber breaks. Can use till you get a replacement

Good point, let me correct my statement " . . . Otherwise, they are just going in storage."

#7515 4 years ago

I just finished installing my plastic protector set (the low-profile nuts were an absolute requirement - thanks neverahighscore for suggesting that). Other than that, it was just figuring out how to take everything apart and put it back together.

While I was at it, I also replaced all of the rings/sleeves that I could with my new ones. Now I only have all of those in the pop area under the ramp. I have no idea how to remove that ramp, so I'm about to go researching. OCD refuses to let me play the game until I get all of rings the same color.

UPDATE: Well my research hasn't yielded any info on how to remove the pop ramp in order to get to all of the rings underneath. Can someone please provide some instruction/pointers, or point me to documentation that explains how to do it? I guess I could just start taking things apart, but wanted to avoid any unnecessary steps.

#7517 4 years ago

Thanks, but I needed to pull the pop ramps too. Took me awhile, and it wasn't easy, but I finally figured it out.

Everything you said + for the back ramp you had to remove the right wire form, the 2 ramp flap screws, the long standoff post, the gate at the left end, and even then it wouldn't move enough out of the way for me to reach everything so I had to cut the 4 zip ties. Finally was able to move it around enough to get to all of the posts and rings. Put it all back together with no left over fasteners, so I would call that a success.

#7518 4 years ago

So here are my pics after updating all of the rings and sleeves to Titan glow-in-the-dark and also adding the Pinbits green plastic protectors. I really like the way it came out. My Cliffy's are on order and I have some light strips coming to illuminate the scoop and center trough using my homemade wire harnesses.
IMG_7972.jpgIMG_7972.jpgIMG_7973.jpgIMG_7973.jpgIMG_7974.jpgIMG_7974.jpgIMG_7980.jpgIMG_7980.jpgIMG_7970.jpgIMG_7970.jpgIMG_7971.jpgIMG_7971.jpgIMG_7975.jpgIMG_7975.jpgIMG_7976.jpgIMG_7976.jpgIMG_7977.jpgIMG_7977.jpgIMG_7978.jpgIMG_7978.jpgIMG_7979.jpgIMG_7979.jpg

IMG_2845 (resized).JPGIMG_2845 (resized).JPG
#7522 4 years ago
Quoted from TOLLS:

You should look at red comet rings for the bumpers.

Those are nice, but I really like the Pinball Life Britecaps (have them in my Getaway). They have an outer ring that stays lit and an inner ring you can adjust to light based on the vibration of the pop firing. This gives a good visual to go along with the pop action.

https://www.pinballlife.com/britecaps-evo-pop-bumper-lighting.html

#7523 4 years ago

FYI, if anyone orders a set of rings form Titan, please be aware that the AMFr set is different than the original. Eric and I worked this out, and he is going to add a profile for AMFr so that the game can have its own recommended kits. If you want, you can go by the manual (2-39), but you will need two add 2 additional of item C For the 2 mini-posts in the game (by default one post has the ring and the other doesn’t, but not listed in the rings itemization, and I wanted both covered). FYI, these are the 1” red pointed posts - one above the left Martian and the other above the large flying saucer.

#7529 4 years ago
Quoted from Titan_Pinball:

I compared them all last night. The ring lists for both versions are actually the same. The Kit ID #3 that you ordered was a "custom" kit. The changes are in the description. https://www.titanpinball.com/kits/index.php/view/id/3
Here is a "Stock" kit: https://www.titanpinball.com/kits/index.php/view/id/17
If you plan to run the adjustable outlane post on the right side all the way down, I would change the 1-1/4" to 1-1/2"

Thanks for the clarification, Eric. I appreciate you taking the time to figure everything out, and updating the group. Above & beyond service like you always deliver.

#7530 4 years ago
Quoted from wolftownjeff:

Where can I buy the bracket for mounting the Martians?
What is the best pop bumper mod, Brite Mods or the Comet Bumper Disc Ring?

"Best" is in the eye of the beholder. Really depends upon what you want. You can set the PBL's to always be on (like the Comets) or for the outer ring to always be on with the inner LEDs flashing based upon the pop's vibration (the sensitivity is adjustable with a small Philips head screwdriver). I spend all kinds of money with Comet and love their products, but in this one case I prefer the Pinball Life product. The PBL ones also have white under lighting and they simply snap into the wedge socket w/o any wires and no gluing to the cap is required (the comets have a wire with a socket at the end, and you need to hot glue them into the inside of the cap). Also, just to be clear, these do not fire by being tied into the pop bumper somehow. The center lighting is strictly based on vibration sensed by the mod. You'll have to play around with the sensitivity to try to localize it to the pops as best you can verses heavy bass or shaker motor triggering them.

Of course the BriteCaps are more expensive at $12.95 each ($39 for a set of 3) verses the Comet rings at $7.95 each ($24 for a set of 3)

britemod.gifbritemod.gif

#7532 4 years ago
Quoted from TOLLS:

You might want to check clearance.

No BriteCaps in PBL Clearance or rings in Comet clearance. What are you referring to?

#7534 4 years ago

Added a scoop light (ice blue) and a trough light (UV).

I selected the ice blue because I thought it would complement the light blue graphics and the blue inserts above "return to battle" light. However, I'm not sure that I'm happy with it. I may order a green strip next time I need something from Comet (will be soon). I like the UV light. The camera exaggerates the blue, but in person it looks much better. Throws some light on the area and makes the UV rings really glow.

IMG_2846 (resized).JPGIMG_2846 (resized).JPGIMG_2848 (resized).JPGIMG_2848 (resized).JPGIMG_2847 (resized).JPGIMG_2847 (resized).JPG
#7537 4 years ago
Quoted from wolftownjeff:

There appears to be no extra room above the pop bumper caps for the Brite caps. The ramps are right on top of the caps.
Will they fit?

Since I have the PBL BriteCaps on my Getaway, I can actually measure pop height with and without. I’ll try to get this done later and will report back.

#7539 4 years ago

Thank you to everyone who provided input, photos, and video in response to my request about Pin Stadium lighting. I just placed my order based upon everyone's positive reviews when used on AFM.

Also, if anyone else is on the fence, I searched the web and found a current 15% off promo code before I ordered: "buffalo". Not sure how long this will be active, but thought I would share with everyone.

#7540 4 years ago
Quoted from wolftownjeff:

There appears to be no extra room above the pop bumper caps for the Brite caps. The ramps are right on top of the caps.
Will they fit?

I test fitted this morning, and the BriteCaos will work without issue. However, you will need to remove the ramp to access all three pops.

Now just need to figure out which color. I color matched blues on my Getaway, and they look really nice. However, I don’t know how red with red caps would look.

For those of you who added the Comet rings, what color LEDs did you go with?

#7541 4 years ago

So up until now, I had only heard of strobe multi-ball. Was playing tonight in a totally dark room, my strobe is set to high, and voila . . . I was awarded SMB by SOL. WOW! What an experience - almost felt like I was at a rave or something. Absolutely loved it!

#7545 4 years ago

I received my PinStadium lights today, and just finished installing them. I must say that I am not disappointed. For now I’m just going with a fixed color and brightness (not using any of the randomizations), but I love how it brightened the game. I have it set to where lighting is more cool in color the way I like it. I can also now actually see the backboard.

My favorite part has to be the UVs tapped into the center saucer flasher - awesome light show!

Without PinStadium
4A8371BF-5D4A-41EE-BE9E-ED489ABDF9E8.jpeg4A8371BF-5D4A-41EE-BE9E-ED489ABDF9E8.jpeg

With PinStadium
48200C27-701D-460A-95BC-2FE2201164C1.jpeg48200C27-701D-460A-95BC-2FE2201164C1.jpeg

#7546 4 years ago

So the speaker panel rattle on this game has been driving me crazy. In addition to rattling as a result of its own vibration, my game room is upstairs so just walking around it caused vibration. After thinking about it a little, I came up with a perfect solution that completely eliminates the speaker panel rattle. I unscrewed the two spacers that the top of the panel hooks onto. I then took some thin silicone post sleeves that I had, and pushed them down over the spacer. I put the screw back through the sleeve and spacer then reinstalled. It is a perfect fit and the sleeve absorbs all of the vibration.

E88C5746-21AA-4E80-8AA5-2C112166F607.jpegE88C5746-21AA-4E80-8AA5-2C112166F607.jpeg15D7D503-2098-4ED4-862D-A6CD02C3B2C2.jpeg15D7D503-2098-4ED4-862D-A6CD02C3B2C2.jpeg
#7549 4 years ago
Quoted from Amused_to_Death:

Looks great!
Not PinStadium related...
I don’t see any light bleed from your speaker lights. Did you do something to eliminate the often huge cracks you see on both sides of the panel? I’m always seeing the lights shining through.

Hmm, given that I don’t know what you are referring to, my game must not have that issue. I’ve done nothing aside from my mount mod with the thin post sleeves.

#7550 4 years ago

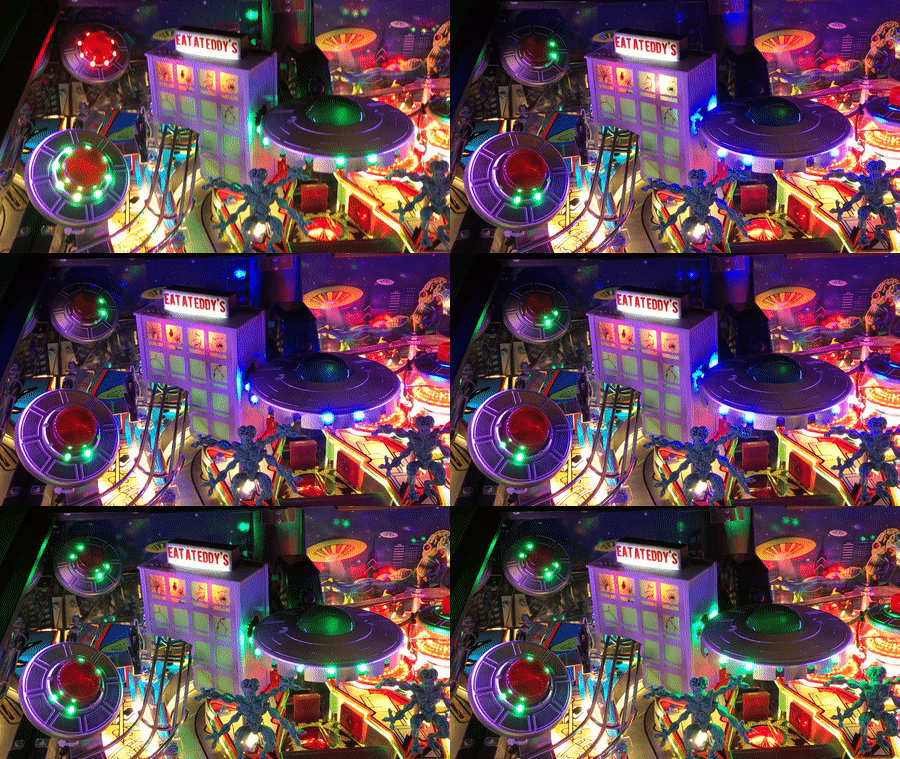
So, I kind of like Mezel's E@E building, but I don't really care for the overall style of it. I think the game calls for something more modern that matches the skyscrapers in the artwork of the backboard & backglass. Therefore, I've decided to design and build my own. Mine will have an illuminated sign on top, green tinted windows to match the game, and two fire bulbs on the inside. Also, it will be secured via friction fit and a magnet sheet so it is not permanently affixed, but still secure in place and won't rattle.

I've already printed a template and it works great. Now just need to get the time to print the actual final model. I plan on using a white marble filament for the exterior. I'll provide plenty of pics and a video to show it off once I'm done.

pasted_image (resized).pngpasted_image (resized).png
#7552 4 years ago
Quoted from PinMonk:

White might be too stark a contrast with what's on the playfield.

This is white marble which has an overall appearance of a light grey, and I think it will look really good for a modern style building.

Here is a pic with true white on bottom and the marble white on top.
IMG_2871 (resized).JPGIMG_2871 (resized).JPG

Here's a pic of one of my JP mods using the white marble for the T-Rex sign. You can see the contrast between the marble and the white decal part of the sign.

JP (resized).jpgJP (resized).jpg
#7555 4 years ago
Quoted from pinballinreno:

Shattered windows near the side impact would be a cool effect with the ones on the left side mostly intact.
I mean the building was just hit by a spaceship.
Faux realism! Lol

I like that idea. I might play with it to see what I can do.

Well, I messed around and realized that with broken windows you'll see the inside of the model which I don't want. You might just see black, but you could also see empty space and on the upper windows you might see the wires and lighting. Maybe I can figure out a way to make them at least looked cracked, but not sure.

#7562 4 years ago

Well, I didn't realize there was such passion over the AFM chute cover design. My intent is to design and create something that I like for my game, and that I think fits the theme of the existing artwork. That is definitely a modern style building, IMO, when looking at the buildings on the backboard and the backglass. The "Eat at Eddy's" is just a fun tie in. I see it more as a billboard on top of the building like you would see in many large cities. Heck, at worst Eddy's is a national chain and this building is home to their corporate HQ, so why not have your slogan on top of the building? I'm pretty much settled on my initial model, but I may later try to work in some additional damage to the building as I can make time to work on it.

#7565 4 years ago
Quoted from Fizz:

Personally I don't think any building really fits. Everything else in the game, you are attacking Martians, gathering weapons etc. And saving cities.

I think the point is the Martians are attacking cities, and this is a building in the city you are defending. You are not really shooting the building in the lock shot, at least I don't perceive it this way. Just like you are not shooting the black chute when the mod is not there. It is just a ball return.

#7572 4 years ago

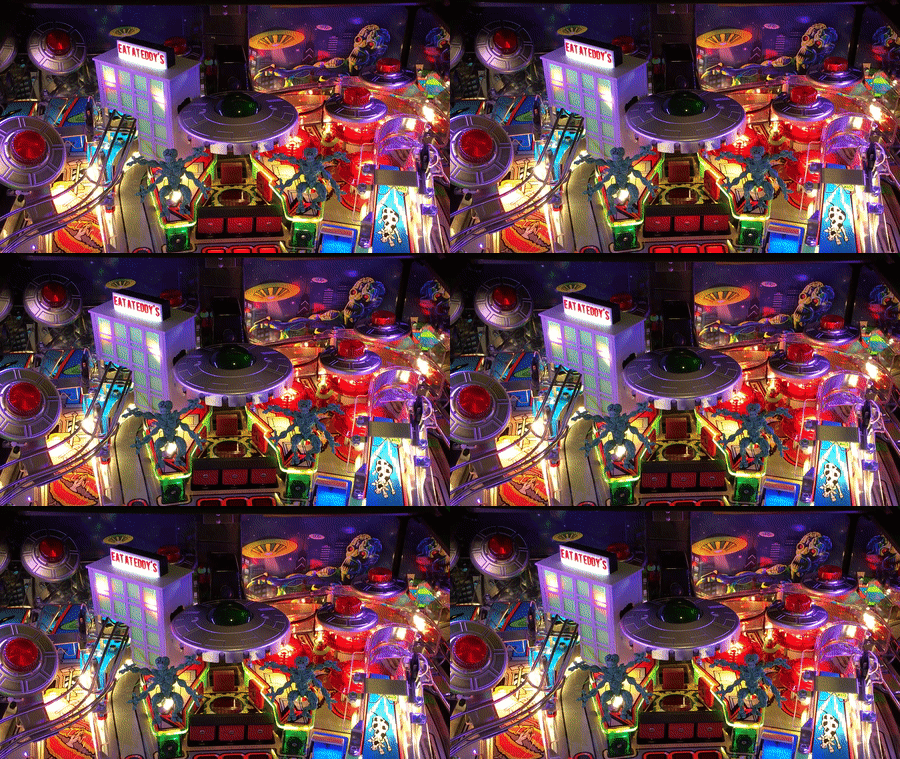
So here is my first prototype. I still need to put burn marks on it, but overall I think it came out pretty good.

With PinStadium
IMG_2878.JPGIMG_2878.JPGIMG_2874.JPGIMG_2874.JPGwps.gifwps.gif

Without PinStadium
IMG_2877.JPGIMG_2877.JPG

wops.gifwops.gif
#7580 4 years ago
Quoted from Mr_Tantrum:

Added a scoop light (ice blue) and a trough light (UV).
I selected the ice blue because I thought it would complement the light blue graphics and the blue inserts above "return to battle" light. However, I'm not sure that I'm happy with it. I may order a green strip next time I need something from Comet (will be soon). I like the UV light. The camera exaggerates the blue, but in person it looks much better. Throws some light on the area and makes the UV rings really glow.[quoted image][quoted image][quoted image]

Just got my green LED strip installed, and I like it much better than the ice blue - definitely the way to go.

IMG_2880.JPGIMG_2880.JPGIMG_2881.JPGIMG_2881.JPG
#7586 4 years ago
Quoted from joseph5185:

Haha!! I haven't successfully saved 3 countries ONCE yet in my hundreds of plays.

I think you need to utilize the super skill shot to help you accomplish your goal, if you are not already doing so (Page D in the manual).

#7588 4 years ago

Finished my E@E building. Took a fire starter to it & then a flat clear coat to seal it in. Wen't more for a subtle burn than a crispy one.

IMG_2887.JPGIMG_2887.JPGIMG_2888.JPGIMG_2888.JPG
#7589 4 years ago

Also, I have the PBL BriteCaps on order (red) and Cliffy's too. After that, I may design a few target decals for the red targets (I like how the green ones look, so I'll keep those plane), then call it a day. Well, I also plan on doing some LED flipper buttons and tying those into the speaker lights, along with adding some of the static cling Titan button area protectors.

#7592 4 years ago
Quoted from Amused_to_Death:

[quoted image]
Light bleeding through the cracks near the speakers. I didn’t see any in your photos, but I have seen it in person on other LE remakes with light-up speakers. I was wondering if you had added something to fill the cracks. I guess your panel must have a tighter fit than most.

I’ve not noticed that, but now I’m curious and will look more closely. I would think that if it were there then I would have been bothered by it by now. Here is a pic of my panel lowered to compare with yours (I assume you have the issue). Probably a couple of ways to resolve it as I’ve had some bleed on my Getaway when I added illuminated flipper buttons. I just created a black bead using electrical tape that sealed the gap, but you could also use some beaded weather stripping on the back edges of the panel.

https://pinside.com/pinball/forum/topic/attack-from-mars-remake-afmr-owners-club/page/151#post-5253223

#7594 4 years ago
Quoted from bsbdmd83:

Awesome eat at eddies mod. Wanting to know how this was done.

My own 3D design and 3D print. I sourced Comet lighting products and custom made my own wiring harness to tie it into GI w/o altering original wiring in any way. Then used a fire starter to create burns, and finally coated with clear matte finish spray enamel.

#7603 4 years ago
Quoted from joseph5185:

I didn't realize there were variances?
I was looking at this one:
https://cointaker.com/products/attack-from-mars-eat-at-eddys-building

The only variance I am aware of is the one that I just developed: https://pinside.com/pinball/forum/topic/attack-from-mars-remake-afmr-owners-club/page/152#post-5260091

I like the idea, but didn't like the old style office building. My idea was to make one in the likeness of the buildings in the artwork on the backboard & translite.

#7604 4 years ago

Just finished installing my Pinball Life BriteCaps EVO (red with original AFMr caps). I have the outer ring set to its brightest, and the inner ring to light on vibration. FYI, replacing the bulbs/caps on these is quite the chore. I had to remove the right wire frame, the tractor beam ramp, and the back ramp had to be fully loosed so that it could be moved around enough to get to the cap underneath it. Fit is perfectly good with nothing touching or rubbing.
IMG_2900.JPGIMG_2900.JPGIMG_2901.JPGIMG_2901.JPGIMG_2904.JPGIMG_2904.JPGezgif.com-crop.gifezgif.com-crop.gif

#7609 4 years ago
Quoted from wolftownjeff:

That looks great to me. Thank you so much for sharing the pics and comment.
I was worried about fit. I am scared to ask how long it took.
Thx again

Well, I didn’t time myself but if anyone decides to give it a try, I’m happy to document how to remove everything since I’ve now done it twice: once to replace my rings and a second time for these pop lights. There are a couple of things you have to watch out for.

#7610 4 years ago

I just defeated Mars for the first time ever - lots of fun. However nowhere close to ruling the universe as I only had three achievements.

#7613 4 years ago
Quoted from Amused_to_Death:

[quoted image]
Light bleeding through the cracks near the speakers. I didn’t see any in your photos, but I have seen it in person on other LE remakes with light-up speakers. I was wondering if you had added something to fill the cracks. I guess your panel must have a tighter fit than most.

Playing tonight I do notice that I have some minor bleeding. However, it is not really noticeable when standing close to the machine when plying. However, you do see it if you shift to the side one way or the other.

#7615 4 years ago

So, I've been asked about any pointers I might have when installing the Pinball Life EVO BriteCaps. Here is my best effort to document the process. Before starting I recommend placing a towel over the playfield to protect it. BTW, this same process can be used to remove the pieces you need to replace the rings (I did have to cut the zip ties from the top ramp to get the access I needed however - no biggie, just took lots of pics beforehand and redid zip ties when putting it all back together).

-1) Remove the cow ramp by removing the 2 post screws and the 2 ramp flap screws. Be sure you use a screwdriver with the correct size head so as not to strip the ramp screws. When replacing the 2 ramp flap screws, make sure the heads are seated below the metal flap. You may have to use something thin and non-abrasive to "pop" the flap up over the head when you are re-installing.
1 (resized).jpg1 (resized).jpg

-2) Remove the right wire frame. Pay careful attention to the center mount screw as there will be a zip tie that will come loose from this. When re-installing, be sure to first put the ramp in position and slide the zip tie back over the post.

a) Remove the nut and washer from the right lower sling.
2a (resized).jpg2a (resized).jpg

b) Remove the screw from the center support.
2b (resized).jpg2b (resized).jpg

c) Carefully slide the two wires from where they are seated into the metal bracket attached to the top ramp. Note that you cannot fully remove the wireframe since wires are attached to it, but carefully set it out of the way and be careful not to scratch anything.
2c (resized).jpg2c (resized).jpg

-3) Loosen the top ramp so that you can maneuver it around enough to replace the pop caps You do not need to fully remove the top ramp, but if you do you will need to cut all of the zip ties off and disconnect cables - I highly suggest not doing this.

a) Remove the nut and washer from the post securing the top ramp above the 3 pop bumpers.
3a (resized).jpg3a (resized).jpg

b) Loosen the top gate nut and remove the lower gate screw securing to the plastic, then rotate the gate so as to access the ramp flap screws. Also, remove the 2 ramp flap screws as performed in step 1.
3b (resized).jpg3b (resized).jpg

c) THIS IS CRITICAL OR YOU WILL DAMAGE YOUR PLAYFIELD AND/OR CABINET | 1) Use a small bag or sock or something to wrap around the upper ramp flap. When maneuvering the ramp around you could scratch the playfield with the thin metal piece. 2) Do the same to cover the metal support bracket at the right of the top plastic ramp. This piece is sharp, and it will scratch your side blade/panel or even the top of your side rail as you maneuver it around.
3c (resized).jpg3c (resized).jpg

-4) Maneuver the top ramp so as to access removal of the 2 screws on one of the pop caps. You may have to hold it up or to the side (or have an assistant do it) to keep it out of the way depending upon which cap you are replacing. Be careful not to scratch the underside of it with a screwdriver or other tool while working to replace the caps.

a) Remove the two screws, and set them aside as you will be using the longer screws supplied with the BriteCaps to re-secure the caps after installation.

b) Remove the LED bulb.

c) Insert the new BriteCap module and orient it so that the screw holes line up with the holes in the housing, and the two small adjustment screws on top of the BriteCap are accessible (i.e. not covered up by the ramp to where you can't get to them).

d) Repeat the process for the other two pop caps.

-5) Turn the pin on in order to adjust the brightness of the outer rings and to set the inner rings to be solid or triggered by vibration. The document that comes with the caps will tell you which adjustment screw is which, or you just turn one to see what it controls. You'll need a fine tipped Philips screwdriver to turn these screws. You only need to turn slightly to achieve change, so don't over do it.
5 (resized).jpg5 (resized).jpg

a) Find which screw controls the out ring brightness. Turn this screw to adjust to desired brightness (I have mine at 100%). Perform this for all 3 caps, as you'll want them to be equally bright, I assume.

b) Turn the other screw to desired setting. If the inner ring is currently on, then it will always be on. If you want it off by default and triggered by vibration then turn the screw slightly until the inner ring goes off. When set to the off position, the inner ring will flash during vibration (i.e. when a ball activates its pop). When adjustments are completed, turn the game off.

-6) Using the longer supplied screws, secure each of the caps by carefully aligning all of the holes. Tighten the screws until the caps are snug and don't vibrate, but don't tighten so much that you strip the holes.

-7) Install the top ramp.

a) Position the top plastic ramp back in place over the post and align the ramp flap holes. Insert and fully tighten the two top ramp flap screws, making sure that the heads rest below the metal flap.

b) Reposition the gate and insert the screw and tighten to secure the bottom part of the gate, then tighten the top nut of the gate.

c) Place the washer and nut back on the support post and tighten.

-8) Install the wire frame.

a) Insert the 2 wires into the support holes on the metal bracket attached to the upper ramp.

b) Place the bottom of the rap over the sling post but do not add nut back yet. Loop the zip tie over the center post to secure the wires, then insert the center post screw and tighten.

c) Place the washer and nut back onto the sling post, position the wire frame so that it is aligned with return lane, and tighten nut.

-9) Install the cow ramp.

a) Position the ramp in place and secure the 2 ramp flap screws fully. Again, make sure the heads of the screws sit below the metal ramp.

b) Insert and tighten the two post screws to secure the ramp.

ALL DONE! Turn the game back on, and enjoy your new PBL Brite Caps.

#7617 4 years ago
Quoted from pinballinreno:

Great write up!
Definitely going to use the sock idea for lots stuff.

Thanks, I was fortunate enough to notice before I did any damage. If you are not aware, I think it would be really easy to accidentally scratch things up pretty badly.

#7619 4 years ago
Quoted from wolftownjeff:

Thanks, great step by step description. A little overwhelming.

You can do it, just learn from what I had to go through. Take your time and follow the process, and you'll do great. I wish I had someone walk me through it, but figured I'd try to help those who came after me since I had to figure things out on my own. BTW, if anyone else knows a better/easier way, then by all means please contribute to the conversation.

#7620 4 years ago

Just finishing installing all of my Cliffy protectors. Man, that is some serious work. Nothing overly complicated, but a lot of work and I spent a couple of hours doing it. Two key things I learned. First, I could not install both SOL Cliffy amp Mantis protectors. I could get them both to fit, but the mantis distorted the Cliffy where I could not get the lips to lay flat on the playfield. Therefore, I opted for the Cliffy’s. Second, you have to remove three posts to install all of the protectors. I saw where others couldn’t get the posts removed. All I had to do is remove the nut and washer from the underside, then use a hammer and punch tool to punch the post up through the bottom of the playfield.

Update: I played 2 games and got 3 balls hung up on the Cliffy's. The 3 target bank which I resolved by adjusting the default target depth, the backside of the SOL which I adjusted, and the outhole drain which I haven't done anything with. It seems like after installing the outhole drain one the edge of the Cliffy is not flush with the playfield. Not sure how I need to fix it as it was flush when installed, but when tightening the assembly underneath it pushes it up for some reason.

#7628 4 years ago
Quoted from tilted81:

Thanks for the write up, those look awesome! Question, the led’s under the caps are just normal leds? They aren’t boards or something?

Thanks. Now that I've had them in, I think I want to take everything apart again and adjust the brightness on the outer ring (I have them cranked to max). Unfortunately, will take some effort on this game with everything that has to be removed, so I will probably be lazy for awhile and just live with it.

No, the LEDs are on a disk (i.e. round board) that has a fixed lead tab that plugs directly into the cap light socket. I've attached a pic, but this is an older setup - now the center ring adjustment is on top and is a screw. They have the color of your choice when ordering on the outer and inner rings on top, and cool white on the underside. IMO, clear caps would not look good with these as you would clearly see the board. Also, PBL does sell several different color caps with their lights ($3 extra per cap).

https://www.pinballlife.com/britecaps-evo-pop-bumper-lighting.html

bc_evo-4 (resized).jpgbc_evo-4 (resized).jpg
pasted_image (resized).pngpasted_image (resized).png

#7629 4 years ago
Quoted from tilted81:

Also, I like the green in your sol hole.. could you show a pic of where that’s at?

To light the SOL, I used a Comet Matrix 3 SMD strip and brightness controller. To tap into GI, I made a custom harness that pulls power from an existing connector and passes through to the same type of connector on one end to plug back onto a GI bulb, and a connector compatible with what the Comet Matrix lineup uses on the other end.

From the underside of the playfield I mounted the strip using the adhesive backing in the inside of the chute (backside) on the downslope near the bottom just above where it flattens.
EEFB7598-A468-4DF2-B593-F633BF878BC4.jpegEEFB7598-A468-4DF2-B593-F633BF878BC4.jpeg97E01A68-10FC-48B0-9338-479ED84D2729.jpeg97E01A68-10FC-48B0-9338-479ED84D2729.jpeg4D41BD3E-7C44-43E8-A282-D8F3112A5E34.jpeg4D41BD3E-7C44-43E8-A282-D8F3112A5E34.jpeg

#7632 4 years ago
Quoted from pinballinreno:

I put a similar setup on my DW recently.
I ordered transparent bodies well as transluscent bodies from Zitt.
You can test them with a battery on your workbench to see if you like either one before installation.
After testing, I went with the transluscent bodies.
[quoted image]
They light up the area beautifully and you cant see the wire.
You can also get colors.

Those look really nice on DW.

#7633 4 years ago

FYI, if anyone would like to order a wiring harness that lets you tap into the GI and connect a Comet Matrix cable, I will sell them for $10 for the first and $5 for each additional with shipping included. Just PM me with quantity for payment details.

#7635 4 years ago

Here is a pic of the wiring harness (pic is missing the included Z-connector which allows you to connect to an existing GI wire for power). This is not my original idea, and full credit goes to Gogdog for the idea and instructions he posted earlier in this thread. It would cost someone as much or more than what I'm charging to source the materials and build for themselves. However, I know that many guys would rather buy a readymade piece than to go to the effort of creating their own, so I thought I would make them available to anyone who might be interested.

I'm making them for $5 a piece and the first order has to cover packing materials and shipping cost (thus, the extra $5). I know what parts have to be ordered, how to make the pigtails, and test each one before I ship. These allow for anyone to simply add lighting mods without any physical modifications to their pin (i.e. they are fully reversible, and do not require modifying the existing wiring whatsoever.
harness.jpgharness.jpg

#7639 4 years ago

Thanks for the link, as I didn't realize Mezel sold them. Quite honestly, these aren't fun to make (can't tell you how many times I've nearly punctured my fingers), but I wanted to make them available for those seeking to do their own simple and low-cost lighting mods (scoop lighting, backboard lighting, trough lighting, etc.)

#7642 4 years ago
Quoted from Lermods:

It just seemed odd to resell the harness when mezel already sells them and their harness was used as the guide by gogdog to make it originally.

I didn't realize Mezel sold them individually apart from combined with their mods, or I would have just bought mine from them and pointed people to their site. I searched everywhere I could before I decided to order all of the components to make my own, but somehow didn't come across Mezel's.

I've created and sold all kinds of mods for older pins and typically just tied in lighting using Comet Matrix components and their alligator clips to hook onto a GI socket. However, AFMr is my first modern pin, and it required a different solution. I haven't really seen any posts in this thread before about these being available anywhere (just Gogdog's post about making them), so my intention was to make a ready-to-us harness available to the group that I didn't think was publicly available elsewhere.

As far as the components go to make the harnesses, if anyone desires to build their own here is where I sourced everything:

- MTA-100 feed thru headers: https://www.mouser.com/ProductDetail/571-3-640620-4
- JST 2 power connectors (male): https://www.mouser.com/ProductDetail/713-321050009
- 0.1" feedthru Z-connectors: https://www.greatplainselectronics.com/proddetail.asp?prod=MWWS100-2236 (you cut/snap these to the desired pin count - 4 pins in this case)

I don't have any kind of punch tool, so I use a narrow flathead screwdriver to punch the wiring onto the feed thru header. This process is a little precarious, and where I've nearly punched holes through my hands a few times when things slip.

#7645 4 years ago

I don't mind being downvoted for opinion posts, but what is wrong with my DIY SOL lighting mod @wackybrakke? Did I not explain or show something clearly regarding the mod? I'd like to resolve whatever the issue may be.

#7647 4 years ago

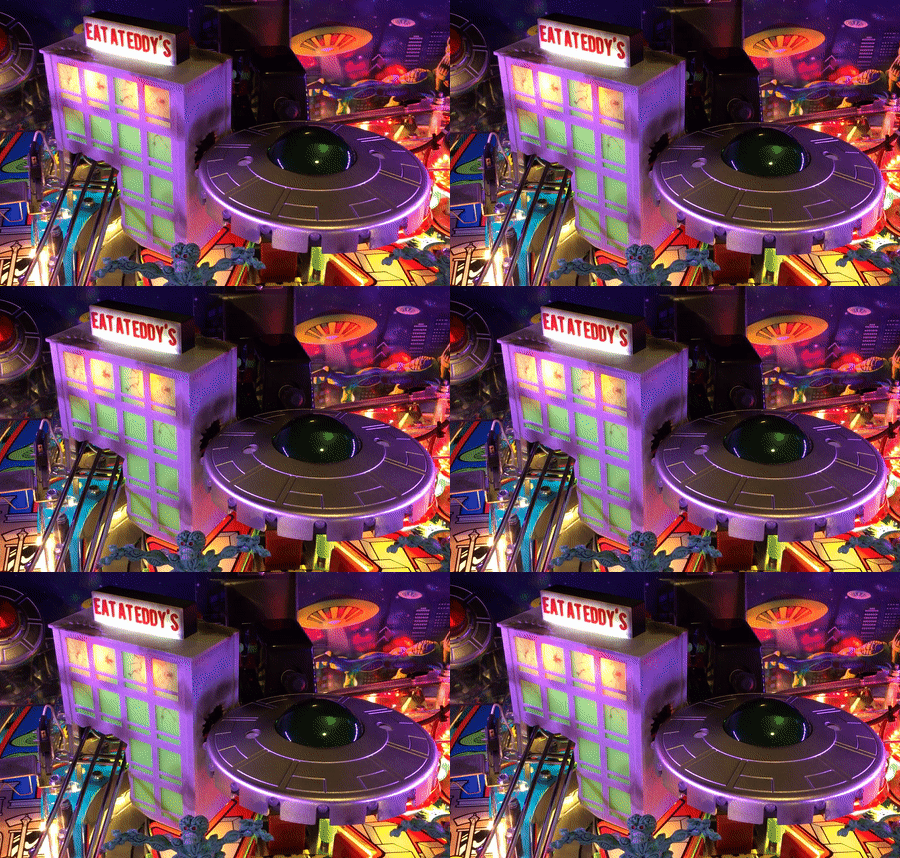
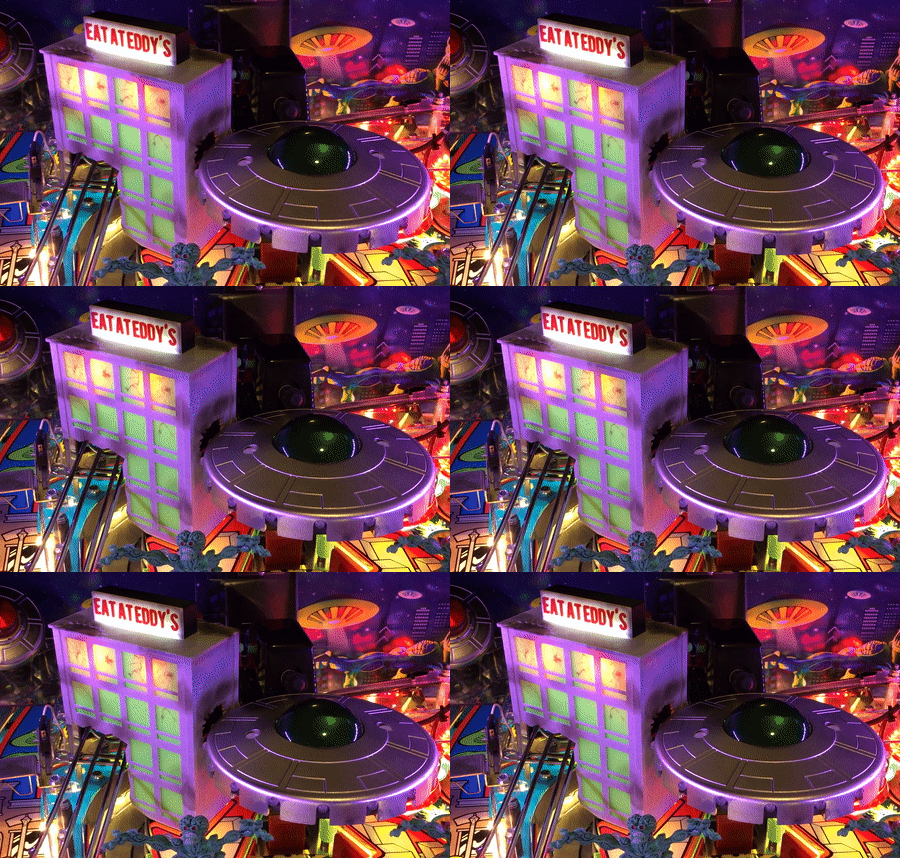
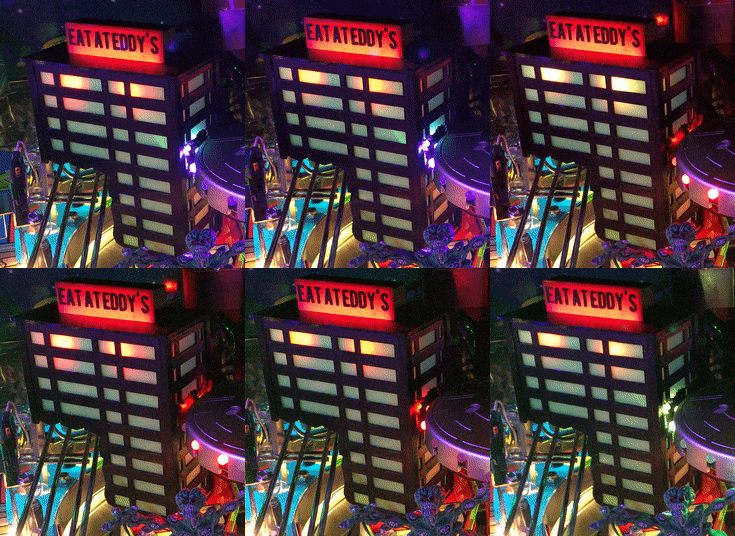
Just finished v2 of my building mod. In this one, I tried to add cracks to the windows using a tested process where I actually have a waterslide decal embedded between printed layers of the clear plastic. What I learned is that it works, but my cracks need to be a lighter gray instead of black (this will be v3). I also added a couple of blast craters on the roof (front left and back right), and I reworked the inside light mounting to better diffuse the fire LEDs (I had to make it 1 cm taller to accommodate).
IMG_2944.JPGIMG_2944.JPGIMG_2945.JPGIMG_2945.JPG

Version 2
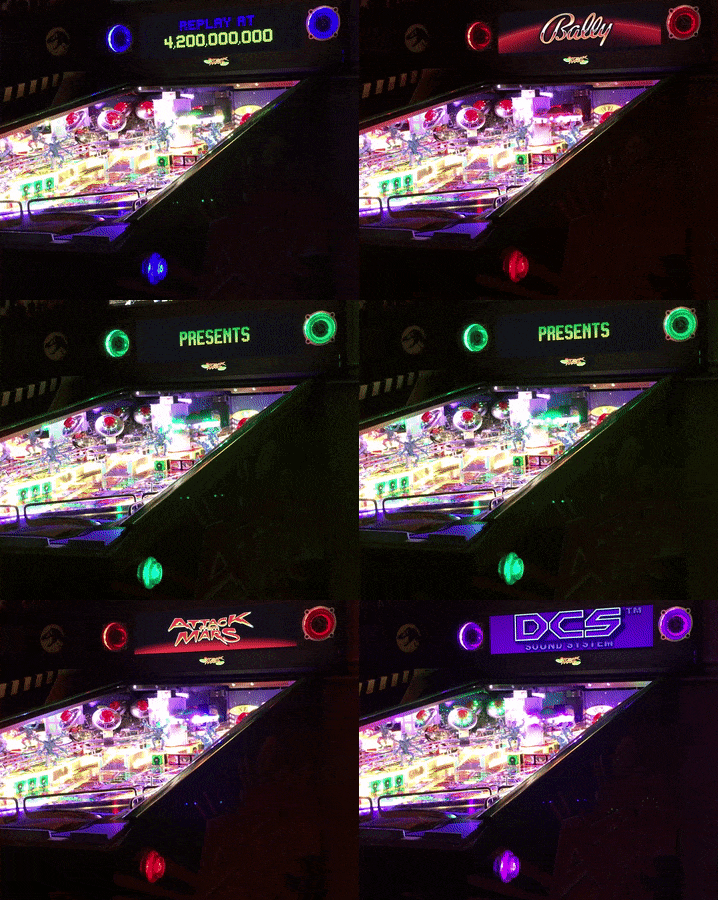
EAE.gifEAE.gif

Version 1 for Reference
old.gifold.gif

#7649 4 years ago
Quoted from shovelhed:

Is your eat at eddys building actually purple or the uv lighting effect? Can you take a pic of it without the playfield lit up?

That is the ambient lighting. It is a marble white (has a light gray appearance). See this post: https://pinside.com/pinball/forum/topic/attack-from-mars-remake-afmr-owners-club/page/152#post-5254006

#7652 4 years ago

Thought I would share my final version of the building mod (sorry, no real flames).

IMG_2947.JPGIMG_2947.JPGIMG_2948.JPGIMG_2948.JPGIMG_2949.JPGIMG_2949.JPGIMG_2950.JPGIMG_2950.JPGIMG_2952.JPGIMG_2952.JPGEatE.gifEatE.gif
#7654 4 years ago
Quoted from SeaLawyer:

Awesome! If I didn’t already have the Mezel version, I’d buy this. I like it better. The green in the windows complements the green in the game nicely.

Thanks. I chose that green specifically because of how it went with the game and because green is a common tint for glass buildings.

#7656 4 years ago

I believe that my building is different enough from the other one out there, so I've decided to offer it for sale. Each building is printed from multiple 3D printed parts and assembled and glued together. The broken glass effect is achieved by embedding a waterslide decal between layers of the 3D print, so they will never fade, bubble, come loose, or otherwise degrade. The burn effects are actual burn marks that I apply with a fire starter, and I then spray the entire model with a flat clearcoat to lock in the efffect. I use Comet Matrix wiring and lighting for the fire effects and illuminated roof sign, and will include everything needed to install and connect the mod (including a harness to tap into a GI connector without modifying the current wiring). The model friction fits tightly over the chute so that there is no permanent adhesion required, and it sits flush at the base w/o interfering with the ball lock gate.

I'm offering the building for $120 which includes US shipping (will ship internationally on a per quote basis). Be default, my building is done in white marble and green glass, but I'm also happy to do custom colors (e.g. pure white, off-white, etc. for the building, and clear, blue, or some other color for the glass). I don't even mind changing the message on the roof sign as long as it can fit. While I won't do any design changes to the building, color changes or message change on the roof sign will not cost anything extra.

I have a several year history of designing, creating, and selling pinball mods (I've done mods for numerous pins, but primarily focus on the ones I own), and I know there are a few in this group that can vouch for me or I'm happy to point anyone to some of my other work if you are on the fence. For this piece, I will typically be able to ship within one week of payment. Please PM me if interested, and we can arrange details.
EaE.gifEaE.gif

#7657 4 years ago

Back to my crackling plastics issue that I brought up a few weeks ago. After careful evaluation of all my plastics (I actually put my reading glasses on so I could see more details), it appears that the only ones that are really flawed are the two lane return pieces (of course, these are the two that you constantly see while playing). After speaking with CGC support, they informed me that they could only sell an entire set, but they pointed me to Bay Area Amusements where OEM individual pieces are sold. Ended up only costing me $20 with shipping to replace the two pieces. Just thought I would let everyone know in case some other current AFMr owners out there have the same issue.

#7660 4 years ago
Quoted from neverahighscore:

UV light show!
[quoted image]
[quoted image]

That’s cool!

#7661 4 years ago

Just received and installed my v2 chip from distributor. Now what do I do? I assume I can power down the flippers a little now? What do people suggest who have dialed theirs in?

#7667 4 years ago

So I saw on Pawn Stars this week someone bringing in their Forbidden Planet poster to the shop. The poster reminded me of the art on AFM, and since I don't ever recall watching the movie as an adult (I could only remember a couple of things about it from when I saw it probably 35-40 years ago - I definitely didn't know the plot), I decided to check it out last night.

I must say, for a sci-fi movie from 1956, it really held up IMO. The SFX had to be incredibly advanced for the time as they were extremely well executed. The one thing that was kind of funny is that space travel was in a flying saucer very similarly shaped to the AFM versions. They even had a scene where they were coming out of lightspeed travel and they put themselves in a process that looked very similar to the transporter of Star Trek. I wasn't quite sure what was going on here, they defiantly weren't transporting, but this had to definitely influence that element of the Star Trek TV show. Also, a very young Leslie Nielsen played one of the lead roles. As someone who pretty much only knows him from his slapstick (Airplane, Naked Gun Series, etc.), I kept waiting for him to crack a deadpan joke, but of course this never happened.

If you've not seen it before or if its been awhile, and you're a sci-fi fan then you should check it out.
Forbiddenplanetposter (resized).jpgForbiddenplanetposter (resized).jpg

#7669 4 years ago

What is the German guy saying in this game (I can easily understand everything else)?

#7672 4 years ago
Quoted from Gogdog:

Ok...so I'm looking for a definitive answer on this. With the AFMrs….did they use phosphorescent paint for the green on the playfield? (saucers, highlights around the light lock triangles, etc).
I have tried holding a flashlight to the paint and it doesn't glow like "glow in the dark" paints do. Do you have to have special UV bulbs to make them glow?
I also tried out and installed some glow in the dark titans but they sure don't glow much.
[quoted image]
I'm wondering if its because there are no UV lamps. I could switch out my red trough light for UV though if its going to make a difference...

Look up a few posts: https://pinside.com/pinball/forum/topic/attack-from-mars-remake-afmr-owners-club/page/154#post-5282406

The paint is UV reactive and requires UV light to “glow”, not a standard flashlight. The paint is not phosphorescent (ie it does not charge and maintain luminescence).

#7675 4 years ago
Quoted from Rascal_H:

Glad to finally join the club.[quoted image]

Awesome, and welcome! Guess I'm no longer the newbie around here - tag, you're it!

#7676 4 years ago
Quoted from Mr_Tantrum:

What is the German guy saying in this game (I can easily understand everything else)?

Sorry to quote myself, but I just came across this detail of all the game’s call outs, so I thought I would share: http://hem.bredband.net/b257182/afmquotes.html

#7677 4 years ago
Quoted from Gogdog:

I could switch out my red trough light for UV though if its going to make a difference...

I have UV trough light, and it makes a noticeable difference down low, especially with my Titan GITD flipper rubbers.

#7679 4 years ago

Finally got around to playing with the custom logo. I tried several, but in the end settled for something simple. Since it is so small, anything with too much detail or not enough contrast just didn't work well, IMO.

If anyone would like my image then please PM me with your email address.
Logo.jpgLogo.jpg

#7680 4 years ago
Quoted from Da-Shaker:

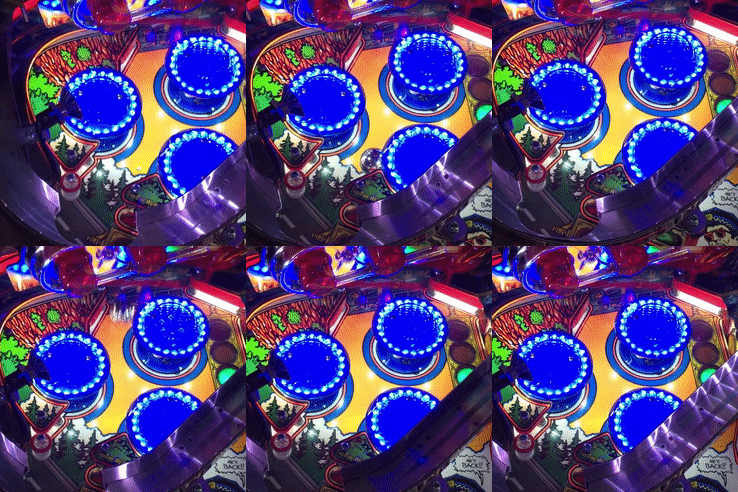
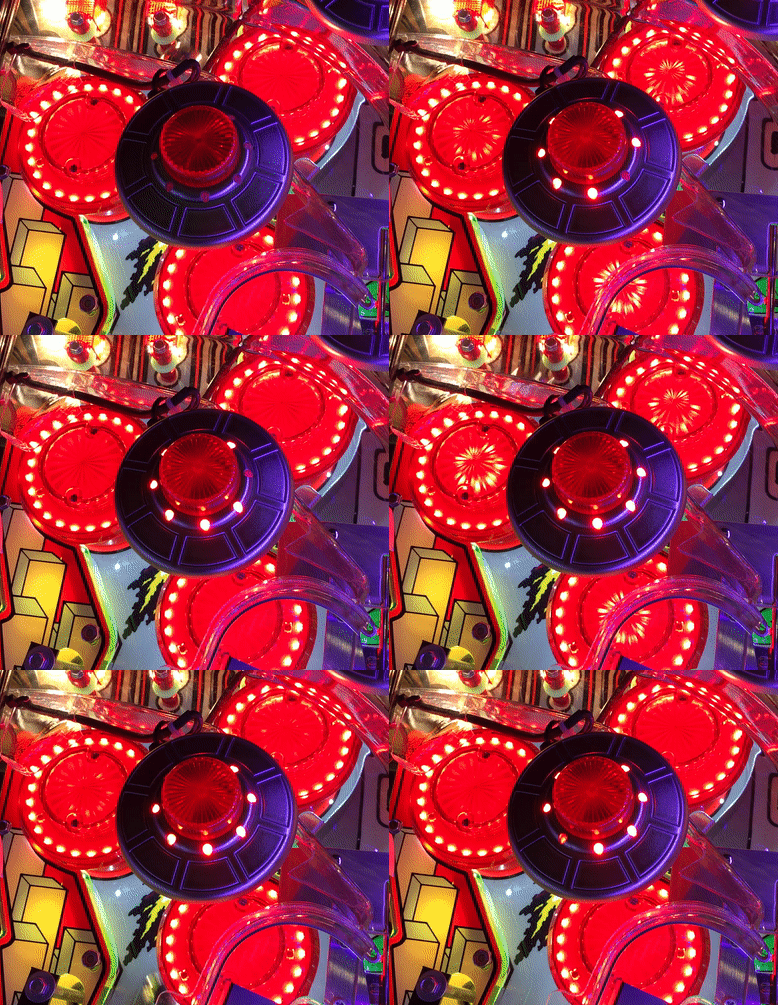
Which Pinstadium kit did you have to buy to make this happen on your game? They have to many options. It looks amazing. Thanks for the video.

The standard version is all you need (of course you can always go bigger): https://pinstadium.com/product/pin-stadium-lights

FYI, when I bought mine less than a month ago I searched the web and found a current 15% off promo code before I ordered: "buffalo". Not sure how long this will be active, but you should at least try it if you are going to order.

#7683 4 years ago
Quoted from RussMyers:

How did you do that?
Is there documentation?
Thanks,
RussM

In the manual, but outlined in this post: https://pinside.com/pinball/forum/topic/attack-from-mars-remake-afmr-owners-club/page/27#post-4095492

You just need a microSD card to transfer the file.

#7685 4 years ago
Quoted from Da-Shaker:

Thanks T,
So, you didn't have to buy the flasher kit in addition too

The UV flashers are included. Just pick AFMr for your game. If you want to add on the other kit for multiple flasher integration then that is extra.

#7689 4 years ago

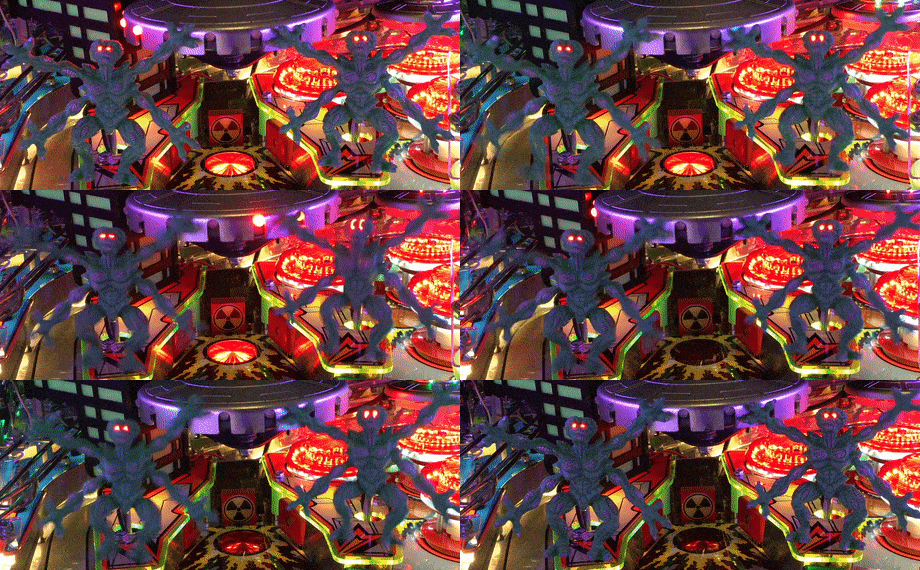
So, yesterday I colored my 4 aliens' exposed muscles silver (used a silver Sharpie), designed and made myself a decal for the top of the 3 center targets (modeled after the existing one out there I like), adjusted the target mech so that it was more level and balls wouldn't get stuck with it lowered, and ordered all the parts to make interactive illuminated flipper buttons (I still need to design a 3D print model for the brackets that the LED strips will adhere to).

If others are interested, the illuminated integrated flipper buttons are a mod that I would be willing to sell as a kit to make it easy on those less prone to doing DIY projects. Probably not for everyone and I don't really have a final tally on it yet, but just something I wanted to do to my game.

#7692 4 years ago

Well, nothing that others haven't already done and shared in this thread. However, I'm thinking about and working on a couple of other small things. Once I get the buttons wired and working then I'll post pics of everything.

#7693 4 years ago

Has anyone done any custom coin reject inserts for this game yet? That will definitely be something on my "to do" list as I don't like the generic ones that come with the game. They look like someone is turning up the volume to me instead of inserting a coin. Seriously, who holds a coin like that when they are about to insert it into a game? Also, looks like a woman's hand with well manicured fingernails. Not that I have anything against women, but just not representative of the vast majority of middle-aged men pinball enthusiasts of whom I imagine mostly have unkept nails (I've seen enough of my share of close-up pics and vids on Pinside to be highly confident in my assertion).

I'd probably go with Martian heads (either b&w outline or maybe even a color image would work with these).

pasted_image (resized).pngpasted_image (resized).png

#7695 4 years ago

I'm very frustrated

I just received the two lane return replacement plastics I ordered to replace my crackling ones, and they have the same exact issue. Now I have to go through the hassle of trying to return them or get them replaced with good ones.

Originals
IMG_2971 (resized).JPGIMG_2971 (resized).JPGIMG_2972 (resized).JPGIMG_2972 (resized).JPG

Replacements

IMG_2974 (resized).JPGIMG_2974 (resized).JPGIMG_2973 (resized).JPGIMG_2973 (resized).JPG
#7696 4 years ago
Quoted from shovelhed:

You can buy green coin rejects from twisted quarter. Here’s a link for the inserts.
https://drive.google.com/drive/mobile/folders/0BxfIenA1e2fNdXZ4OWdFeERWUWs[quoted image]

Thanks. I may still see what the green Martians look like.

#7697 4 years ago

So here is what I did decaling the mothership area. I still want to come up with something for the drop target (maybe a reticle with an explosion - I'm open to ideas). I'm not going to do anything for the green Martian targets or the two targets behind the gate since I like the transparent green, and the other two are hardly visible from the player's perspective.

- Made a 3 target series with a flying saucer theme and a marsscape as the background
- Made the 3 target bank top decal
- Colored the exposed muscles of all 4 Martians with a Silver Metallic Sharpie

IMG_2975.JPGIMG_2975.JPGIMG_2967.JPGIMG_2967.JPGIMG_2966.JPGIMG_2966.JPG
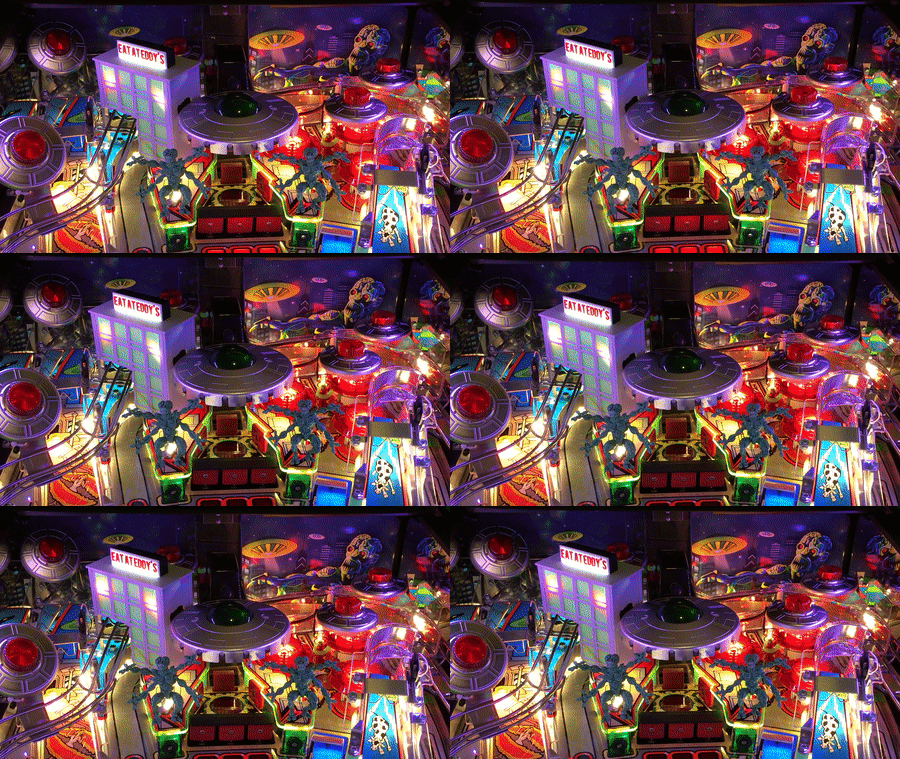
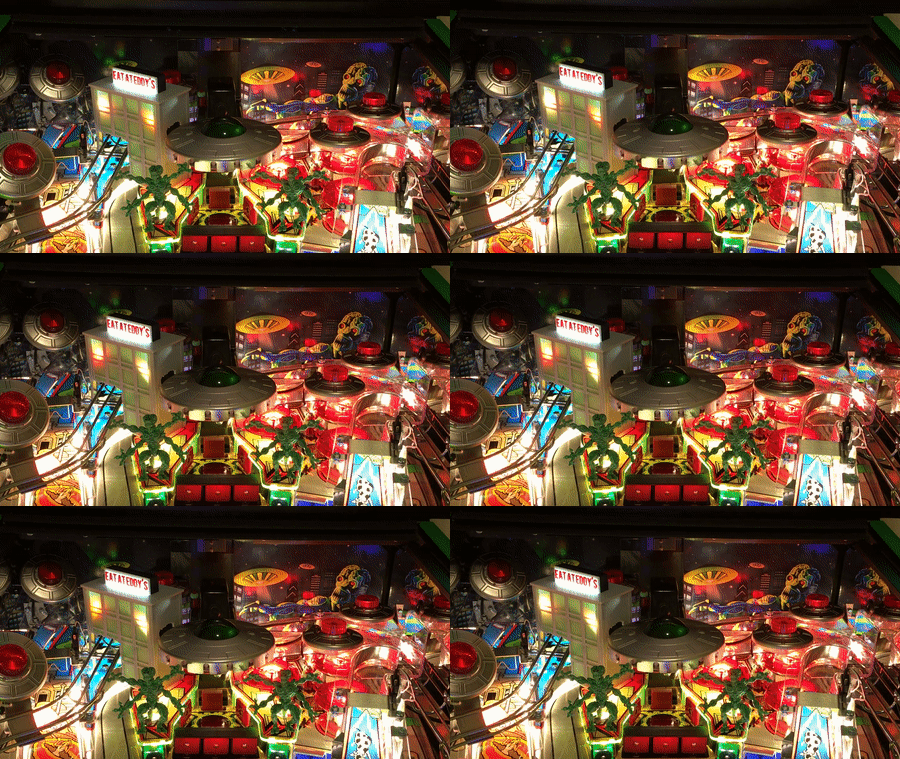
#7698 4 years ago

I still need to design a mounting bracket for the LEDs, but overall the illuminated flipper buttons were a fairly simple mod. Of course I had to order all of the parts and make my own wiring harness to tap into the LED speaker connector, but everything went smoothly.

ezgif.com-optimize.gifezgif.com-optimize.gif
#7705 4 years ago

Finished the flipper button LED mount designs (different for left & right). Now I just need to print and test for fit. FYI, these will be adhered to the inside of the cabinet using the same high-tack double-sided adhesive I use for all of my decals. I wanted to avoid adding screw holes to the cab if possible, so I'll have to see how things workout.

pasted_image (resized).pngpasted_image (resized).png
#7706 4 years ago

Yes, I know, and this is a great mod you've put together. Under cab lighting is not for me (at least for now), but I used the same principles I learned from reading the informative posts here about how you guys did it to design and integrate my flipper buttons. While I had to build a couple of custom cables, everything else was off the shelf LED cables and connectors.

#7707 4 years ago
Quoted from hawknole:

My coin inserts are custom and very similar to what was posted above
[quoted image]

I like them. Nice job.

#7708 4 years ago

For the drop target I decided to go nuclear, and I'm really happy with how it came out.

IMG_2981.JPGIMG_2981.JPGIMG_2983.JPGIMG_2983.JPG
#7709 4 years ago

I anyone is interested in purchasing any of the decals, please PM me. Pricing including US shipping is as follows:

- Target bank top decal | $6
- Drop target decal | $5
- 3 Bank target decals | $12

The full set of decals ordered together | $20 (save $3)

All decals are printed on a photo quality printer using only OEM inks and ultra gloss OEM paper. I coat them with a clear gloss vinyl, precision cut, and color edges on the drop target and target bank top decals. For adhesion I use a high tack double-sided sheet that covers the entire decal, and on the drop targets I use a shock absorbing clear mounting tape that does not require the center be punched out for the target rivet.

FYI, installing the drop target can be a challenge, but here is how I did it (takes a little work, but makes install a snap).

1) Turn on the game and start if required to bring the drop target in the up position. Turn the game back off.
2) Fully pull out the playfield and rest on lockbar support.
3) From backside of backboard removed the two screws holding in the mothership assembly.
4) Set mothership assembly aside to where you can easily access the drop target.
5) The drop target is very sensitive, so do not touch it from the front side. Remove the decal backing, use one hand to push forward from the backside of the drop target, and apply the decal evenly with the other hand (should be flush with top and both sides).
6) Reposition mothership assembly then insert and tighten the two screws.

When installing the top target bank decal, do so when the assembly is in the lowered position (you will need to press decal firmly into place, so lower position is better.

#7710 4 years ago

Just finished installing my flipper button LEDs using my custom brackets. Very clean install, and the brackets worked as I had hoped.
IMG_2984 (resized).JPGIMG_2984 (resized).JPGIMG_2989 (resized).JPGIMG_2989 (resized).JPGIMG_2987 (resized).JPGIMG_2987 (resized).JPGIMG_2990 (resized).JPGIMG_2990 (resized).JPG

#7712 4 years ago
Quoted from markp99:

Nice idea. Just a "holder" for the LED strip, right? Any pics from outside the cabinet?

Yes, just a holder for the strip without doing anything permanent to the cabinet. I meant to post external pics, but must have somehow messed up. I can take some more later, but here is my previous post that shows the overall results when I was testing.

https://pinside.com/pinball/forum/topic/attack-from-mars-remake-afmr-owners-club/page/154#post-5292016

I probably spent more than is reasonable just to illuminate the buttons (wouldn't be the first time I did such a thing on a pinball machine), but I like them. Here in the next day or two I'm going to calculate what everything costs, and if there is enough interest (I'd probably need at least 5 orders) then I'll sell full plug-and-play kits that include everything.

#7717 4 years ago
Quoted from markp99:

My "Duct Tape Solution" (tm) would be much less elegant than this one!
I might have some interest in a kit for this.
Actually, I have a bunch of RGB LED boards left over from my GoT project. I bet a simple bracket might suffice to hang this near the flipper buttons. Might not be bright enough, but worth a try.

I'd be happy to sell the brackets separate on their own for $10 including US shipping. They are 3D printed in black with adhesive backing covering the entire surface for attaching to the interior of the cabinet. I'll even add a hole in the center bracket handle in case someone wants to screw them into place. Anyone can PM me if interested in purchasing.

#7718 4 years ago
Quoted from jibmums:

The ship was decelerating to sub-light speed, therefore:
"A variation of the classic transporter beam was employed in the ship's D.C. (deceleration) stations to protect the spacecraft's occupants from the worst effects of decelerating out of hyperspace and back into real-space. This feature was later internalized in the newer starships which used warp drive nacelles, thus making the point where the actual jump in or out of warp space or hyperspace virtually unnoticeable."
Lot of interesting reading about Forbidden Planet here:
http://www.pjfarmer.com/secret/contributors/forbiddenplanet.htm

Very cool (in a sci-fi nerdy kind of way). Thanks for the link.

#7719 4 years ago

So, after evaluating everything, I'm offering my interactive illuminated flipper mod kit for $50 including US shipping. I will want a minimum of 5 commitments before I'm willing to take orders (I have to buy many of the items in bulk to make the kit). After the initial 5, I will need commitments in increments of 5 to fulfill subsequent orders. Please reply to this post if you are in, and if we hit at least 5 by the end of the weekend then payment will be required and I'll begin production.

Kit will include everything you need to illuminate both flipper buttons and will interact with the speaker lights:
- Power splitter to tap into speaker lighting
- Cabling from the backbox to the cabinet
- Splitter in cabinet to left & right extension cables
- 2x Extension cables
- 2x Interface to LED strips
- 2x LED strips (3 SMD each)
- 2x 3D printed LED strip adhesive mounts
- 2x Transparent flipper buttons with springs

I will also create step-by-step directions for installation. There will be no modification of the pin or its wiring required.

AFMr.gifAFMr.gif
#7722 4 years ago

That's 10+ commits for the flipper button mod thus far.

rrosenhouse
Vyzer2
Chappie101
wolftownjeff
Monte_
Bentleybear
mjannusch (maybe 2 if works with MBr)
Tilted81 (maybe 2)
Wolftownjeff (maybe 2)

#7726 4 years ago
Quoted from hawknole:

Any idea if these will work for MBr too?

Quoted from mjannusch:

I'm in as well for at least one set. 2 sets if it'll work in MBrLE also (which I'd think it would).

Good question. Can someone take some close-ups of the following in MBr for me?

- The LED connection to the speaker (remove the backglass and lower the speaker panel. You should see a 4 wire connector (square shaped if viewed from end) somewhere near the left and/or right speaker with red/gree/blue and a yellow or black wire probably). Connectors will look like the photo below.
- An inside shot of each of the button areas like I posted here: https://pinside.com/pinball/forum/topic/attack-from-mars-remake-afmr-owners-club/page/155#post-5293448

C3E76460-D8B6-4E1E-9DB6-A4FA0BB702F7 (resized).jpegC3E76460-D8B6-4E1E-9DB6-A4FA0BB702F7 (resized).jpeg
#7730 4 years ago
Quoted from Lermods:

Can you show a pic of your connection at the speakers? We run our undercab lights through that connection, plug and play, and I just want to make sure there won’t be any compatibility issues so people don’t have to worry about it if they have our kit already (or have yours and want ours). If you made your connections like we made ours, anyone who buys your flipper buttons will not have to worry about compatibility with our undercab lights. And yes, the connection is the same for MBR. You must have an SE or an LE for these to work.
Our undercab and instructions can be found here:
https://lermods.com/shop?olsPage=products%2Fattack-from-mars-remake-pinball-led-strip-undercabinet-light-kit

All I do is use a Y cable with the same 4 pin connectors to feed off of the RGB +12V. I don’t see any reason why both wouldn’t be compatible. Mine could just Y off your Y, or even Y off the other speaker.

Better yet, for those who already have your mod, I could offer a 3 way splitter that would replace yours and my two way ones. That way they would only need one splitter but it would feed both mods.

I can try to get a pic up tomorrow.

#7731 4 years ago

Okay, I’ve been getting lots of PMs and things are getting hectic (I never thought the mod would be so popular). So, I’m definitely going to do a first run. I think I’ll give everyone a chance to commit through Sunday, so I can order all the materials on Monday. I’ll be PMing everyone over the next couple of days to provide payment info.

After seeing the pics for MBr, my mod will also work for it. I’ve also had a question about working with MMR. Are there any MMR owners out there who can confirm that the connections are the same (pics would be great)?

#7734 4 years ago
Quoted from Lermods:

Mmr does not have speaker lights that are stock with the game.

Does it have any RGB line you can tap into?

#7737 4 years ago
Quoted from YZRider926:

MMR might be doable with the new rgb lighting and panel upgrade kits coming out.

If a MMR was equipped with the RGB lighting as the other CGC pins are, I’m sure they would use the same wiring and both my nod and the under cab lights should have no issues connecting. It sounds like the MMr RE will have standard, but I’m still unclear if there will be a full RGB retrofit offered, and if so when it will be released.

#7738 4 years ago
Quoted from BentleyBear:

Set me up for 1.

On the list. FYI, please PM me with your address and I can provide an accurate shipping quote.

#7740 4 years ago
Quoted from Lermods:

Can you show a pic of your connection at the speakers? We run our undercab lights through that connection, plug and play, and I just want to make sure there won’t be any compatibility issues so people don’t have to worry about it if they have our kit already (or have yours and want ours). If you made your connections like we made ours, anyone who buys your flipper buttons will not have to worry about compatibility with our undercab lights. And yes, the connection is the same for MBR. You must have an SE or an LE for these to work.
Our undercab and instructions can be found here:
https://lermods.com/shop?olsPage=products%2Fattack-from-mars-remake-pinball-led-strip-undercabinet-light-kit

Here you go. Pic of current splitter with potential add-on male lead to power both buttons & undercab, along with pic with everything tucked in place.

BTW, not only do I crimp my wire leads, but I also solder and test them to ensure 100% they work and will not fail.

2.jpg2.jpg1.jpg1.jpg

#7742 4 years ago
Quoted from Gogdog:

How long of LED strips do most people use for undercabinet lighting? 10SMD, or...20SMD+?
Huh...I would have thought comet pinball would have rgb led strips...but I can't find them there. Do we have to go to Ebay or something to find them?

I can't speak to the length, but if you want a full DIY and not the plug-and-play kit from Lermods or the flipper button kit I'm offering, then these will do the trick: https://www.amazon.com/gp/product/B07CMMHQDP/ref=ppx_yo_dt_b_asin_title_o01_s00

If you don't want the brightness of the 5050 SMDs, then you could go with a 2835 SMD strip or something in between.

#7745 4 years ago
Quoted from Gogdog:

Ah nice...learn something new every day. Ok, so with those strips, you cut in 3 smd sections (so 3, 6, 9, etc), and then solder the wires directly to the strips at the 4 connection points.
Though...the led strips I was buying from comet are usually 6.3V, and these are 12V (though comet does sell 12V versions as well). I guess the speaker lights in AFMr are running 12V that you are tapping into, vs the GI lights (that I tapped into to run a trough light) are 6.3V?

Yes those strips can be cut in multiples of 3. Yes, RGB lighting is 12V in the game. You can either solder or use connectors.

#7746 4 years ago
Quoted from Lermods:

I don't think you need to make that extra lead for undercab. Your connections will work fine with my undercab.

Just an OCD thing for the buyer, do they want 2 splitters linked together or a single one.

#7748 4 years ago

FYI, cutoff for first round of AFMr/MBr flipper button lighting kit will be this Sunday at 1:00 Central (must have paid by then). I'll be sending out PMs to everyone who has expressed interest thus far later today to everyone listed here, but please PM me if you want to order and aren't in the list below:

Dashmonster
rrosenhouse
Vyzer2
Chappie101
wolftownjeff
Monte_
Bentleybear
mjannusch
Tilted81

#7752 4 years ago

Saturday morning check in on LED flipper button kits.

Thus far 16 kits have been reserved, and 14 have already been paid for. Reminder that the deadline for ordering & payment is tomorrow at 1:00PM Central. After the cutoff, I'm going to order all components so that I can get everything in, made, and shipped as quickly as possible.

#7753 4 years ago

Got my replacement plastics in today, and they look perfect now. No more ink crackling.

6145CAE5-F919-4120-9019-EBFA682AB26B.jpeg6145CAE5-F919-4120-9019-EBFA682AB26B.jpegC75CE3A9-1941-4E55-8270-76C9F5A4E2EB.jpegC75CE3A9-1941-4E55-8270-76C9F5A4E2EB.jpeg
#7755 4 years ago
Quoted from pinballinreno:

I think they might have just messed up and sent the wrong ones.
I got replacement plastics, without cracks in them, very early on.
I think most if the LE run had the cracked ink.
I bought NIB

This time I had them take off the protective film and check them. They were very supportive and helpful. From the sound of things, I think they had to go through a few before finding good ones. I assume they still have some stock from the bad runs, and just weren’t aware.

#7756 4 years ago

Okay, only a few more hours to make the first flipper buttons run deadline at 1:00 central today. Thanks for the great response to all those who have committed, as I have about 20 orders thus far (I’m going to be really busy over the next week or two).

#7757 4 years ago
Quoted from Lermods:

Here’s a video of the undercab, could look nice with the buttons.

Yes, and for those wondering who haven't picked upon in yet, both mods work well together without any issues and nothing special is required for installation.

#7758 4 years ago

Okay, LED flipper button kit ordering is closed. Thank you everyone who ordered. I'll be ordering components today, and getting to work on things. Thank you for everyone's interest, and I'll keep everyone updated on progress.

Update: All components required were in stock and ordered. Everything should arrive this week, so I think I know what I'll be doing next weekend.

#7777 4 years ago

As an update to everyone who ordered the LED button kits, seems like I've been doing nothing but cutting wire and soldering the last couple of days, and I still have a ton to go. Currently, I'm working on the power splitters, and when done with these I'll have to work on the ends for the power extension which also requires soldering connections on both ends. Doesn't really seem like that much until you do 21 sets of everything.

All of the brackets are printed, and I decided to drill holes in them and provide screws for those who find the adhesive backing is not enough. I'm still waiting on a couple of parts to arrive, but moving forward with construction of everything in the interim. I'm projecting mid next week for shipment at this point.

IMG_3021 (resized).JPGIMG_3021 (resized).JPG
#7779 4 years ago

Whew, been working all day on LED flipper buttons and just finished all of the soldering and cable making. Tomorrow I will test everything, make the necessary corrections, and begin packaging. I also still need to take several photos and create installation instructions. I'm still short a few parts that are in transit, so if I end up shipping some orders before others I will do so by purchase order. If all goes well, the majority will ship out on Monday or Tuesday.

#7785 4 years ago
Quoted from rkelley17:

Just joined the club! We are loving AFM![quoted image]

Welcome to the club!

#7787 4 years ago

Good news, all flipper light kits will be shipping later today. For installation instructions, please see this document: http://thezumwaltfamily.com/afmrpinball/AFMR_MOD_Instructions.pdf

#7792 4 years ago
Quoted from AvidPinPlayer:

Hello AFMr members, I have a question. I purchased a brand new AFMr SE and I'm getting the following Test Report: "Check Switch F3 L. Flipper E.O.S." so what should I check for? As I browse through the other similar switches I can't see anything unusual???[quoted image]

I'm not sure, but CGC tech support is very helpful if you open a ticket: https://chicagogamingcompany.freshdesk.com/support/login

I suggest you do so in addition to inquiring here in the forum.

#7807 4 years ago
Quoted from WizWiggy:

Has anyone here installed a trough light strip? If so, where did you tap in for power? Thanks.

Yes, I have. I used Comet Matrix 4" UV LED strip (https://www.cometpinball.com/products/lighting-strips) and 12" Matrix extension cable, along with my custom harness to tap into an existing GI bulb (I've since found you can also buy the harnesses from Mezel Mods).

https://pinside.com/pinball/forum/topic/attack-from-mars-remake-afmr-owners-club/page/153#post-5278178

https://pinside.com/pinball/forum/topic/attack-from-mars-remake-afmr-owners-club/page/153#post-5278422

#7808 4 years ago

I have a 2nd design for my building based upon a request from an original AFM owner. This one resembles the buildings on the AFM LE topper. I'm going to test print to see how it comes out, then I'll share some photos with the group.

pasted_image (resized).pngpasted_image (resized).png
#7810 4 years ago
Quoted from maffewl:

Where’d you place the strip? I haven’t seen a good location for this as it is almost completely blocked off. Did you put it inside the mechanism?

Just at the top of the trough. You can see the black heat shrink at the right where the wires went back unto the apron (had to remove apron to install, of course).
IMG_3080 (resized).JPGIMG_3080 (resized).JPG

#7814 4 years ago
Quoted from maffewl:

Apologies, I was in a rush and misread the original question. I was asking more about the SOL hole. You have a lighting strip there as well, correct?

Here is the answer to that one: https://pinside.com/pinball/forum/topic/attack-from-mars-remake-afmr-owners-club/page/153#post-5277208

#7815 4 years ago
Quoted from Gogdog:

Thanks for the pic....good timing. I was just about to install my UV trough light strip...and was a bit horrified on how I originally put my red one in ->
[quoted image]
So this time...I didn't completely take the apron off, I just loosened it enough to slide the wires through the top. When retightening...you can leave enough of a gap for the wires.
[quoted image]
[quoted image]

Good pics, exactly how I ran mine.

#7818 4 years ago
Quoted from Gogdog:

In that location though..are you worried about balls constantly falling from the backside and hitting the led strip?

The location is on the bottom of the downslope, and has been zero issue there in the dozens of games I’ve played. If you think about the angle and the spherical ball shape, little to no ball ever actually touches the strip in that position. Just use a strip that has the protective coating like Comet’s Matrix strips do.

#7820 4 years ago

The thought crossed my mind (also illuminating below the center target bank), but haven't taken the time to evaluate how to accomplish it.

#7822 4 years ago
Quoted from SeaLawyer:

Git 'er done!! I want the SOL scoop lit, but I want the color to change depending on which insert leading into is lit. E.g., the scoop lights up orange when the extra ball is lit, yellow for SOL, white for Martian Attack, green for RTU. If more than one insert is lit, it should default to the more important insert (extra ball>SOL and MA, MA>SOL, RTU>all others...).

Yeah, if it were the original game this might be easier, but beyond my engineering capabilities. Would need to somehow intercept the circuit for each lamp on the game board and have a device translate and pass color onto a RGB+ LED strip.

However, I’d definitely buy one if someone else designed it.

#7832 4 years ago

Finished printing the alternate version of my building, and waiting for glue to set. Should have some pics of it in action later this afternoon.

IMG_3081.JPGIMG_3081.JPGIMG_3082.JPGIMG_3082.JPG
10
#7835 4 years ago

Here's my black version of the building installed. I think it came out pretty nice. Not quite sure which is my favorite now.
IMG_3083.JPGIMG_3083.JPGIMG_3084.JPGIMG_3084.JPGAFM.gifAFM.gif

#7838 4 years ago
Quoted from neverahighscore:

Have you had time to play your new game at all?

Very little, actually. I'm looking forward to getting all of these projects behind me, so that I can just enjoy playing.

#7840 4 years ago

For those who ordered the flipper LED kits from me, I wanted to let everyone know that I've had a couple of people so far who had some issues with the LEDs. Before I shipped, I tested the entire rigging on my own pin to ensure that everything worked correctly. However, it appears that the LED strips can be sensitive to over bending or the coupler they are connected to for some reason can be flaky and lose contact (could occur during shipping or installation). Please let me know if you have any issues via PM, and I'll walk you through a couple of minor troubleshooting steps. If we quickly determine there is an issue with your LED strips, I will gladly and promptly send you replacements and no additional cost.

I made this mod because I liked it and I know that others would too, so I want it to work correctly for everyone. I apologize to those of you who have experienced issues, but I'm happy to work with you to make it right.

#7845 4 years ago
Quoted from stavio:

He can be moody though

So moody, I'm thinking "she" (Martian women have pretty deep voices from what I can discern).

#7847 4 years ago
Quoted from okgrak:

Joining the club in a couple weeks. Looks like I need mr_tantrum's decal set for the drop target, his Eat at Eddy's mod, and I'm thinking about the Lermods under cabinet light synced to the speaker lights. I don't have any under-cabinet lighting on any of my machines, so this might make AMFr stick out bit.
mr_tantrum, with the green plastic protector set, did you need to install UV lighting anywhere else to make it pop, other than the trough?

The only UV lighting I have is the trough (and the flashers on my PinStadium). I did this mainly to make the flipper rubbers glow.

#7850 4 years ago
Quoted from Gogdog:

I don't think you need anything to make the plastic protectors "pop"..they are neon colored so any normal lights already from the GI will give you that "tron" like glow...

You will need low profile lock nuts, however. Otherwise you’ll never be able to secure them with the standard ones.

#7874 4 years ago
Quoted from whitey:

Anyone LE owners that want to part with s topper ?

I'd sell mine for $8000, and include a free AFMr LE pinball machine with it.

#7879 4 years ago
Quoted from maffewl:

LE - Limited Edition
SE - Special Edition
CE - Classic Edition

Edition designation was one of the most confusing things for me when I got into pinball, especially since different manufactures use different terms.

For AFMr editions, scroll to bottom of page to see side-by-side comparison: https://www.chicago-gaming.com/coinop/attack-from-mars

#7881 4 years ago
Quoted from Lethal_Inc:

Was wanting to protect the SOL kickout hole with some mylar instead of the cliffy. Would it suffice? Installing that cliffy looks to be a PITA.

Yes it was a PIA, but I believe it will be worth it in the long term. However, even the bigger pain was the center target Cliffy. Get them all and take an afternoon to do them all at once.

#7891 4 years ago
Quoted from maffewl:

I removed it and placed a cliffy. I tried to have both, but it was really tight and looking like a hammer was going to be needed. I seek to avoid that tool on a pinball, so I just went with the cliffy and put the mantis in the goodie bag.

ditto here

#7893 4 years ago
Quoted from EStroh:

I have a cliffy and mantis on mine. Tight fit, but I got it in.

I started that way, but I just couldn't make both work. No matter what I did to reshape the Mantis, the Cliffy would distort in shape and I couldn't get it to lay flat all the way around.

#7904 4 years ago

I've done dozens of custom cards for people, and am happy to design a set for you. I sell them for $10 a pair (includes postage), and they are printed on a photo quality printer using OEM inks and ultra gloss photo paper. I then coat them with a clear gloss vinyl for durability and longevity.

PM me with your specific ideas if you are interested, and I'm sure I can create something to your liking.

#7913 4 years ago
Quoted from wolftownjeff:

Neat idea.
I am still hoping someone can 3d print or make some clear nuts to replace the metal ones.

The issue is when 3D printing clear, it is very difficult to get a non-milky look without expensive PET with thin layers and even then it requires expensive finishing.

I've seen smaller clear bolts and nuts (you can google it), but nothing the size of a flipper button. Heck, they make clear flipper buttons, why not matching nuts?

#7916 4 years ago
Quoted from LTG:

Please go to - https://www.chicago-gaming.com/ - under Support open a ticket on the help desk.
It may go to me. I'll alert it to CGC.
As pintechev posted, don't change settings in the CGC menu until you get the updated chip in there.
Thank you.
LTG : )

When I got mine a couple of months ago, even as the second owner they asked me to get the chip through the original distributor (which I did).

#7926 4 years ago
Quoted from LTG:

I'd raise the playfield pitch for now to slow down flipper power.
LTG : )

Using gravity is cheating.

#7937 4 years ago
Quoted from Lethal_Inc:

How about CGC sending me a new one instead?

It’s not that hard to remove the translite. Just remove the entire box from the pin by unplugging it’s wiring harness from the circuit board then you can take it to a table or workbench to do the work.

#7939 4 years ago

I've recently had an issue with my drop target decal (the nuclear symbol one). I made this as a 1" x 1" decal since that is the exposed area of the target when in the up position. I noticed a small white spot in the lower left of mine which progressively got worse. What I figured out is that the paper was separating as the edge was getting caught on my Cliffy protector when it raised/lowered. To combat this, I created a new decal that is 1/8" taller so that the bottom of the decal sits below the slot when in the target is in the up position.

All of this to say that if you've purchased a target decal set from me and are experiencing the same issue, please PM me to let me know and I'll happily send you a new taller decal at no cost to you.

#7940 4 years ago

I’m thinking about swapping out my star posts with these along with Comet post LEDs.

Has anyone used either before, and what are thoughts on how it might look?

https://www.pinballlife.com/fluorescent-green-transluscent-star-post-1-116-tall.html

#7944 4 years ago
Quoted from dashv:

Finally installed my first two mods. Can you tell what they are?

Not with that glare from the playfield glass

Quoted from dashv:

Thinking of doing the under cab lighting next.

I went back and forth on this, but ended up splitting off my LED flipper button cabling and ran a light strip along the two sides and front edge of the underside of the cab. I actually really like it, especially when the room is dark.

#7946 4 years ago
Quoted from Gogdog:

I tried the GITD comet lights and posts...you can see those here ->
https://pinside.com/pinball/forum/topic/attack-from-mars-remake-afmr-owners-club/page/157#post-5317588
It was $36 plus shipping...and thankfully I was able to return them.
I do think green transparent with normal white light would look better though. They would be around the same price...$22 for the comet lights and $4.50 for the posts...but then you have to add in shipping so probably around the same price. Plus you have to make your own wiring harness so you need the parts for that (as you are aware...but they are easy to make).
For me the effect wasn't great enough to replace the GITD with something else so I went back to stock.

Thanks for the reply. I do remember seeing your post, and the GITD seemed underwhelming. However, I do think that either lighting the original red posts or the neon greens I linked to might be significantly more visually appealing. I'm thinking of buying white lights so that I can use them with either the red or green posts. I'll re-evaluate after Christmas and make a decision then.

#7947 4 years ago

I posted my high score last night of almost 17B, and had a blast doing it. I had A few different multi-balls (including strobe), destroyed Mars, and I was only a super jackpot short of ruling the universe (I need to figure out what that is and how to achieve it). Guess I'll just have to keep trying.

Definitely my favorite game of all time to play, and I absolutely love the theme, graphics, and call-outs. I even have my son walking around the house saying, "Get your hands off of me . . . all four of them!"

#7951 4 years ago
Quoted from pinballinreno:

One of the keys to RTU is to ignore the mothership and cities.
They will be taken care of almost accidentally during multiballs and the other activities.

I watched the video recently posted of some guy who really knew what he was doing. Part of me wants to try to follow his methodology, but the other part of me wants to keep things more fun/game like instead of business/task centered.

#7952 4 years ago

So I decided to pick up a couple of Big-O Jiggly Marians with Glowing Red LED Eyes from Mick's Pinball | https://www.mickspinball.com/big-o-jiggly-martian-add-on

I really wanted red eyes, but didn't want to take the time or effort of going the DIY path. The two Martians arrived today, so I thought I would share. First of all, I really like them. They are slightly larger than the standard ones, and they are more rubbery which gives them additional jiggle. As I did with my originals, I decided to color the muscles with a metallic silver Sharpie to match the LE topper (I also used a red Sharpie around the eyes).

By default, the Martians come fully wired and ready to install. You simply slide the original Martians off their metal brackets and slide these on. I did remove them so that I could feed the wiring down through an opening where the shaft that shakes them comes up from below the playfield (it helps to loosen the 4 screws on the bottom of the playfield holding the coil bracket while installing to enlarge the gap). Mick includes clip on wire connectors, but I wanted the installation to be a little less permanent. My solution was to create a wiring harness with a splitter and to solder on connectors to the end of each Martian cable using some Comet Matrix wiring/connectors. I also inserted a Matrix brightness controller to tone things down just a bit as the LEDs used are surprisingly bright. It all came together nicely, then I just used the pigtail to tap into existing GI bulb wiring.

I really like the red glow of the eyes and the jiggliness of the Martians. Now, I just need two more of them.
IMG_3158.JPGIMG_3158.JPGIMG_3156.JPGIMG_3156.JPGIMG_3157.JPGIMG_3157.JPGIMG_3159.JPGIMG_3159.JPGIMG_3160.JPGIMG_3160.JPGIMG_3162.JPGIMG_3162.JPG
2Martians.gif2Martians.gif

#7955 4 years ago
Quoted from TheMickster:

Regarding the way Mr_Tantrum wired them in, I thought about doing it that way, but I really do not understand what is wrong with just tapping into the existing wiring, nothing permanent and no cutting of the wires

In case I didn't state it clearly enough for those considering buying the red-eyed Martians, the kit includes everything you need to install them. Normally, I probably would have just used the included wire taps, but since I've added all my other lighting mods with my homemade wiring harnesses I decided to follow suit with these. My way is absolutely not required, and probably over the top for most.

I would also say then when inspecting Mick's Martians, I was very impressed with how they are wired. I can only imagine what it takes to work with the wiring that looks barely thicker than thread. The whole mod is excellent quality, constructed quite well, and I highly recommend them to anyone who wants to stare at red beady Martian eyes while blasting their flying saucers out of the sky.

#7960 4 years ago
Quoted from PinThrift:

I bought two of the unlit and two of the ones with the LED eyes. They look fantastic on the machine and I have gotten a lot of positive feedback from people who have come over to play pinball on my AFMr. Everyone liked the Glowing eyes as well as the increased Jiggly.
Before I bought the Martians from Mick, I did some looking around for other Martians with LED eyes. I was only able to find a couple of other options which were much more expensive. There was a set of 2 used ones for $180 or a regular sized Martian with LED eyes for $115 each. So, I didn't have an issue with the pricing. Also, as someone who does not have a ton of experience working on Pinball machines, I thought the installation process was pretty simple.
Apologies for the poor quality of the attached pictures.[quoted image][quoted image]

They're so cute!

#7991 4 years ago
Quoted from Aflacjack:

Got my Big O jiggly martians installed. Very easy to do. I went with 2 led lighted eyes and 2 normal ones. Thanks for a super cool mod. Saw it here[quoted image][quoted image][quoted image][quoted image][quoted image]

They look great!

#7992 4 years ago

So, here is my latest mod - fluorescent green star posts with LED post lights. I really like how they turned out, and the fluorescent green goes perfectly with he overall color scheme. The photos don't quite do things justice, but I did the best I could with a camera phone.

Not an exact quantity inventory (didn't count wires or splitters, but I can if anyone is interested), but here is what I used to accomplish this:
- 9 x fluorescent green star posts | https://www.pinballlife.com/fluorescent-green-transluscent-star-post-1-116-tall.html
- 8 x cool white Matrix star post lights: https://www.cometpinball.com/products/star-post-lights?variant=29411774201958
- multiple 2-way & 3-way Matrix splitters | https://www.cometpinball.com/products/matrix-splitter-wires
- multiple 6" & 12" Matrix extensions | https://www.cometpinball.com/products/matrix-extension-wires
- 1 x Matrix Brightness Adjuster (all posts run up to this single adjuster) | https://www.cometpinball.com/products/brightness-adjusters?variant=12493660618796
- 1 x my custom AFMr wiring harness | Mezel's version is here: https://mezelmods.com/collections/under20/products/4-pin-100-idc-assembly

Before: Red posts with Titan GITD ring
IMG_3175 (resized).JPGIMG_3175 (resized).JPG

After: Fluorescent green posts with Titan GITD ring
IMG_3176 (resized).JPGIMG_3176 (resized).JPG

Fluorescent green posts with post LEDs
IMG_3185 (resized).JPGIMG_3185 (resized).JPGIMG_3184 (resized).JPGIMG_3184 (resized).JPGIMG_3186 (resized).JPGIMG_3186 (resized).JPGIMG_3187 (resized).JPGIMG_3187 (resized).JPG

Lower playfield: Game off
IMG_3182 (resized).JPGIMG_3182 (resized).JPG

Lower playfield: Game on
IMG_3198 (resized).JPGIMG_3198 (resized).JPG

Ball eject post (I didn't light this one since it is out of player's view)
IMG_3188 (resized).JPGIMG_3188 (resized).JPG

#7994 4 years ago
Quoted from Gogdog:

Ok...those look good. A lot better than the UV lights and GITD star posts that I tried to do. And I didn't think about doing those other star posts on the side....(so 8 lights total)...nice job there.

Yeah, I really like them more after playing at night without ambient lighting. They were super bright before I put the brightness controller inline, but very nice brightness now.

#7995 4 years ago

Does anyone know if the coin reject button assemblies the HAPP versions like they use in Stern's? If so, I'm thinking about switching to green ones.

#7996 4 years ago

Just finished my custom reject button inserts. Similar to others, but I added the cow in the tractor beam. Happy to share, just PM me if you would like to have them. For those who have never replaced these, it is fairly simple once you figure out how.

I suggest printing the inserts on a thick nice paper (I used ultra gloss photo paper).

1) Turn off pin then open the coin door and push in one of the buttons.
2) You'll notice a "C" pin around the end of the metal shaft attached to the button - use needle nose pliers to pull off while holding the button from the front as the spring will pop it out (notice how the spring is oriented). Repeat for the second button.
3) The paper insert slides in from one end while the other end is partially open to catch it. Use a razor knife to push from the partially open end to where the paper insert slides out of the other end, and repeat for other button.
4) Pun the new paper inserts into the slot and orienting them so that the fully open slot is at the top. You may need to use a razor knife to push the insert all the way in.
5) Put a spring over the insert shaft (small end of the spring by the button and large end goes into the housing), orient correctly, then reseat button. While holding the button all the way in, use needle nose pliers to reseat the "C" pin and repeat for second insert.
6) Close the door, power on pin, and enjoy your new custom inserts!

AFMr Inserts (resized).jpgAFMr Inserts (resized).jpg

Pin Off
IMG_3190 (resized).JPGIMG_3190 (resized).JPG

Pin On
IMG_3191 (resized).JPGIMG_3191 (resized).JPG

#7997 4 years ago

Well, after installing two of the Mick's Pinball red-eyed Martians, I just had to complete the set. Received them today, did my typical silver coloring, and installed them onto the same circuit as the other two to ensure the same eye brightness (I have a brightness adjuster inline).

I think they really look great, and highly recommend them.
IMG_3192 (resized).JPGIMG_3192 (resized).JPGIMG_3193 (resized).JPGIMG_3193 (resized).JPGIMG_3194 (resized).JPGIMG_3194 (resized).JPGIMG_3195 (resized).JPGIMG_3195 (resized).JPG

#7998 4 years ago

At this point, I think I'm just about done with the mods once I make sure the green HAPP reject buttons are what I need for this game. I do have one other thing I would like to do, as I'm not particularly a fan of the backboard graphic. I think I'm going to go with the cityscape on the backboard, but need to figure out what all is involved to make this happen. Has anyone changed theirs, and if so would you mind sharing pics along with the procedure?

AFM_Backboard (resized).jpgAFM_Backboard (resized).jpg
#8000 4 years ago
Quoted from evh347:

The Big-O Jiggly Martians look cool, but I do not want to permanently connect them using wire taps. Mods should be able to be reversed.

Easily done, and I'm happy to walk you through process and let you know everything you will need to accomplish it if/when the time comes that you decide you want to move forward. Will add approximately $15-$25 to the project depending upon a couple of options.

#8002 4 years ago
Quoted from Kawydud:

I downloaded them all from pinsound, can email it to you if you like.

Or you can download them all yourself for free from here: http://pinsound-community.org/forum/index.php?/files/file/58-attack_from_mars_ost_mars_attacks_by_pinheadzip

You can use fre:ac to convert the ogg files to wav files quickly and easily: https://www.freac.org

Here is a transcript of all the callouts: http://hem.bredband.net/b257182/afmquotes.html

#8005 4 years ago
Quoted from Lethal_Inc:

I’m confused on how to get dirty pool. I have the saucer opened up and start a multiball, bash it until the next shot destroys it, drop target down, and try to cradle both balls. I shoot one ball up to destroy the saucer and when I try to shoot the second ball up before the bank target raises it just goes in the hole too. Once you destroy the saucer should the drop target raise or do I just have to hit the side targets so it ricochets and doesn’t drop in the hole with the first ball?

Just sounds like a timing issue with your shots to me. Personally, I've yet to achieve it.

"A useful trick while in multiball is to try and get a ball trapped behind the forcefield. Then when another ball hits the front of the forcefield the trapped ball will (usually) bounce straight up into the hole behind the drop target. This awards you the points for the next city and displays the words "Dirty Pool" on the DMD."

http://pinball.org/rules/attackfrommars3.html

#8006 4 years ago

With my new coin reject button inserts I wanted to brighten things up some (the OEM bulbs are a little dim to me). So, I put some 4 SMD Comets in, and wow what a difference. I was going to take a pic of old vs. new to post here so I went to pull one of the Comets out and nearly burned off my fingerprints. Only then did I realize that these are 12v bulbs and not the standard 6v ones.

Lesson learned | DO NOT PUT STANDARD LED BULBS IN THE COIN SLOTS!

I have a message into Comet to see what their brightest 12v wedge bulbs are, and next time I need to order anything I'll pick up a couple and see if they make a difference.
IMG_3199 (resized).JPGIMG_3199 (resized).JPG

#8007 4 years ago

Since my last posting of installing all 4 red-eyed Mick's Pinball Martians, I've had a few inquiries regarding exactly how I did it. This will be a little repetitive of some previous posts, but I hope to specify all parts needed and wiring technique that I utilized.

Here is parts list required for installation of both 2 and 4 Mick's Pinball red-eyed Martians. As a note, I recommend the brightness adjuster since by default the red eyes are blindingly bright (a good thing). The brightness adjuster even set to it's highest setting tones the brightness down perfectly for what I like.

COMMON
- You will need a soldering iron, solder, and some basic soldering skills to adapt the provided Marian wiring to a female Matrix connector
- 1 x 4 Pin .100 IDC Assembly | https://mezelmods.com/collections/under20/products/4-pin-100-idc-assembly
- 1 x Comet Matrix Brightness Adjuster | https://www.cometpinball.com/products/brightness-adjusters?variant=12493660618796
- Approximately 4" of 5/64" or similarly sized heat shrink tubing
- Approximately 2" of 5/32" or similarly sized heat shrink tubing

2 MARTIAN INSTALL
- 1 x Comet Matrix Female to Female Gender Changer (you will cut in half to make 2 connectors) | https://www.cometpinball.com/products/matrix-gender-connection?variant=12493662224428
- 1 x Comet Matrix 2-Way Splitter | https://www.cometpinball.com/products/matrix-splitter-wires?variant=12493662355500

4 MARTIAN INSTALL
- 2 x Comet Matrix Female to Female Gender Changer (you will cut in half to make 4 connectors) | https://www.cometpinball.com/products/matrix-gender-connection?variant=12493662224428
- 1 x Comet Matrix 2-Way Splitter | https://www.cometpinball.com/products/matrix-splitter-wires?variant=12493662355500
- 1 x Comet Matrix 3-Way Splitter | https://www.cometpinball.com/products/matrix-splitter-wires?variant=12493662388268

OPTIONAL IF YOU WANT TO COLOR LIKE MINE
- 1 x Silver Metallic Sharpie (coloring of exposed muscles) | https://www.amazon.com/Sharpie-39108PP-Metallic-Permanent-Blister/dp/B00009RAX4/ref=sr_1_6
- 1 x Red Sharpie (coloring around eyes) | https://www.amazon.com/Sharpie-Permanent-Markers-2-Pack-1765450/dp/B004YHU1KO/ref=sr_1_3

INSTALLATION PROCEDURE

1| If desired, use the Sharpie pens to color around the eyes red and the nails and exposed muscles silver.
IMG_3200 (resized).JPGIMG_3200 (resized).JPG

2| Strip the ends of the wires on each of the Martians about 1/4", twist each wire, and tin each with solder. Repeat the process for all Martians.

3| Cut the Comet Matrix Female-to-Female Gender changer in half with scissors, split the wires fully, strip the ends on each wire about 1/4", twist each wire, and tin with solder. Repeat the process for as many ends as Martians you will be installing.
IMG_3211 (resized).JPGIMG_3211 (resized).JPG

4| Place about 3/4" of the thinner heat shrink over each wire of a Martian, then about 1" of the larger heat shrink over BOTH red and black wires. Move the tubing up the wire so that it is not in the way when soldering.

5| Solder the Comet Matrix wires to the Martian wires (red to red, and black to black), and repeat for all Martians.

6| Move the smaller heat shrink tube over the solder joints of each wire one at a time and shrink using the heat from solder iron or heat gun. Then, move the larger heat shrink tube over both smaller ones and shrink, then repeat for all Martians. This completes all soldering and the Martians are ready to install.
martian (resized).jpgmartian (resized).jpg

7| Turn off game, remove glass, lift/rest playfield on lockbar support, remove all 4 balls, and fully lift playfield resting against backbox.

8| Loosen about half way (do not remove) the 4 screws on each of the brackets where you will be installing Martians
1 (resized).jpg1 (resized).jpg

9| Lower playfield and feed end of wiring through the opening where the shaft that the Martian is mounted to comes up through the playfield. Even with the bracket loosened the gap may still be too small for the white connector. If this is the case, using care you may remove the 2 leads from the connector by pulling them straight out one at a time. Make note of which pin goes into which hole. Feed the connector through, lifting the playfield if necessary to pull out all of the slack. If you removed the white connector, now re-insert the two wire leads back into the correct holes (look at another connector if you need to for proper orientation). If you like, zip tie the wire to the top of the shaft/rod that supports the Martian bracket.

10| Lift playfield again and rest against backbox. Then tighten all 4 screws on each of the brackets you previously loosened in order to feed the wires through.

11| Remove the connector to the GI light on the left side of the playfield and attach the .100 IDC Assembly harness (this is the bulb that is about 4" below the white PCB board at the leftmost edge of the playfield). Plug the end of the assembly onto the bulb and plug the power feed (the connector previously removed from the bulb) onto the z-connector of the assembly.
IMG_3203 (resized).JPGIMG_3203 (resized).JPG
IMG_3206 (resized).JPGIMG_3206 (resized).JPG

12| Plug the brightness controller onto the small white 2 wire end of the assembly harness.

-a| If installing 2 Martians, plug the 2-way splitter into the brightness controller, then plug each of the Martians into the 2-way splitter.

-b| If installing 4 Martians, plug the 3-way splitter into the brightness controller, plug each of the 2 lower/side Martians into the 2-way splitter, then plug the female end of the two way splitter into the 3-way splitter along with each of the upper/center Martians.
IMG_3208 (resized).JPGIMG_3208 (resized).JPG

13| Using the existing wiring harnesses, secure all wires as neatly as possible. Position the brightness controller so that it is accessible from the side when the playfield is lowered and resting on the lockbar support, then lower the playfield and rest on support.

14| Turn the pin on to see if all eyes are lit. Then use a small phillips screwdriver to rotate the screw on the brightness controller and set position to desired brightness. When set as desired, turn off pin.
pasted_image (resized).pngpasted_image (resized).png

15| Lower playfield, put balls back in, put glass on, install lockbar, power on pin, play a game and enjoy your new beady red-eyed Martians!
AFM (resized).jpgAFM (resized).jpg

#8010 4 years ago
Quoted from NoQuarters:

Extra Jiggly Martians - interesting. Extra Jiggly Women could be good too if there was a spot in the game for them. Ha Ha

I think The Sopranos pin has a spot for such a thing.

Not really something I'd have in my personal collection due to the non-family friendly theme. Recently, I was even approached by a Pinsider to see if I could come up with a replacement mod for the pole dancers. He really liked the game's theme, but thought the dancers would be a deal breaker for his family. Can't remember what I suggested, but I think his opportunity fell through so he moved on.
sop (resized).jpgsop (resized).jpg

#8011 4 years ago
Quoted from wolftownjeff:

Great write up!
Thank you so much for all you do for the AFM community.

Thanks. I don't really know if or how many other like what I do, but I figure if I go to the effort to figure something out then I might as well share with everyone so others can learn from my efforts.

#8018 4 years ago
Quoted from Lethal_Inc:

Anybody know where to get an AFM key fob?

I make double-sided AFM keychains: https://pinside.com/pinball/forum/topic/attack-from-mars-remake-afmr-owners-club/page/149#post-5234141

I also make the same type of keychains for any pin title - either my design or yours.

#8021 4 years ago
Quoted from Mr_Tantrum:

Does anyone know if the coin reject button assemblies the HAPP versions like they use in Stern's? If so, I'm thinking about switching to green ones.

Well, since nobody replied I took a gamble and ordered 2 green HEPP coin return button assemblies from PBL. I also ordered some 12V bulbs from Comet to replace the dim OEM ones in the coin door. Write up and pics to come when I receive everything.

#8026 4 years ago
Quoted from RussMyers:

If it's like the original AFM, there are two metal L brackets on the front of the backboard that attach it to the top of the playfield you have to unscrew and then you have to remove the screws from the bottom that go through the bottom of the playfield and up through the bottom edge of the back board and it comes off.
RM

I looked at it closely the other day, and it looks like 4 screws/bolts hold the backboard on (2 brackets with 2 screws each - lower left and lower right). The bad thing is that the brackets are on the topside of the playfield and the screws are inserted from the playfield side, so some major teardown has to occur to get to them from what I can tell.

Not sure if/when I'll take the time and effort to make the change.

#8027 4 years ago
Quoted from okgrak:

Looking forward to seeing your results. If they are not Happ and are the Williams type, you could always order the clear ones and use a green bulb.

They are definitely not the Williams type (I put clears on my Getaway, so I know what those look like). I don't own a Stern, but from what I recall seeing they are the same as those, so I'm 99% confident that the HAPPs are correct. I ordered both green and cool white 12V 8SMD bulbs to try to see what looks best with the green reject buttons. I'll be sure to post pics of both and old vs. new setup so others can see what everything looks like in case they want to do the same.

#8028 4 years ago

BTW, had several friends over for New Years Eve party (none of them pinball junkies), and AFM was a huge hit for all ages. This game just seems to draw people to it for a wide variety of reasons. Since I discovered AFM 3 or so years ago (I'm a relative pinball newbie), it has been my dream pin. I've been to TPF each of the last three years since I've been in the hobby, and each year I found myself playing AFM over and over and over. I'm so pleased and thankful that I actually get to own one myself and share it with friends and family.

#8032 4 years ago
Quoted from joseph5185:

Hey guys/gals,
Happy New Year!
QQ-
The holes where the flippers align should NOT be visible correct?
Currently, I can see them when playing and I feel like that wasn’t always the case.
I didn’t make any adjustments to the flippers when the machine arrived or ever so maybe they are just a touch loose?
Thanks!

I'm sure it depends on your viewing angle. However, if your flipper bats have moved a little over time then you can always adjust them back. While different people will tell you different ways to "properly" align flipper bats, there are two basic considerations:

1) Vertical Position | You need to ensure you have the proper gap set above the playfield. Here is a good explanation from vid: https://pinside.com/pinball/forum/topic/vids-guide-to-upgradingrebuilding-flippers#post-284684

2) Angle | What many say is "proper" is to loosen the bat shaft, then place a toothpick between the rubber and plastic on the bottom edge of the flipper bat, then slide the toothpick into the alignment hole, then tighten shaft. I've also seen others use straight edges to align with the ball return guide. Others say that some games should have alternate droopy alignments, or that they bats should be in the position they were when the game was delivered. To each their own, but I choose to use the holes for alignment using the toothpick method.

I also don't like when my bats are not symmetrically aligned. What I mean by this is after you use your preferred method of alignment then hold both bats by hand into their highest position. The tips of the bats should reach the same position up the playfield (i.e. one doesn't extend higher than the other), and you can even put a straight edge across the tips to check that they are level. Not sure if this is "proper" or if some games are designed to have asymmetrical positioning, but just the way I like to do it.

#8035 4 years ago

So, I received my Comet 12v 8SMD bulbs today (cool white & green), and even though I don't have my new green coin rejects yet I wanted to show the results. For reference, here are the bulbs I purchased: https://www.cometpinball.com/products/mini-8smd?variant=29411773907046

At first, I plugged one in and could immediately tell with the coin door open that they are significantly brighter than the OEM bulbs. However, when I closed the coin door I was surprisingly disappointed. I could barely tell the difference between the OEM and the Comet. I opened the door again to make sure my eyes weren't deceiving me, and the Comet is indeed brighter. Then I realized that the default mounting position of the bulb is rather far away and also has to go through the translucent red trigger piece. Since the plastic bulb mounts just clip onto the metal fin, I decided to relocate the mount and orient the bulbs so that they point down onto the top of the return button housing. This made all the difference in the world, and now the Comet bulb shines (pun intended) compared to the original.

Original test (OEM on left, Comet on right) - right look slightly brighter
IMG_3243.JPGIMG_3243.JPG

Repositioning of bulbs (OEM on left light when looking from outside of door, Comet on right)
IMG_3246.JPGIMG_3246.JPG

View from outside of coin door with bulbs mounted in new position (OEM on left, Comet on right)
IMG_3247.JPGIMG_3247.JPG

#8039 4 years ago
Quoted from joseph5185:

I still need to order cliffys for my game. Under 500 plays currently. How many cliffys does this game have and how long did it take you to install them?

Definitely set aside 2-3 hours for the project of installing Cliffy's on this pin. While you can add additional options, the standard AFMr is $110 and includes the following:

- Mothership
- 3 bank target
- 2 piece SOL scoop
- outhole drain
- diverter lock edge
- shooter eject

See top of page here for details: http://www.passionforpinball.com/AFM-thin/afm_thin.htm

#8045 4 years ago
Quoted from Red_Devils:

mr_tantrum Would you come and do mine please I have the set but after looking through the thread at all the install instructions I decided it's just out of my scope for a noob like me.

Happily if you were in the neighborhood. Not a difficult job, just takes some patience. I suggest taking pics of all the areas first and Understand what is required. Take it easy and do the simple ones first, and maybe not even do them all in one session. Protect the playfield from tools and parts you will be using, and make sure you have really good lighting.

#8046 4 years ago

Well, I received my new coin reject assemblies from PBL today, but unfortunately they aren't green. The ones I received are clearly teal, but they don't even show teal on their website as an option. PBL is closed for the day, but I'm sure I'll get it taken care of soon enough. Unfortunately, I won't be able to post pics with green coin reject buttons for now.

UPDATE: Well bummer. I just was informed that the green have been discontinued and are no longer available according to PBL. I also just confirmed the same with Marco's. Even though the pics on these sites reflect a true green, the newer color is actually more of a teal and just isn't what I was looking for as a match to AFM.

I can't seem to find clear ones either that I could use with green bulbs, so looks like I'm stuck with the amber/orange. I guess I could buy red ones, but not really worth it to me since I'm more into the green for this pin at this time.

Discontinued old green (what is shown on most sites)
green (resized).jpggreen (resized).jpg

New green/teal (what everyone is actually selling)
teal (resized).jpgteal (resized).jpg

#8049 4 years ago

So, here is the latest with my coin reject saga. I've come to realize that pure green rejects just don't exist anymore, and the closest thing is the teal color which they call "green". I was all ready to send them back, but as a last thought I decided to see what they looked like when lit. When lit with a white bulb, the color is still clearly teal. However, when lit with a green bulb they look very green. I decided that I like it enough to keep them knowing that when the pin is on they will show green, but when off they will be teal.

So, here is what I ended up with:
2 x HAPP green coin reject assemblies #42-0517-03 | you can get from Pinball Life or Marco Specialties
2 x Come 8SMD Minis 12v bulbs | https://www.cometpinball.com/products/mini-8smd?variant=12387014967340

Pin off with "green" insert on left
IMG_3253 (resized).JPGIMG_3253 (resized).JPG

Pin on with "green" insert on left and cool white LEDs
IMG_3254 (resized).JPGIMG_3254 (resized).JPG

Pin on with "green" insert on left and green LEDs
IMG_3261 (resized).JPGIMG_3261 (resized).JPGIMG_3258 (resized).JPGIMG_3258 (resized).JPG

Pin off with both "green" inserts installed

IMG_3263 (resized).JPGIMG_3263 (resized).JPG
#8050 4 years ago

So I messed something up somehow when I put everything back together on the coin door. There was nothing electrical done when replacing the coin return buttons, but for some reason my bulbs will barely glow now. I tested both with the original bulbs and the Comets and they both do the same thing. Instead of being nice and bright when you turn the pin on, they bulbs barely illuminate (you cannot tell with the coin door closed but with it open you can see that the bulbs have faint light).

I've switched out bulbs, wiggled wires, checked connections, repowered the pin, but I still can't get them to illuminate correctly. Does anyone have any idea what my issue may be? The only thing that I can tell is impacted is the two coin door bulbs.

#8052 4 years ago
Quoted from LTG:

I'd measure power to the bulb socket. Get an idea of what is wrong at least. Power, socket, or LED.
LTG : )

That sounds like a great job for my new Christmas present to myself multi-meter. I'll take some readings and post back.

That feed should be 12v AC, correct?

#8055 4 years ago
Quoted from okgrak:

You didn't have a multimeter??? I'm shocked.

I had a cheap Harbor Freight one that bit the dust. Wanted to go with something that seemed more durable and reliable. My biggest issue was always knowing where to insert the leads when I changed settings, but my new one actually flashes the correct ports when you change settings which is awesome for electrical novices like me.

Here is the meter I purchased: https://www.amazon.com/gp/product/B07SHLS639/ref=ppx_yo_dt_b_asin_title_o00_s00

Here is the add-on cable set I bought to go with it: https://www.amazon.com/gp/product/B07SD3L9HR/ref=ppx_yo_dt_b_asin_title_o00_s00

Along with the case to hold everything: https://www.amazon.com/gp/product/B0823MGSJW/ref=ppx_yo_dt_b_asin_title_o01_s00

And here is a pic of my old one. It did the job while it lasted, but I'm loving my new one.
63759_W3 (resized).jpg63759_W3 (resized).jpg

#8056 4 years ago
Quoted from LTG:

I'd measure power to the bulb socket. Get an idea of what is wrong at least. Power, socket, or LED.
LTG : )

I'm only getting 4.2V to the sockets. I measured at both the sockets at the leads/wires that are plugged into the sockets.

Quoted from okgrak:

Does opening the coin door have any effect on the voltage of those sockets? I know it disables high voltage, but maybe those 12V feeds are different from the regular GI. Does the rest of the machine work properly?

Everything else appears to be working properly. Also, prior to the issue the LEDs were always at full brightness with the door opened or closed.

#8058 4 years ago
Quoted from LTG:

DC
LTG : )

Yeah, I figured that out when my meter reading kept bouncing all over the place.

#8060 4 years ago
Quoted from LTG:

Follow connections back to the source, with a meter, see where it drops. Weak connection, or power supply.
LTG : )

The two wires are yellow and yellow/white. I've tested them at the connector in the cab, and I still get the 4.2v. Tracing them to the backbox, it look like the two wires are on J3 pins 12 & 13 the AFM-SUB-CONTRLR. If I disconnect and reconnect the J3 connector then turn the pin on, the coin door lights flash full power but then go dim again. About to put a meter on the board to see what happens.

#8061 4 years ago
Quoted from LTG:

Follow connections back to the source, with a meter, see where it drops. Weak connection, or power supply.
LTG : )

Okay, I decided to disconnect the connector inside the front left of the cabinet that includes the coin door lamp wires and runs to the back of the pin, up the backbox, and onto J3. When doing this, turning the pin on, and taking a reading at the connector, I'm receiving a solid 12v. When I plug the connector from that includes the door lamps back in, voltage goes back down to 4.2. I'm guessing there may be a short in the wiring somewhere between the lamp sockets and that connector or in a socket, so those are my next things to evaluate.

#8063 4 years ago
Quoted from maffewl:

May want to test the bulbs themselves for a short. Ask me how I know.

Even with no bulbs installed, I’m still getting 4.2v.

Okay, how do you know?

#8065 4 years ago
Quoted from LTG:

Follow connections back to the source, with a meter, see where it drops. Weak connection, or power supply.
LTG : )

I am completely and utterly confused.

- I've tested with 6 different bulbs (2 original and 4 Comets) and get the same results

- I've tested both yellow and yellow/white for continuity, and all is good
- If I remove both bulbs, turn the pin on, and take a reading at both sockets or at the connector for the wiring harness, I get 12v
- If I add one or two bulbs, turn the pin on, they are dim, take a reading at the connector for the wiring harness, I get sub 11v
- After failure, I turn off pin, remove bulbs, take a reading, I usually get sub 11v and sometimes 12v
- If after low reading, I turn off the pin, remove J3 and reseat J3, turn pin on, take a reading, I get 12v
- If I turn the pin off after than insert 1 or 2 bulbs, turn the pin on, I get a bright flash then dim LEDs, take a reading, I get sub 11v

Ultimately, it seems like when the circuit is completed with a bulb it kills the voltage. I just replaced the sub power board just a few weeks ago, so really hoping its not that again. Guess I need to open a ticket.

#8070 4 years ago
Quoted from LTG:

I advanced it to the engineer.
LTG : )

Thanks. I did submit a ticket with details, and you can PM me if you need name, email, reference number, etc. (or do you have access to the CGC support system?)

#8087 4 years ago
Quoted from RussMyers:

Put a voltmeter on the bulb sockets; should be about 12v. I bet you're getting low voltage on them.
RM

Not the issue, as I'm working with CGC support. No conclusions yet, but possibly a bad board (just put a new one is less than 2 months ago). Basically, voltages are all correct until I insert a bulb in either coin door socket, at which point the voltage drops significantly at the coin door lamp only.

#8088 4 years ago

I thought I would show off my latest mod . . . do you see it? Here are pics with normal lighting and with my PinStadium UV lit.

It cost a whopping $0.70 at PBL for the fluorescent green post to replace the OEM red one: https://www.pinballlife.com/data-eastsegastern-narrow-plastic-post-1-116-tall.html

Note that the holes in the post are for #6 screws, so I did have to drill it out to fit the larger screw used in the game.
IMG_3292.JPGIMG_3292.JPGIMG_3294.JPGIMG_3294.JPG

#8090 4 years ago
Quoted from maffewl:

mr_tantrum You should play your game at some point. It’s quite fun.

Indeed. Had my top score game this week, and my second best game (was 2 objectives away from ruling the universe).

Also, I just can’t help myself from customizing things to my liking. A couple of years ago when I bought my 370z I went through the same thing. It was the car I’ve always wanted, but still had to personalize it. One weekend when I was out in the garage working on it, my wife came out and asked what I was doing. I told her, and her response was, “ It’s not a pinball machine, you know?!”

#8091 4 years ago

ALTERNATE COIN DOOR REJECT LED BULB ALERT - DO NOT MAKE THE SAME MISTAKE I DID!

Okay, since I was the one that started the idea of new rejects and brighter LEDs, I felt obligated to let everyone know what I learned. If you've read my recent posts on the topic, I purchased some brighter 12V LED bulbs to replace the OEM ones in the coin door to illuminate my new "green" coin reject buttons. Soon after, my coin door bulbs were not illuminating properly, and even putting the old ones back in still resulted in ultra dim lighting. After working with CGC support, it has been determined that the newer bulbs drew too much current and caused a failure on the PIN-PCB-CONTRL2 board. Even though they were still 12V LED bulbs, the extra current required to power them somehow resulted in a component failure on the board that controls the 12V power to the coin door.

As a result of using these "non-approved" LEDs I've voided my warranty on my 60 day old board, and I am solely responsible for the cost to replace the board. Expensive lesson learned, and I don't want anyone else to follow my lead on this one. I'm accustomed to doing all sorts of lighting mods on my older games, so I never guessed this would have been an issue. Apparently, the new technology is less adaptable to these types of things and designed to more specific tolerances.

#8093 4 years ago
Quoted from TheMickster:

Wow, that is a disappointment,,,are their tolerances that tight and specific to cause this? How much, and where can you get the replacement PIN-PCB-CONTRL2 board, Planetary or direct from CGC?
Sorry to hear this, so you can never change those specific LED 12V bulbs at that coin door location? Doesn't seem right,,,,
Thanks for the update..

Planetary sells them, but I'm hoping that CGC can offer a more affordable out of warranty replacement option (still awaiting finalization for such).

#8099 4 years ago
Quoted from Gogdog:

That sounds like bull crap if they are voiding your warranty for that. You bought normal 12V led bulbs from a reputable pinball parts provider. Can we not change any bulb in any pinball machine as it will void warranties? The tolerances on amperage on the board should not have been so tight that you can't put in a different, reasonable led bulb without blowing a circuit board. That sounds like a design failure...not user error.

That was my first reaction but after I calmed down and thought about it, I was the one who changed something to be out of spec by introducing non-OEM parts. As frustrating as it might be, I took the risk and I am responsible by the letter of the law. Just wanted to share my story not as a complaint or pity party, rather, I didn't want my idea/action to cause the same problem for anyone else.

#8101 4 years ago
Quoted from okgrak:

Is anything else effected by this? Seems like an expensive fix just to boost some dim coin slot leds.

Nope, everything else about the game is unaffected. If you look at the schematic there is a 12V circuit dedicated to just the 2 coin door LEDs (there are other 12V that feed starter LED, launch LED, etc.)

I agree that it was an expensive mistake, and I have debated whether or not to leave it "as is", to try to repair the board myself, to route a 12V feed directly from the power supply, or to replace the board. I've decided to replace the board to return the game back to fully working order, and consider it a lesson learned.

I'm no electrician, but the way it was explained to me is that the issue was caused by drawing too much current on the coin door circuit causing some component on the control board to fail.

#8105 4 years ago
Quoted from Kawydud:

Can you post a picture of the board?

The PIN-PCB-CONTRL2 board is the one in the backbox to the left of the larger board. J3 is where the 12V yellow and the yellow/white that goes to the coin door are connected.
pasted_image (resized).pngpasted_image (resized).png

#8115 4 years ago
Quoted from okgrak:

That rubber is an age old question that has not been definitively answered, but the best answer I’ve heard is that one can use it to fasten down that arm during transport.
When you raise the playfield, use that bar to secure it in position by seating the round part into the hook shaped end of the rail mounted to the underside of the playfield.

Many/most will say to never use the support bar since it twists/torques the playfield. Would be ideal if the manufactures provided bars on both sides to support the playfield. Whenever I need inside I just rotate mine all the way up and rest it against the backbox, but you definitely must remember to remove all of the balls before doing such. For quick jobs, I just yell for my son to come to the gameroom and I make him hold it up.

#8118 4 years ago
Quoted from pacman11:

Alright should a buy a remake classic or a nice original? About same price.. Any thoughts?

I struggled with the same decision just a few months ago. I've always wanted an AFM, but ones in nice condition can only be found at a premium. When the opportunity came for me to purchase a pre-owned AFMr LE, at first I was dismissive. I then did tons of reading and research, and came to the decision that for similar money I'd rather have the newer technology. After now having the pin and comparing it to my two early 90's games (Williams Getaway HS2 & DE Jurassic Park), I'm so glad that I chose the AFMr over the original. The newer technology is solid, the sound and video are superior, the topper on the LE is really cool, the cleanliness of the cabinet and circuitry are a welcome plus verses my older games, the vibrancy of the cabinet and playfield artwork are superior, CGC customer support is great even for out of warranty games, and I could go on.

There are those who will always prefer the original from a collector's perspective, but if you are one who just loves the title, wants an excellent condition game with newer technology and features, and just wants to play without having to continually fix/repair/maintain then the AFMr is for you.

#8122 4 years ago
Quoted from pacman11:

Thanks, yeah most of my collection is Bally/Williams stuff just because I prefer the feel of these era games. I am just not a big fan of newer stern games just wondered if it feels that way.

I've played several games on a very nicely restored AFM, and I would say that the feel of the game is nearly identical from my memory. I bet if you put them side-by-side and rotated play you might or might not notice a few minor differences in overall feel assuming both games were identically dialed-in. Of course the remake has all new parts, LEDs, etc. However, several of the playfield components are identical and interchangeable with the original such as the plastics, posts, etc.

#8124 4 years ago
Quoted from okgrak:

I believe that claiming the original "shoots better" or is more "solid" is rubbish.

Definitely more the player that the game. I've often argued that I could hand a crooked twig to a professional pool player and he would wipe the table with me using a $1,000 Balabushka cue. Similarly, if I switch my 20 year old Ping i3 knock offs with what's in Tiger's bag and we played a round he would still best me by 30+ strokes.

Just my way of saying that an amateur is an amateur regardless of the tools and a true professional can adapt and still perform at the highest level. However, us amateurs like to think that the tools make us significantly better (a multitude of businesses make billions knowing we think this way). If they don't, then well . . . it can't be our fault - must be bad equipment.

#8129 4 years ago
Quoted from maffewl:

ltg I'm looking to install wifi plugs (Alexa) for my pinball machines to easily turn them all on/off at the same time. Does this hurt the newer games such as AFMr that use a computer type system, or is it akin to moving the power switch down the cord?

I just bought an inexpensive version for my 3 pins, and it works great. I'm not using Alexa, but phone/tablet app (this model does support Alexa/Google Home). You can individually control and even schedule the 4 AC outlets, but all 4 USB are treated as a single outlet (i.e. they are either all on or all off). USB doesn't really matter for me, and I didn't need one with individual external controls since it is behind my pins out of reach.

https://www.amazon.com/gp/product/B074CJYPZV/ref=ppx_yo_dt_b_asin_title_o03_s00

#8135 4 years ago

Well, my quest to replace the orange coin rejects with green to match my green LE accents is finally over. I just received the replacement board, plugged everything back in, and voila - I have coin door LED's once more (using the original bulbs, of course). Now, how do I make them look green instead of teal (the color of the button plastic)? I came up with the idea of designing LED covers for 3D printing. I tried 3 different green filaments, but in the end "green apple" did the trick.

Here are the covers.
IMG_3324 (resized).JPGIMG_3324 (resized).JPG

Here they are installed (note how I repositioned the bulb mounts for maximum brightness).
IMG_3322 (resized).JPGIMG_3322 (resized).JPG
IMG_3321 (resized).JPGIMG_3321 (resized).JPG

Here is a look with left LED + bulb cover and the right LED w/o bulb cover.
IMG_3320 (resized).JPGIMG_3320 (resized).JPG

And finally, the end result.
IMG_3323 (resized).JPGIMG_3323 (resized).JPG

#8137 4 years ago
Quoted from pocketscience:

I know they're simple but can you share the STL? Upload to thingiverse maybe?

Here is the Thingiverse link: https://www.thingiverse.com/thing:4121647

Print at .2mm (higher resolution is not necessary). I experimented with a few different designs, but what worked best is where the face is .4mm thick and the wall is .8mm (2 layers on my .4mm nozzle). They just friction fit over the bulb.

If anyone would like a pair but can’t print them yourself, I’m happy to mail them if you’ll cover postage cost (probably around $4 for US shipping).

Here is the filament I used: https://www.amazon.com/3D-Solutech-Filament-Dimensional-Accuracy/dp/B00ME76OHA/ref=sr_1_3

And here are the coin rejects (they are really teal, not green like the picture): https://www.marcospecialties.com/pinball-parts/42-0517-03

Inserts are attached.
40DBCCBF-E230-42AF-9DB3-D23DC254FD3D.jpeg40DBCCBF-E230-42AF-9DB3-D23DC254FD3D.jpeg

#8141 4 years ago

So after upgrading my 4 Martians to Mick's Big-O Jiggly ones (https://www.mickspinball.com/big-o-jiggly-martian-add-on), I wondered what I was going to do with the originals (and the extra jiggly one I have). Up until now I just had them hidden in the coin box inside the cabinet. However, I wanted a way to display them so I came up with a 3D printed stand. The stand works perfectly with the originals and Mick's, allows the Martian to be suspended in the air, and lets you easily display the green creatures. So, if you have extra Martians laying around you want to display, then consider purchasing some of my stands.

I designed two different versions: one where the Martian is completely upright and the other where it leans forward.

Photos show stand printed in "clear", but I have nearly 20 different colors to choose from. Price is $10 for 1 stand (includes US shipping) and $5 more for each additional stand (e.g. $15 for 2, $20, for 3, $25 for 4). Please PM me if interested in purchasing.
IMG_3349 (resized).JPGIMG_3349 (resized).JPGIMG_3348 (resized).JPGIMG_3348 (resized).JPGIMG_3346 (resized).JPGIMG_3346 (resized).JPGIMG_3347 (resized).JPGIMG_3347 (resized).JPG

IMG_3352 (resized).JPGIMG_3352 (resized).JPGIMG_3351 (resized).JPGIMG_3351 (resized).JPGIMG_3350 (resized).JPGIMG_3350 (resized).JPG
#8147 4 years ago
Quoted from jrh7:

Does anyone have a solution or suggestion to mute the bright light shining through the legs of the top left martian?

Can’t say that I ever noticed it. Can you post a pic? Does it depend on your viewing angle?

#8151 4 years ago
Quoted from jrh7:

Does anyone have a solution or suggestion to mute the bright light shining through the legs of the top left martian?

Okay, I'm barely 6'3" and have never noticed it until now. If I stand at my normal position (fairly close to the pin and upright) then the light is blocked. However, if I move back slightly or bend over slightly, the light is blinding. Not sure how much shorter you would need to be for it not to be an issue, but I'm guessing that anyone plus or minus a few inches from 6' tall would have the issue.

My normal viewing angle.
IMG_3358 (resized).JPGIMG_3358 (resized).JPG

Slightly back from the pin and/or slightly leaning over.
IMG_3357 (resized).JPGIMG_3357 (resized).JPG

#8159 4 years ago
Quoted from LargemouthAss:

Joined the club yesterday! Bought an SE and brought it home with my daughter! Loving it so far!![quoted image][quoted image]

Congrats, and welcome to the club!

#8169 4 years ago
Quoted from LTG:

.1
LTG : )

I was going to type the same response, but didn’t want people thinking I was a smart@$$ (not saying you are, of course).

#8174 4 years ago
Quoted from Lethal_Inc:

Who sells the GI lamps for these remakes and what are they called? I think I’d like to see what cool white GI looks like instead of the warm white.

They were originally made by Nifty that seems to be defunct (they passed their business to Comet, but Comet does not make/offer these types of bulbs - I've spoken to them directly about it). Back then they had both cool and warm white, but those of us late to the party missed out.

https://pinside.com/pinball/forum/topic/attack-from-mars-remake-afmr-owners-club/page/2#post-3861379

#8177 4 years ago
Quoted from Lethal_Inc:

Well that’s a bummer. I thing cool white would look better

Agreed. One of the reason I decided to buy Pinstadium lights for this pin which I have set to a cooler white.

#8190 4 years ago
Quoted from Stuieb84:

Apologies if this has been answered before, as I'm new to this thread: how tall is the LE with topper installed. I'm just checking to see if it fits in the location I want to put it

I just measured mine, and it is exactly 84" to the top of the topper backboard. Additionally, the Martian does bounce up a little, so I would say absolute minimum ceiling height should be 85" just to be safe.

#8192 4 years ago
Quoted from Monk:

Joined the club this weekend. I typically would go for the classic/pro model of a game, but was fortunate enough to find a SE for a reasonable price close by so I jumped on it. I knew I’d like the game, but the extras on the SE are blowing me away. Very pleasantly surprised and as with all the remakes, the game feels so solid. Extremely happy with the purchase.[quoted image]

Welcome to the club!

#8205 4 years ago
Quoted from Flynnyfalcon:

Woohoo... Joined the club today! It's being pin-sat for a week or two until I can make some space but damn it's pretty. And an absolute blast to play![quoted image][quoted image][quoted image]

Awesome!

#8216 4 years ago
Quoted from freegame450:

I have owned my AFMrLE for two years, and today is the first time that I got the cow attack video mode.
Does anybody know what the criteria is to start the cow attack video mode?
I do normally hit the launch button rapidly after a cow appears on a big old beam ramp shot…....Just because I like to hear the cow sound repeatedly. Thinking this is tied into the cow video mode, but not sure.

I suggest you read this: http://pinball.org/rules/attackfrommars.html

...There is also a way to turn the flying saucers into cows! To do it you have to get the cow off of the big-o-beam and the tractor beam and while it is showing the animation of the cow hit the launch button (you will hear a strange noise if you do it right). If you get video mode after doing this it will change video mode into a sort of "Attack From the Pasture!"

1 week later
#8249 4 years ago
Quoted from okgrak:

Here is an inexpensive mod that I’m really happy with the results. I ordered a metal glass channel from Mantis Pinball and had robertstone0407 powdercoat it to match the le color scheme.[quoted image][quoted image]

I love it! I'm Martian green with envy.

#8255 4 years ago

Wow, the backboard was a beast to remove. I sincerely hope I can figure out where all of the nuts, bolts, and brackets go to put it all back together.

I just finished printing the vinyl (doing it in two pages since you won't be able to see the seem), now I need to laminate, cut, and apply - wish me luck.
IMG_3459.JPGIMG_3459.JPGIMG_3460.JPGIMG_3460.JPG

Just finished applying the decals, and board is finished. Tomorrow is the re-install.

IMG_3461.JPGIMG_3461.JPG
#8258 4 years ago

I got it all put back together, and I really like the results of the new backboard graphic.

IMG_3468.JPGIMG_3468.JPGIMG_3467.JPGIMG_3467.JPGIMG_3466.JPGIMG_3466.JPG
#8261 4 years ago
Quoted from Da-Shaker:

Nice work, can't wait to see the finished product

Quoted from Red_Devils:

As usual you do fantastic work, nice job!

Thanks. I'm just glad I figured out where all the brackets, screws, and nuts went when I was putting it back together. I made the mistake of not taking any photos, but the more I started tearing things apart, I just kept having to remove stuff to get to where I needed.

BTW, if anyone else decides to undertake such an adventure, I'm happy to share what I learned as far as the removal process goes. The main place I messed up is not realizing there are 5 screws coming up from the bottom of the playfield to secure the backboard in addition to the left and right brackets accessible from the top. I had everything broken down with all the hardware laying on a towel in the playfield when I decided to feel underneath for screw holes (which I found) when the board wouldn't budge after I released the two brackets. I had to carefully relocate all of the parts on the towel and gently rock the playfield up making sure none of the stuff hanging loose caused any damage. If I had to do it again, I would obviously remove these 5 screws from the underside first, do all the work, then replace the 5 screws at the finish.

#8266 4 years ago
Quoted from gjm:

The speaker panel is tightly installed, not loose. Probably not much they can do with it but should I report it to my distributor anyway?
Anyone else have this "gap" between their speaker panel and the head? This is my first "NIB" pin. It is an SE model.
I'm a Gottlieb EM, System one guy so go easy on me
Besides ordering the Cliffies, any other things I should do for protecting the playfield?
Thanks.[quoted image][quoted image]

Yes, there is a gap, so you just need to manually center the panel.

Also, if you have rattle during game play, here is my solution: https://pinside.com/pinball/forum/topic/attack-from-mars-remake-afmr-owners-club/page/151#post-5253223

Promoted items from Pinside Marketplace and Pinside Shops!
$ 119.99
Cabinet - (Alt) Translites
FlyLand Designs
 
$ 12.00
Playfield - Decals
Metal-Mods
 
$ 15.00
Cabinet Parts
Mödley Crüe
 
11,500 (Firm)
Machine - For Sale
Idaho Falls, ID
$ 79.00
$ 219.00
Gameroom - Decorations
Lit Frames
 
$ 200.00
Playfield - Toys/Add-ons
Horror Mods
 
From: $ 15.00
Cabinet - Other
UpKick Pinball
 
12,000
Machine - For Sale
San Diego, CA
$ 17.50
Cabinet - Other
Rocket City Pinball
 
$ 1.29
Playfield - Toys/Add-ons
Daddio's 3D Printed Mods
 
5,400 (OBO)
$ 399.00
Cabinet - Decals
Mircoplayfields
 
$ 30.00
Playfield - Other
YouBentMyWookie
 
$ 40.00
Gameroom - Decorations
The Flipper Room
 
$ 35.00
Cabinet - Other
Rocket City Pinball
 
$ 44.95
Playfield - Toys/Add-ons
PinBoss Mods
 
From: $ 20.00
Various Novelties
Pinball Photos LLC
 
$ 16.95
Playfield - Toys/Add-ons
ULEKstore
 
$ 249.99
Playfield - Toys/Add-ons
PinballGeek
 
$ 10.00
Playfield - Protection
UpKick Pinball
 
$ 39.50
Cabinet - Sound/Speakers
Pinball Haus
 
$ 15.00
Cabinet - Sound/Speakers
Gweem's Mods
 
From: $ 33.00
Gameroom - Decorations
Rocket City Pinball
 
Hey modders!
Your shop name here
567 posts in this topic match your search for posts by Mr_Tantrum. You are on page 1 of 3.

You're currently viewing posts by Pinsider Mr_Tantrum.
Click here to go back to viewing the entire thread.

Reply

Wanna join the discussion? Please sign in to reply to this topic.

Hey there! Welcome to Pinside!

Donate to Pinside

Great to see you're enjoying Pinside! Did you know Pinside is able to run without any 3rd-party banners or ads, thanks to the support from our visitors? Please consider a donation to Pinside and get anext to your username to show for it! Or better yet, subscribe to Pinside+!


This page was printed from https://pinside.com/pinball/forum/topic/attack-from-mars-remake-afmr-owners-club?tu=Mr_Tantrum and we tried optimising it for printing. Some page elements may have been deliberately hidden.

Scan the QR code on the left to jump to the URL this document was printed from.