(Topic ID: 257696)

Addams Family - Scratch Build?

By Shredder565

4 years ago


Topic Heartbeat

Topic Stats

You

Linked Games

Topic poll

“This project is”

  • Ambitious 117 votes
    42%
  • insane 135 votes
    48%
  • will be undone by a official remake in a few months..:) 27 votes
    10%

(279 votes)

Topic Gallery

View topic image gallery

20240418_151220 (resized).jpg
20240418_151930 (resized).jpg
20240418_142010 (resized).jpg
438922685_10161016172280211_6004500180515248965_n (resized).jpg
438935641_10161016172310211_884505193556236161_n (resized).jpg
439014279_10161016172265211_7954450884413445341_n (resized).jpg
20240418_131921 (1) (resized).jpg
20240418_131941 (resized).jpg
20240418_131950 (resized).jpg
20240418_131748 (resized).jpg
20240418_132024 (resized).jpg
20240418_125859 (resized).jpg
20240418_130201 (resized).jpg
20240418_121801 (resized).jpg
20240418_121545 (resized).jpg
20240418_121351 (resized).jpg
There are 5,458 posts in this topic. You are on page 31 of 110.
#1501 3 years ago
Quoted from Shredder565:

ordered and ready.
I think it might be easier to find a piece of wood the exact size and dimensions of the playfield so I don't have to take things off to make it easier to install properly. then I'll just put the real thing in.

It would make a good test, but I'm not sure it's really necessary to go to the trouble. The step where you install the playfield is actually pretty easy, in that there aren't any fasteners involved. The fasteners are all in the prep steps, with the playfield out of the cab: you attach the pivot nuts to the cabinet walls, and you separately attach the 01-8726 brackets to the underside of the playfield. The playfield then drops in simply by sliding the brackets onto the pivot nuts. It's designed specifically so that you can move the playfield in and out of the cab with the playfield populated.

#1502 3 years ago
Quoted from mjr:

It would make a good test, but I'm not sure it's really necessary to go to the trouble. The step where you install the playfield is actually pretty easy, in that there aren't any fasteners involved. The fasteners are all in the prep steps, with the playfield out of the cab: you attach the pivot nuts to the cabinet walls, and you separately attach the 01-8726 brackets to the underside of the playfield. The playfield then drops in simply by sliding the brackets onto the pivot nuts. It's designed specifically so that you can move the playfield in and out of the cab with the playfield populated.

#1503 3 years ago

I really like what wallyb is doing with the stern slides and supports.

Im very tempted to do it.

#1504 3 years ago

Re Davi's video - note that that won't quite apply for TAF. That's for the new-style brackets used on the later WPC games. TAF uses the older fixed brackets, so it's a bit different (and a lot simpler). Unless you're planning to change that in your build to the new-style brackets, or the modern Stern system, which as pinballinreno mentioned, wallyb has gotten working with TAF.

#1505 3 years ago
Quoted from mjr:

Re Davi's video - note that that won't quite apply for TAF. That's for the new-style brackets used on the later WPC games. TAF uses the older fixed brackets, so it's a bit different (and a lot simpler). Unless you're planning to change that in your build to the new-style brackets, or the modern Stern system, which as pinballinreno mentioned, wallyb has gotten working with TAF.

I really like this!
Im doing a restore on my TAF next summer and am very interested in this.

#1506 3 years ago

OK, so my parts arrived two days early.

I want to make sure I understand exactly where the holes go. I only want to do this once.. and I hate drilling into this thing at all.....
125885762_10158508018215211_9183021302462427352_n (resized).jpg125885762_10158508018215211_9183021302462427352_n (resized).jpg

and this is where the inside currently stands.

#1507 3 years ago
Quoted from Shredder565:

OK, so my parts arrived two days early.
I want to make sure I understand exactly where the holes go. I only want to do this once.. and I hate drilling into this thing at all.....
[quoted image]
and this is where the inside currently stands.

Are the backbox hinge holes drilled?

#1508 3 years ago
Quoted from Shredder565:

and this is where the inside currently stands.

Were gonna need a bigger drill.

#1509 3 years ago
Quoted from pinballinreno:

Are the backbox hinge holes drilled?

I would think so..but I need to find time to go through the HEP thread to see how it all looks from a page back heh. I'm not touching anything until I know 100% for sure how it all goes .

#1510 3 years ago
Quoted from Shredder565:

I would think so..but I need to find time to go through the HEP thread to see how it all looks from a page back heh. I'm not touching anything until I know 100% for sure how it all goes .

Its hard to see in the picture but,

My question was:

1) Can you attach the head with the bolts that go thru the sides of the cabinet?

2) do you have the safety bolts that secure the head onto the cabinet body from inside the head at the bottom?

2) can you clip the safety clip on the back?

4) can you fold the head down onto the cabinet using the hinges?

It all of this is good, then all you have to do is drill the holes for the rear playfield mounts, this part is pretty easy.

If no, then I can help you sort it out a bit.

#1511 3 years ago

you can mount the lower cabinet speaker:

get 2 pieces of speaker grill from marco:

https://www.marcospecialties.com/control/keywordsearch?SEARCH_STRING=Screen+-+Speaker+%2F+vent+7%22+square%0903-8603-1

Staple one piece into place for the speaker, centered, using a square.

use other one for the other small holes in the lower cabinet.
Just cut into 2 or 3" squares and staple into location.

They are called rodent guards lol.

Mount the speaker plate over the speaker grill plastic:
20201116_154411 (resized).jpg20201116_154411 (resized).jpg20201116_154415 (resized).jpg20201116_154415 (resized).jpg

Use 4 or 6 regular playfield screws, they are 5/8", longer if you wish but they shouldnt go thru the bottom.

Screw the speaker down onto the plate using the pre-drilled, divoted holes.

Done in 5 mins.

#1512 3 years ago

I'll get some ordered friday

#1513 3 years ago

For others who havent bought a new undrilled cabinet, this is how i do it:

Mount head on cabinet.
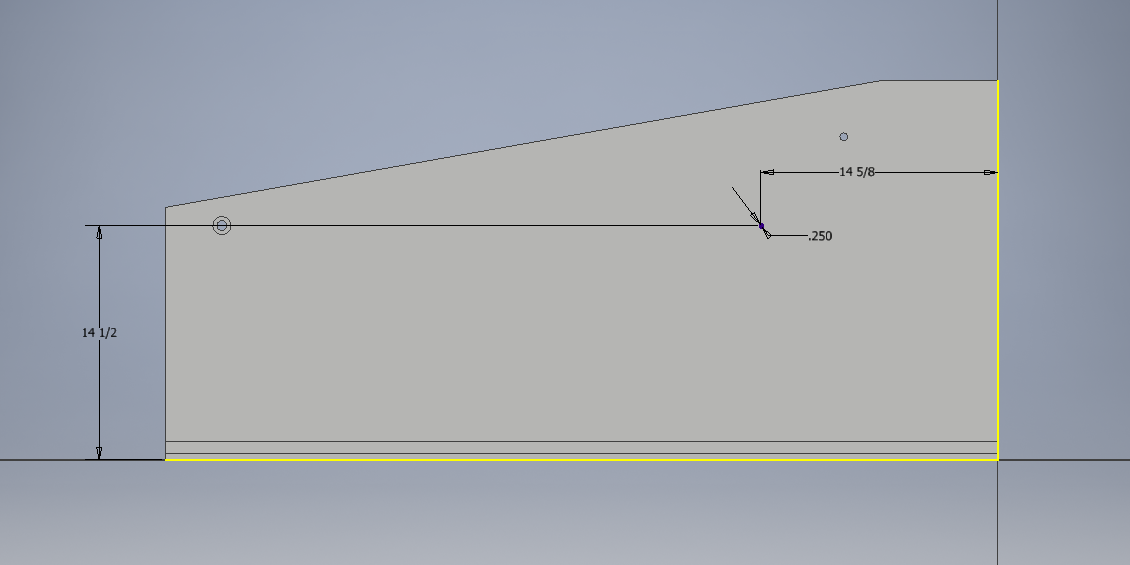
Center it and make it flush with the backside.
Make a small centerline for reference if you want.

Mount the DMD channel.
Check it with the DMD for fit and location. You want the panel vertically plumb. Check that the translite fits and all is good.

Bolt it together with the head bolts
20201117_112114 (resized).jpg20201117_112114 (resized).jpg

Add the safety draw clip:
The hook part can just be flush with the bottom edge.

Align the bottom latch with the latch opened and hooked, latch handle opened to about 90 degrees or a bit less. Screw it all down with regular playfield screws.

It doesnt have to actuate super tight.
Too tight and it just rips out the upper screws. If it ends up springy but slightly firm its good enough.

Its a safety latch.
20201117_112103 (resized).jpg20201117_112103 (resized).jpg

Mount the hinges with the screws and plates firmly.

Mark the center of the square with a center/transfer punch:

20201117_103942 (resized).jpg20201117_103942 (resized).jpg20201117_103854 (resized).jpg20201117_103854 (resized).jpg

Next pull it all apart and lay the lower cabinet on its side.

Use a drywall square to mark your hole locations for the playfield.
20201117_112600 (resized).jpg20201117_112600 (resized).jpg20201117_112556 (resized).jpg20201117_112556 (resized).jpg

Once you are certain of your location, use a punch and make good solid punches to keep the bit centered.

drill the holes.

1/2" for the head hinge inserts.
3/8" for the playfield pivots.

Use forstner bits.
20201116_172813 (resized).jpg20201116_172813 (resized).jpg

Its important that the holes are straight. I use a cheap drill guide i bought from harbor freight.

A key thing to mention:

The drill bit cuts pretty slow.
It won't run away from you like an auger bit.

In fact you can press on it pretty hard and it will be ok.

Just keep checking that you dont drill thru all the way.
20201116_171217 (resized).jpg20201116_171217 (resized).jpg

I dont drill all the way through, just untill the bit shows on the oposite side:
20201116_171624 (resized).jpg20201116_171624 (resized).jpg

Then drill from the inside to finish the hole, you dont need the drill guide for this:
20201116_171742 (resized).jpg20201116_171742 (resized).jpg

When done you will have holes comparable to the CNC ones:
20201116_172831 (resized).jpg20201116_172831 (resized).jpg20201116_172824 (resized).jpg20201116_172824 (resized).jpg
Install the hinge inserts from the "inside" with a 1/4" allen wrench, widen the holes if necessary by running the drill bit around a little.

Install the pivots, crush in the carriage bolts with a nut and washer.

Drilling the 4 holes in the head is pretty much the same.

Really its not dificult at all.

If you take your time, everything will fit good enough to continue the build:
20201117_145401 (resized).jpg20201117_145401 (resized).jpg20201117_145409 (resized).jpg20201117_145409 (resized).jpg

Now that the playfield is rough fitted,
I can address warps, inconsistencies and whatnot, With reverse bends or shims etc.

#1514 3 years ago
Quoted from pinballinreno:

Its hard to see in the picture but,
My question was:
1) Can you attach the head with the bolts that go thru the sides of the cabinet?
2) do you have the safety bolts that secure the head onto the cabinet body from inside the head at the bottom?
2) can you clip the safety clip on the back?
4) can you fold the head down onto the cabinet using the hinges?
It all of this is good, then all you have to do is drill the holes for the rear playfield mounts, this part is pretty easy.
If no, then I can help you sort it out a bit.

I was getting a bit confused case I thought you where thinking of a different part of the cabinet. but,
The cabinet came shipped with the backbox/head down, so yeah it folds onto the playfield.
Yep, the Saftey Clip fastens fine.
if I understand right, inside the back box by the THING light, there are indeed two un used bolt holes.

hope that helped

#1515 3 years ago
Quoted from Shredder565:

I was getting a bit confused case I thought you where thinking of a different part of the cabinet. but,
The cabinet came shipped with the backbox/head down, so yeah it folds onto the playfield.
Yep, the Saftey Clip fastens fine.
if I understand right, inside the back box by the THING light, there are indeed two un used bolt holes.
hope that helped

Very good!

Wing bolts or 3/8 × 16 x 2 or 2.5" bolts with washers go in the empty holes.

Its important to put in the bolts.

The little safety latch wont hold anything really.

I like the wing bolts, but if they are in the way of an add on board, i just use regular bolts.

See my prior post to drill holes.

Its pretty easy with the right tools.

I can get dimensions for your pivot holes off my TAF cabinet if you need them.

#1516 3 years ago

Note:

I use a set of side protectors all the way thru the build to protect the cabinet from many playfield insertions.

#1517 3 years ago
Quoted from pinballinreno:

Very good!
Wing bolts or 3/8 × 16 x 2 or 2.5" bolts with washers go in the empty holes.
Its important to put in the bolts.
The little safety latch wont hold anything really.
I like the wing bolts, but if they are in the way of an add on board, i just use regular bolts.
See my prior post to drill holes.
Its pretty easy with the right tools.
I can get dimensions for your pivot holes off my TAF cabinet if you need them.

WhaT I'm trying to find on the HEP thread, but it gets a bit tough wading through the different cabinet posts..
What does the finished setup of the playfield holding install look like?

I'll add the wing bolts to the marco list for Friday.

#1518 3 years ago

-edit- never mind, I see some pictures added above. I think that explains it a bit more.

#1519 3 years ago
Quoted from Shredder565:

-edit- never mind, I see some pictures added above. I think that explains it a bit more.

yeah its pretty basic.

Bolt thru the wood.
black fender Washer on inside over the bolt.

Add a nut over the washer and bolt, tighten to crunch the carriage bolt into the wood until the head of the bolt meets the cabinet side. Remove the nut.

For DW, TAF, and somewhat later games, use a slotted Pivot bushing over the bolt. Tighten with a flat blade screwdriver, sideways thru the slots. If the bolt is in the way of the slots of the pivot bolt, the bolt is too long or the pivot bushing is too short. There are 2 sizes....

In a pinch Ive been known to dremel the bolt shorter with a cutoff wheel...

Paint the heads of silver bolts with acid etch black primer, etc.

Fully tightened the end of the bolt barely comes thru into the slotted area of the bushing by a thread or 2.

#1520 3 years ago

A couple people PM'd me about drilling the head:

Layout the hole locations using the top and back of the head as a reference.

Again I use my drywall square, $9 at harbor freight...

You can write on it with a pencil to go between its 1/8" marks!

Once you are sure of the locations, punch a nice solid mark with a center punch, drill with a regular 3/16" oxide or gold bit.

Its ok if there is a little chipping on the inside, its covered by the lightboard mounting bracket.

Use the drill guide for good straight holes.
20201117_165622 (resized).jpg20201117_165622 (resized).jpg20201117_165644 (resized).jpg20201117_165644 (resized).jpg

#1521 3 years ago
Quoted from pinballinreno:

A couple people PM'd me about drilling the head:
Layout the hole locations using the top and back of the head as a reference.
Again I use my drywall square, $9 at harbor freight...
You can write on it with a pencil to go between its 1/8" marks!
Once you are sure of the locations, punch a nice solid mark with a center punch, drill with a regular 3/16" oxide or gold bit.
Its ok if there is a little chipping on the inside, its covered by the lightboard mounting bracket.
Use the drill guide for good straight holes.
[quoted image][quoted image]

Notice that I have the locking points on the drill guide all the way out.

I dont need any holes or scratches to fill later, might as well remove the stupid things.
I can clamp it down if necessary for my use.

#1522 3 years ago

I hope all of this helps...
I can post a picture of a bolt, washer and pivot nut if it helps..

#1523 3 years ago

It just scares me trying to get it exactly right. and I hate having to drill through the artwork heh. maybe I'll give it a try next week and get it over with.

#1524 3 years ago
Quoted from Shredder565:

It just scares me trying to get it exactly right. and I hate having to drill through the artwork heh. maybe I'll give it a try next week and get it over with.

Put some masking tape where the holes are going to be drilled and make your marks on that.

#1525 3 years ago

stupid question time. Do I need four holes on BOTH sides, or only on the right side of the cabinet for the playfield holders?

#1526 3 years ago
Quoted from Shredder565:

stupid question time. Do I need four holes on BOTH sides, or only on the right side of the cabinet for the playfield holders?

If you need a picture of the side of the cabinet just ask.

#1527 3 years ago
Quoted from Shredder565:

stupid question time. Do I need four holes on BOTH sides, or only on the right side of the cabinet for the playfield holders?

The lower cabinet has only 2 holes on each side. One for the playfield pivot and one for the head/backbox hinge.

On your cabinet, since the head is already attached, you only need to drill one 3/8" hole, on both the left and right side of the lower cabinet, for the playfield pivots. The head hinge holes are already done for you, you dont need to drill those.

In the backbox/head, there are 2 sets of 2 holes (total of 4) for the 2 hinge brackets that mount the light board inside of the head.
They are only on the left side. The right side does not have to be drilled.

#1528 3 years ago

Get those holes on the bottom cab perfect, I messed up a brand new cabinet and had to improvise once, it was messy. But in the end I save it, but yikes, I should have reached out for help

#1529 3 years ago
Quoted from Chosen_S:

Get those holes on the bottom cab perfect, I messed up a brand new cabinet and had to improvise once, it was messy. But in the end I save it, but yikes, I should have reached out for help

Its easy to mess it up if you are not careful.

I have a pretty good methodology at this point.

It makes it pretty easy.

#1530 3 years ago

Okie dokie. I Was getting the two cab images confused. I thought one was the playfield on it's side heh. I'll tackle it sometime next week..

#1531 3 years ago
Quoted from Shredder565:

Okie dokie. I Was getting the two cab images confused. I thought one was the playfield on it's side heh. I'll tackle it sometime next week..

Why don't you look for help for exact X-Y measurements, like this?
Tons of AF owners here (or in AF club thread).
https://pinside.com/pinball/forum/topic/hep-this-week-9-17-18/page/9#post-4620674

#1532 3 years ago

Here's a link to HEP's restoration of a TAF cabinet. It has the exact location for the TAF playfield pivot holes.

https://pinside.com/pinball/forum/topic/hep-this-week-9-17-18/page/32#post-4728213

#1533 3 years ago

OK, so, we are using this image as the base, and the hep measurments.....

https://images.pinside.com/6/a4/6a47cd97e3bc12ba5d65572b1b36f3d4ad283fc8/resized/large/6a47cd97e3bc12ba5d65572b1b36f3d4ad283fc8.png

I'm printing this one on our full size rico printer now. so hoepfully it'll be 1 with the cabinet. and the holes are 3/8s.....will be trying this in a half hour and hoping for the best.

14 5/8 back 14 7/16 down. two holes, one on each side.

#1534 3 years ago
Quoted from Shredder565:

OK, so, we are using this image as the base, and the hep measurments.....
https://images.pinside.com/6/a4/6a47cd97e3bc12ba5d65572b1b36f3d4ad283fc8/resized/large/6a47cd97e3bc12ba5d65572b1b36f3d4ad283fc8.png
I'm printing this one on our full size rico printer now. so hoepfully it'll be 1 with the cabinet. and the holes are 3/8s.....will be trying this in a half hour and hoping for the best.
14 5/8 back 14 7/16 down. two holes, one on each side.

One thing to note:

The flipper button holes on my Funhouse virtua-pin cabinet were 3/16" lower than on my original cabinet.

This does not in any way affect the playfield installaton.

Also I prefer to make all of my measurements from the front of the cabinet.
The playfield hangs from the front hangers in the lockdown bar receiver, and rests on the pivots. Nothing hangs off the rear of the cabinet.

Measuring from the front avoids any cabinet length inconsistency problems.

Hence the drywall square, lol.

Chris's measurements should be spot on. He has done many, MANY, TAF cabinets !

Measure twice (or more) cut once...

#1535 3 years ago

IT helps to work with engineers who know how to measure exact. I HOPE this looks right. I haven't properly all set it up yet, but I Think scary part one is over.

125826331_10158514557490211_5959077635174668821_n (resized).jpg125826331_10158514557490211_5959077635174668821_n (resized).jpg
#1536 3 years ago

Looks about right.

Did your backbox/head come with the light board installed?

#1537 3 years ago
Quoted from pinballinreno:

Looks about right.
Did your backbox/head come with the light board installed?

Nope, I've got to get those holes drilled next and IIRC, order the hinges if I can find them.

#1538 3 years ago
Quoted from Shredder565:

Nope, I've got to get those holes drilled next and IIRC, order the hinges if I can find them.

Post a wanted ad on pinside for the backbox hinge set. They are pretty generic.

Im confident that someone has a few of them left over from a dead game.

They arent ever seen, so old crusty ones are just fine and clean up wonderfully.

I'd send you some if I had them.

#1539 3 years ago

Is there an alternate new part that would work just as well that's kind of like the original? doesn't have to be exact so long as it does the same job.

#1540 3 years ago
Quoted from Shredder565:

Is there an alternate new part that would work just as well that's kind of like the original? doesn't have to be exact so long as it does the same job.

someone must have an old set laying around,

#1541 3 years ago
Quoted from Shredder565:

Is there an alternate new part that would work just as well that's kind of like the original? doesn't have to be exact so long as it does the same job.

The original hinges seem easy to find - they're available on Marco (and probably other places). I don't think there's a common substitute; you might be able to improvise something with hardware-store door hinges if you really put your mind to it, but the geometry makes it tricky. I'd just go with the standard parts for this.

#1543 3 years ago
Quoted from mjr:

The original hinges seem easy to find - they're available on Marco (and probably other places). I don't think there's a common substitute; you might be able to improvise something with hardware-store door hinges if you really put your mind to it, but the geometry makes it tricky. I'd just go with the standard parts for this.

Out of stock

Make a wanted ad

#1544 3 years ago
Quoted from pinballinreno:

Out of stock
Make a wanted ad

Really? Huh, I got some just a few weeks ago... actually, I just checked, and it looks like you're good to go with all three parts at Marco - all show in stock:

A-12498
A-12497
01-6571

#1545 3 years ago

Maybe, but I don't think so. Take a look at pictures to get a feel for the geometry. The trick with the standard parts is that the pivot point isn't at the seam - it's set up with so that the left edge of the insert swings out in an arc, to clear the little guide rails on the sides. The other issue is that the front part of that door hinge probably won't fit in the available space without conflicting with the guide rail or sticking out in front of the backglass plane. What you'd need in a generic part is probably something called a "pivot hinge", which has the special geometry needed here.

#1546 3 years ago
Quoted from mjr:

Really? Huh, I got some just a few weeks ago... actually, I just checked, and it looks like you're good to go with all three parts at Marco - all show in stock:
A-12498
A-12497
01-6571

By golly, they are back in stock!

Time to order!

#1547 3 years ago

Ordered by today hopefully, along with the speaker grill. that way at least I can get most of the back box done.

#1548 3 years ago

Bracket - insert hinge mounting 01-6571 1 $11.95 $11.95
Hinge assembly upper insert A-12497 1 $13.95 $13.95
Hinge assembly lower insert A-12498 1 $12.95 $12.95
Screen - Speaker / vent 7" square 03-8603-1 2 $5.95 $11.90

#1549 3 years ago
Quoted from Shredder565:

Bracket - insert hinge mounting 01-6571 1 $11.95 $11.95
Hinge assembly upper insert A-12497 1 $13.95 $13.95
Hinge assembly lower insert A-12498 1 $12.95 $12.95
Screen - Speaker / vent 7" square 03-8603-1 2 $5.95 $11.90

Note that you'll need two of the 01-6571 hinge mounting brackets - one for the upper hinge and one for the lower hinge.

#1550 3 years ago

oops, crud ...

added

Promoted items from Pinside Marketplace and Pinside Shops!
10,000 (OBO)
Machine - For Sale
Roselle, IL
$ 53.99
Eproms
Matt's Basement Arcade
 
11,000 (OBO)
Machine - For Sale
Hanford, CA
$ 25.99
Lighting - Led
Lee's Parts
 
From: $ 1.00
Playfield - Other
Rocket City Pinball
 
From: $ 11.00
Playfield - Toys/Add-ons
Twisted Tokens
 
20,000 (OBO)
Machine - For Sale
Oakdale, CA
$ 25.00
Playfield - Decals
Metal-Mods
 
$ 16.00
Boards
Lermods
 
$ 119.00
Playfield - Toys/Add-ons
pinballmod
 
From: $ 55.00
Gameroom - Decorations
Pinball Photos LLC
 
$ 29.99
Electronics
NO GOUGE PINBALL™
 
$ 9.95
Eproms
Pinballrom
 
$ 10.00
Playfield - Protection
UpKick Pinball
 
From: $ 33.00
Gameroom - Decorations
Rocket City Pinball
 
$ 9.95
Eproms
Pinballrom
 
$ 31.99
Lighting - Interactive
Lee's Parts
 
$ 15.00
Pinball Machine
Uberlaser
 
From: $ 8.00
Playfield - Toys/Add-ons
Twisted Tokens
 
$ 35.00
Electronics
Yorktown Arcade Supply
 
$ 29.00
Gameroom - Decorations
Pinball Photos LLC
 
$ 62.00
Playfield - Toys/Add-ons
Lermods
 
$ 35.00
Various Other Swag
JK Pinball
 
$ 45.00
Playfield - Toys/Add-ons
Twisted Tokens
 
$ 26.99
Playfield - Other
Lee's Parts
 
$ 180.00
$ 145.00
Playfield - Toys/Add-ons
Twisted Tokens
 
$ 41.99
Lighting - Interactive
Lee's Parts
 
9,300 (OBO)
Machine - For Sale
Rancho Cucamonga, CA
$ 35.00
Cabinet - Other
Rocket City Pinball
 
There are 5,458 posts in this topic. You are on page 31 of 110.

Reply

Wanna join the discussion? Please sign in to reply to this topic.

Hey there! Welcome to Pinside!

Donate to Pinside

Great to see you're enjoying Pinside! Did you know Pinside is able to run without any 3rd-party banners or ads, thanks to the support from our visitors? Please consider a donation to Pinside and get anext to your username to show for it! Or better yet, subscribe to Pinside+!


This page was printed from https://pinside.com/pinball/forum/topic/addams-family-scratch-build/page/31?hl=davi and we tried optimising it for printing. Some page elements may have been deliberately hidden.

Scan the QR code on the left to jump to the URL this document was printed from.