
 Bryant, AR
I just picked up an Indy 500 and it is in great shape except that all three lighted targets have the lower tab broken off so none of them score. Instead of spending $20 each to replace them I decided to try and fix them and I think it worked out real well so I thought I would share.
Tools needed:
1. small sheet of aluminum (I got it at Lowe's)
2. rivet tool
3. mini tool with cutting wheel
4. aluminum cutters
5. pliers
Step 1:
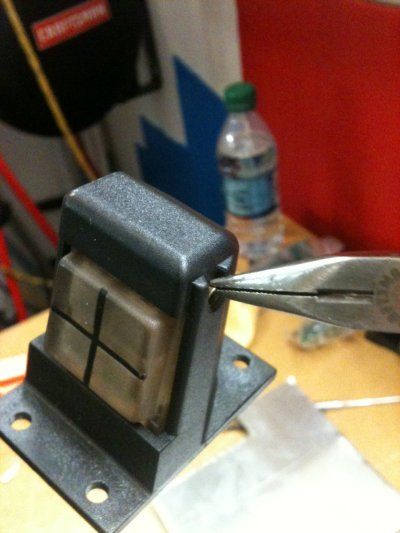
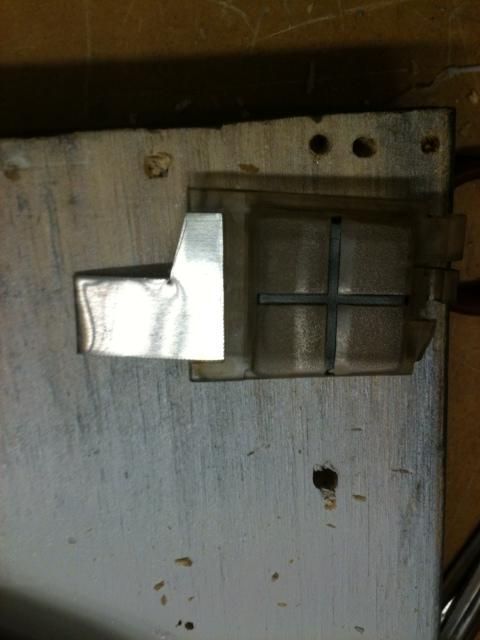
Take your pliers and work the edge of the brass pin to the center by putting the pliers on the edge and then bending down towards the center. Work your way around and try and flatten out the lip so you can slide the pin out.
http://i1222.photobucket.com/albums/dd487/LonzoTWA/Indy%20500%20Target/1.jpeg
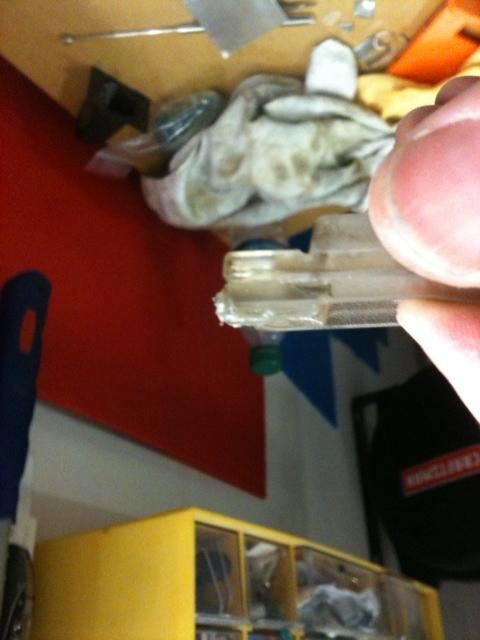
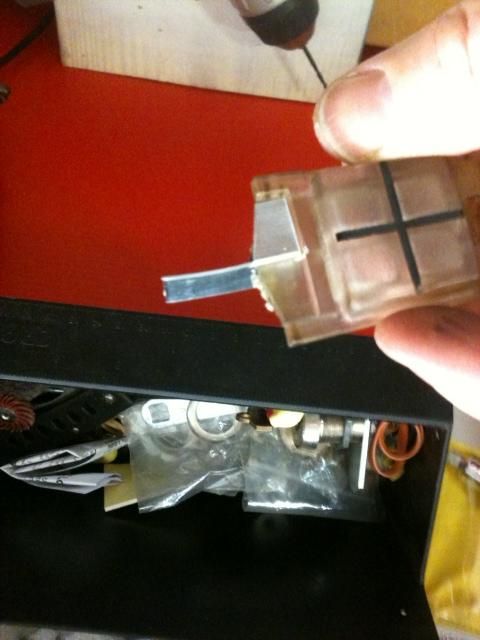
2. When you remove the target, you will see that the back part has a support that sticks out that used to run down the broken tab.
http://i1222.photobucket.com/albums/dd487/LonzoTWA/Indy%20500%20Target/2.jpeg
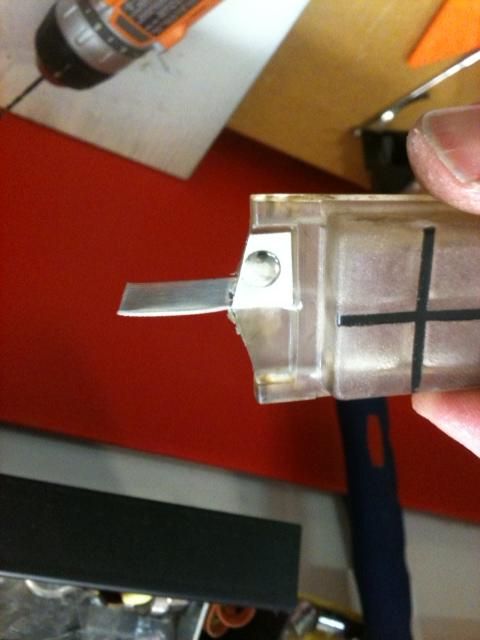
3. File this tab off so the back of the target is flush.
http://i1222.photobucket.com/albums/dd487/LonzoTWA/Indy%20500%20Target/3.jpeg
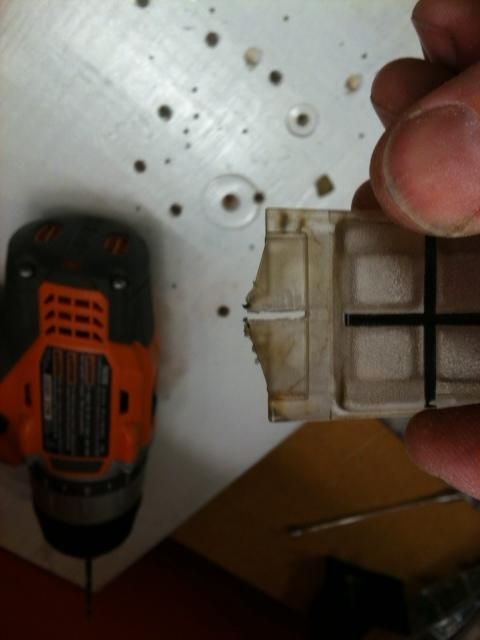
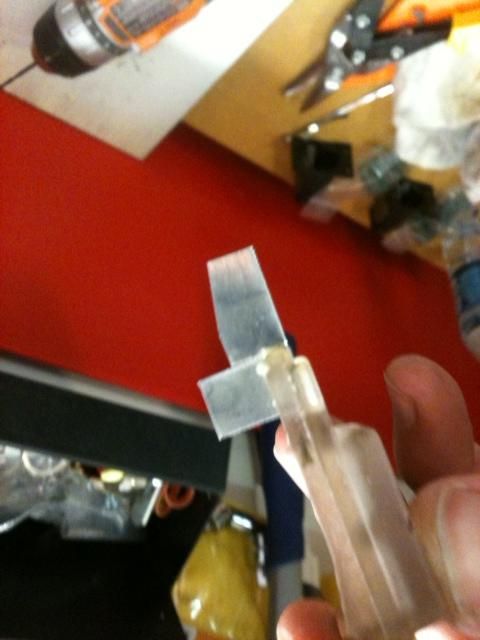
4. When you look at the target from behind, you will see where the tab used to be. If you look at the target from the front, you will see a recessed section on the lower target. Take your mini tool with cutoff wheel and cut a slot up to the portion of the target that is recessed on the front.
http://i1222.photobucket.com/albums/dd487/LonzoTWA/Indy%20500%20Target/4.jpeg
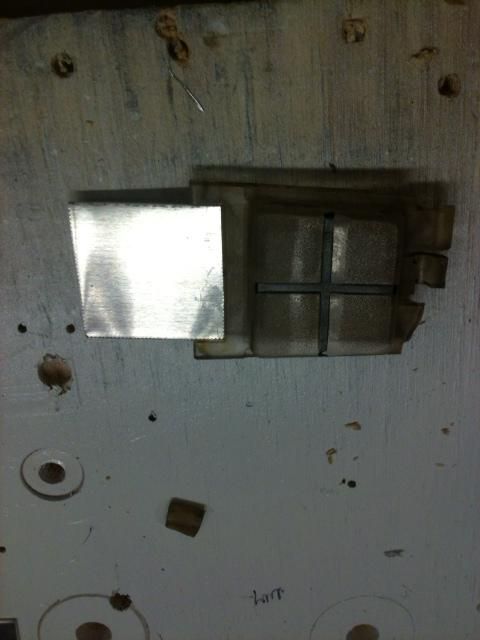
5. cut a piece of metal that fits in the recessed section of the front of the target and it just a hair over an inch long. If you have your broken tab you can use it for reference.
http://i1222.photobucket.com/albums/dd487/LonzoTWA/Indy%20500%20Target/5.jpeg
6. Now trim the metal to match the bottom of the target as shown and then cut straight down the middle.
http://i1222.photobucket.com/albums/dd487/LonzoTWA/Indy%20500%20Target/6.jpeg
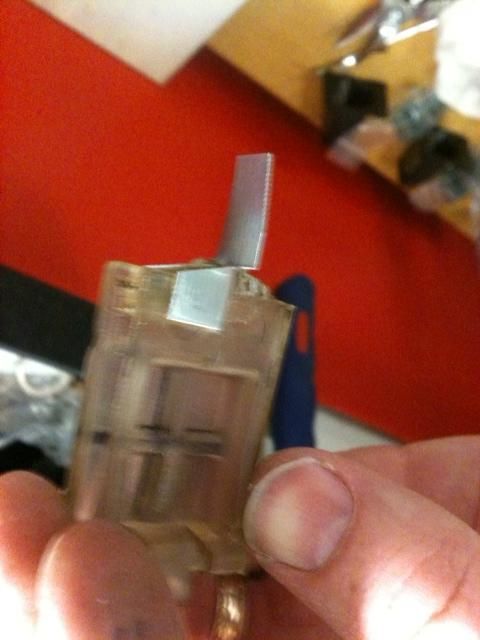
7. Now bend the metal at the slit and place it back on the target.
http://i1222.photobucket.com/albums/dd487/LonzoTWA/Indy%20500%20Target/7.jpeg
8. I am not going to give a rivet lesson here but drill some holes and rivet the metal to the target. Make the rivet as close as you can to the center as the plastic is thicker there.
http://i1222.photobucket.com/albums/dd487/LonzoTWA/Indy%20500%20Target/8.jpeg
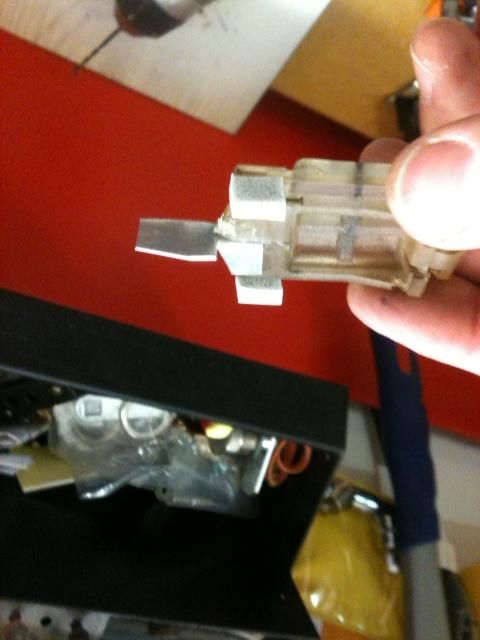
9. Now trim the lower part of the metal to match the broken tab. If you don't have a tab then look at the picture and try and match it. Notice that the lower back is slightly tapered. where the metal meets the plastic. Make a cut from the back straight across to the plastic leaving the metal at the top. It will be used in the next step.
http://i1222.photobucket.com/albums/dd487/LonzoTWA/Indy%20500%20Target/9.jpeg
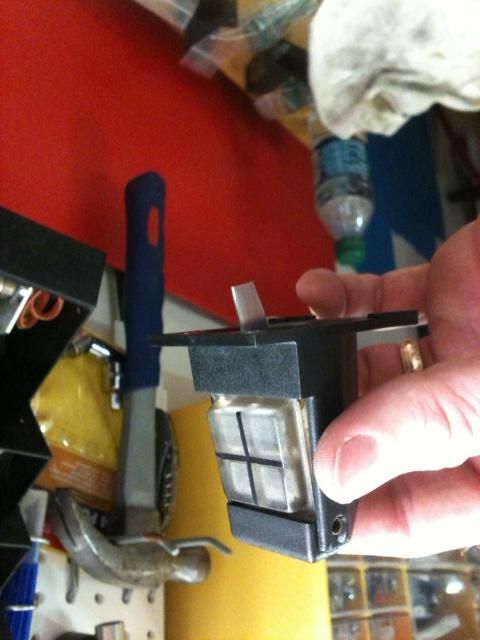
10. Now fold the top tab back onto the plastic and cover up the rivet. I used a pair of pliers to make sure it was as tight as possible. This will give more support. For you rivet pros out there you might be able to wait to rivet until this point and rivet through both pieces of metal. I didn't think about it until I had already fixed all three and it seems to be pretty solid without it.
http://i1222.photobucket.com/albums/dd487/LonzoTWA/Indy%20500%20Target/10.jpeg
11. Now place some foam on the target. Do not skip this step, this is the reason these targets fail is that the foam wore out and nobody ever replaced it.
http://i1222.photobucket.com/albums/dd487/LonzoTWA/Indy%20500%20Target/11.jpeg
12. Now put the target back together and then use a screwdriver or pliers to put the ridge back in the brass pin. When you install the target make sure the metal tab is centered on the optic sensor guide and you are done.
http://i1222.photobucket.com/albums/dd487/LonzoTWA/Indy%20500%20Target/12.jpeg
Well, I hope this was helpful and easy to understand. If you have any questions, let me know.
Thanks
Lonny
 Klagenfurt Am Wörthersee

